기화기를 청소하는 방법: 완전한 유지 관리 가이드
David Martinez
Concentrate Expert
기화기를 청소하는 방법: 완전한 유지 관리 가이드
기화기를 정기적으로 청소하는 것은 최적의 성능을 유지하고 원활한 베이핑 경험을 보장하는 데 필수적입니다. 초보자이든 노련한 애호가이든 상관없이 장치를 적절하게 청소하는 방법을 이해하면 장치의 수명을 크게 연장하고 대마초의 풍미를 향상시킬 수 있습니다. 이 포괄적인 가이드는 다양한 유형의 기화기를 청소하는 단계와 프로세스를 더 쉽게 만드는 몇 가지 유용한 팁을 안내합니다.
기화기는 다양한 형태로 제공되며 건식 허브 기화기에서 농축 모델에 이르기까지 다양한 용도로 사용됩니다. 각 유형은 약간 다른 유지 관리 기술이 필요하지만 모두 깨끗하고 풍미 있는 히트를 제공한다는 공통 목표를 공유합니다. 기화기를 최상의 상태로 유지하는 방법에 대해 자세히 알아보겠습니다.
빠른 답변
빠르고 효과적인 기화기 청소를 위해 장치를 분해하고 분리 가능한 부품을 이소프로필 알코올에 담그고 잔류물을 부드럽게 문질러 물로 헹구고 완전히 말리십시오. 정기적인 청소는 기화기의 성능과 풍미를 향상시킵니다.
목차
- 3. 챔버 청소
기화기를 청소하는 것이 중요한 이유
기화기를 정기적으로 청소하는 것은 여러 가지 이유로 중요합니다. 첫째, 대마초에서 가능한 최고의 맛을 얻을 수 있도록 합니다. 이전 세션의 잔류물은 증기의 맛을 축적하고 변경할 수 있습니다. 둘째, 청소는 막히는 것을 방지하고 장치가 원활하게 작동하도록 합니다. 시간이 지남에 따라 축적은 공기 흐름을 차단하여 비효율적인 기화를 초래할 수 있습니다.
또한 깨끗한 기화기는 위생적으로 더 위생적이어서 잠재적으로 유해한 박테리아나 곰팡이를 흡입할 위험을 줄입니다. 정기적인 유지 관리는 장치의 수명을 연장할 뿐만 아니라 전반적인 전자담배 경험을 향상시킵니다.
필요한 도구와 재료
기화기를 청소하기 전에 다음 도구와 재료를 수집하여 공정을 더 원활하게 만듭니다.
- 이소프로필 알코올(90% 이상)
- 면봉 또는 파이프 청소기
- 작은 브러시(칫솔과 같은)
- 극세사 천
- 온수
- 작은 그릇
이러한 항목을 손에 넣으면 기화기의 모든 부분을 효율적으로 청소하는 데 도움이 됩니다.
단계별 청소 과정
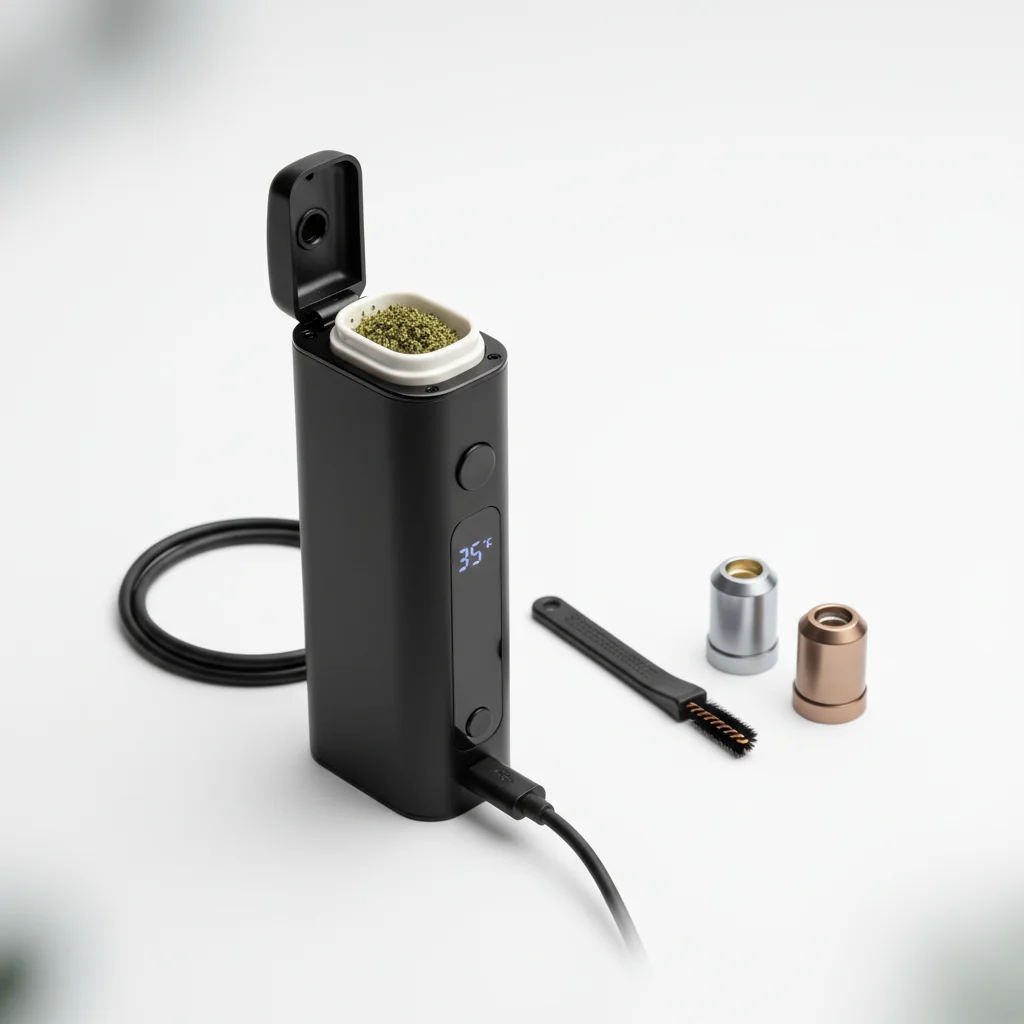
1. 기화기를 분해
기화기를 조심스럽게 분해하여 시작하십시오. 특정 모델을 분해하는 방법을 잘 모르는 경우 제조업체의 지침을 참조하십시오. 일반적으로 마우스피스, 챔버 및 기타 탈부착 가능한 부품을 제거해야 합니다.
2. 마우스피스 청소
- 담그다:약 20분 동안 이소프로필 알코올이 담긴 그릇에 마우스피스를 놓습니다.
- 스크럽:면봉이나 작은 브러시를 사용하여 완고한 잔여물을 제거하십시오.
- 헹굼:따뜻한 물로 마우스피스를 헹구고 깨끗한 천으로 완전히 말리십시오.
3. 챔버 청소
- 브러시:작은 브러시를 사용하여 챔버에서 느슨한 입자를 제거하십시오.
- 알코올 닦기:면봉을 이소프로필 알코올에 담그고 챔버 벽을 부드럽게 청소하십시오.
- 건조:재조립하기 전에 챔버 공기를 건조시키십시오.
4. 발열체 청소
발열체는 가볍게 청소할 때 주의해야 합니다. 알코올에 담그지 마십시오.
- 브러시:모든 축적물을 부드럽게 닦아냅니다.
- 면봉:알코올이 든 면봉을 약간 축축한 면봉을 사용하여 요소를 과포화하지 않도록 하십시오.
5. 기화기를 재조립하십시오
모든 부품이 깨끗하고 건조되면 기화기를 다시 조립하십시오. 각 구성 요소가 안전하게 제자리에 있는지 확인하십시오. 장치가 원활하게 작동하는지 테스트하십시오.
기화기를 유지하기 위한 팁
일관된 유지 관리는 기화기의 수명을 연장할 수 있습니다. 다음은 몇 가지 팁입니다.
- 챔버 비우기:각 사용 후에는 잔류물이 축적되지 않도록 챔버를 비우십시오.
- 사용가는 사람:품질 사용대마초 그라인더균일한 연소 및 잔류물을 줄입니다.
- 제대로 저장:습기가 손상되지 않도록 기화기를 서늘하고 건조한 곳에 보관하십시오.
기화기 사용에 대한 자세한 내용은기화기 온도 가이드.
피해야 할 일반적인 실수
- 알코올 남용:알코올을 과도하게 사용하면 일부 재료가 손상될 수 있습니다. 적당히 사용하고 철저히 헹굽니다.
- 완전히 건조되지 않음:전기적 손상을 방지하기 위해 재조립하기 전에 항상 모든 부품이 완전히 건조되었는지 확인하십시오.
- 정기적인 청소를 무시:광범위한 축적을 피하기 위해 베이핑 루틴의 규칙적인 부분을 청소하십시오.
결론
깨끗한 기화기는 대마초의 풍미와 효과를 즐기는 데 중요합니다. 이 가이드에 설명된 단계에 따라 정기적인 청소 일정을 유지함으로써 장치가 최적의 성능과 수명을 제공하도록 할 수 있습니다. 올바른 기화기를 선택하거나 차이점을 이해하는 방법에 대한 추가 정보마른 허브와 농축 vapes, 다른 가이드를 탐색하십시오. 행복한 베이핑!
Frequently Asked Questions
최적의 성능과 맛을 유지하려면 몇 번 사용할 때마다 기화기를 청소해야 합니다. 정기적인 유지 관리를 통해 장치의 수명을 연장할 수도 있습니다.
Related Guides

510 Thread Batteries: Complete Guide to Vape Pen Batteries
Everything you need to know about 510 thread batteries for vape cartridges. Learn about voltage settings, battery types, features to look for, and how to choose the right battery for your cartridges.
Best Vaporizer Temperature Settings: Effects at Each Level
Comprehensive guide about best vaporizer temperature settings: effects at each level. Learn everything you need to know with expert tips and detailed instructions.

Conduction vs Convection Vaporizers: Heating Methods Explained
Understand the difference between conduction and convection heating in vaporizers. Learn how each method affects flavor, vapor quality, efficiency, and which is best for your vaping style.