
如何包装干草药蒸发器以获得最佳效果
David Martinez
Concentrate Expert
如何包装干草药蒸发器以获得最佳效果
适当的包装技术会显着影响蒸发器的性能。 包装得太紧,您将限制气流。 太松了,你会得到纤细的蒸汽。 本指南教您装载蒸发器以获得最大风味、蒸汽产生和效率的最佳方法。
快速回答
为获得最佳效果:将大麻研磨至中等细稠度(如粗盐),将腔室加载到适当的饱满度(全用于传导,3/4 用于对流),并用轻柔的压力包装——坚固但不压缩。 按压时,材料应有轻微的给予。 加热前始终确保清洁、平整的表面。
为什么包装技术很重要
包装不良是人们对汽化器感到失望的第一大原因。 即使是 400 美元的设备在包装不正确时也表现不佳。
为了获得最佳的研磨一致性,请使用质量[ 磨床来自 Munchmakers](https://munchmakers.com/product-category/custom-grinders/)。 用于蒸发科学,科学导向主持大麻研究。
包装不好会发生什么:
- 太紧:气流受限,抽吸不均匀,抽取不均匀
- 太松散:弱蒸汽、浪费材料、不完全提取
- 错误的磨削: 屏幕堵塞,热点,风味差
- 凹凸表面:热量逸出,不一致的会议
什么样的包装能提供:
- 浓稠、美味的蒸汽
- 均匀提取(无浪费)
- 轻松的气流
- 每个碗的完整课程
第一步:实现正确的研磨
研磨是良好电子烟的基础。 大多数问题都可以追溯到不正确的研磨一致性。
理想研磨:中等精细
想想粗盐或干牛至的稠度——蓬松但均匀,不是粉末,也不是块。
为什么这有效:
- 表面积:足够的曝光率,高效提取
- 气流:粒子之间的空间允许热空气通过
- 稳定加热: 同尺寸的块均匀加热
按汽化器类型进行研磨调整:
什么要避免:
太细(粉末):
- 堵塞筛选和蒸汽路径
- 严重限制气流
- 跌倒在屏幕上
- 产生刺耳的热蒸气
太粗(粗):
- 不均匀的提取(外面的厨师,生的内部)
- 浪费的材料
- 弱、不一致的蒸汽
- 需要不断搅拌
第二步:准备好你的房间
切勿装入脏室。 残留物会影响风味,并会限制气流。
快速预约检查:
1. 目视检查:房间应该看起来很干净,屏幕清晰
2. 吹测试:轻轻吹过——空气应该自由流动
3. 温度:装载前应在室温下
4. 清除碎片: 刷掉任何剩余的材料
帮助的工具:
- 小刷子(通常包含在蒸发器中)
- 顽固残留物的木牙签
- 屏幕压缩空气
- 用于深层清洁的异丙醇湿巾
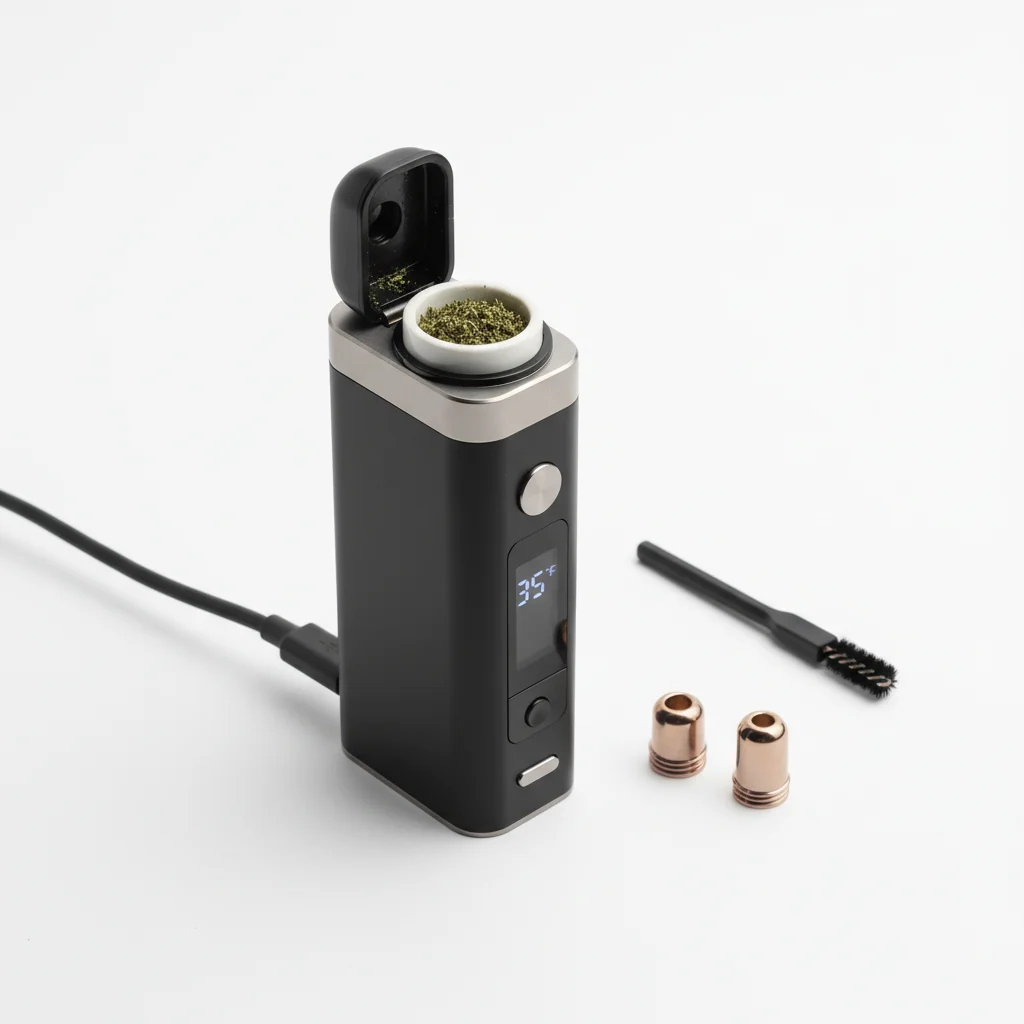
第三步:装入室
装载技术因蒸发器类型而略有不同。 以下是有效的:
用于传导蒸发器:
填充层:全室(与顶部水平)
为什么:传导需要材料与加热的壁接触。 空白空间意味着更少的表面接触,更少的蒸汽。
方法:
1。 用小工具舀地面大麻
2. 放入腔室(添加时不要按下)
3. 填满边缘
4。 继续包装步骤
对流蒸发器:
填充层:3/4 满(离开顶空)
为什么:热空气需要流过材料。 包装过多的气流。
方法:
1。 舀地面大麻
2. 填充到约 3/4 容量
3.在顶部留出可见空间
4。 继续包装(轻触)
混合汽化器:
填充层:满但不溢
方法:
1。 遵循传导方法
2. 包装比纯传导轻微
3. 确保材料没有被压缩到屏幕上
第四步:包装到适当的密度
这是大多数人出错的地方。 “打包”并不意味着压缩——它意味着安定。
正确的压力:
- 灯公司:就像压下咖啡渣,而不是压碎它们
- 给测试:压机应满足温和的阻力,而不是岩石硬度
- 气流检查: 你应该能够通过空气通过
传导包装:
包装稍微紧一点——您希望与腔室壁接触良好。 想想把红糖压进量杯里。 坚定但不坚固。
对流包装:
轻轻包装——只需将材料沉淀下来。 热空气需要流过,所以想“安排”多于“打包”。
常见的包装错误:
错误:反复敲打
创建阻塞气流的压缩层。 一把轻轻的压机就够了。
错误:手指打包
来自皮肤的油脂会影响材料和腔室。 使用工具。
错误:填充然后按下
这会压缩材料和溢出。 先正确填写,然后再解决。
第五步:平整和密封
最终的细节对于一致的会议很重要。
创建平面:
- 刷或压实材料以平整材料
- 边缘上没有峰、谷或松散的材料
- 应该从上面看起来统一
清洁轮辋:
- 移除边缘/螺纹中的任何材料
- 碎片在这里阻止了正确的密封
- 用刷子或手指擦拭干净
检查密封件:
- 关闭腔室/吹嘴
- 应无阻力平稳关闭
- 任何磨削感 = 螺纹中的碎屑
针对不同情况的包装
微量剂量(少量):
许多蒸发器与半包装的腔室作斗争。 选项:
- 剂量胶囊: 适合腔室的小金属吊舱
- 屏幕技术:在顶部添加第二个屏幕进行压缩
- 集中垫: 用作腔室底部的垫片
小组会议:
包装稍微坚固,以获得更长时间、一致的会话。 全室在通过时效果最好。
单人快速命中:
考虑按需对流蒸发器——它们更好地处理部分腔室。
解决包装问题
问题:弱/微弱的蒸汽
可能的原因:包太松
修复:稍微增加密度,确保全腔
问题:画画难
可能的原因:包装太紧
修复:使用较轻的压力,检查屏幕是否有堵塞
问题:提取不均匀(有些是棕色的,有些是绿色的)
可能的原因:错误的研磨或不均匀的包装
修复:研磨更细,平整面,搅拌中段
问题: 热蒸汽
可能的原因:包装太紧或研磨太细
修复:松开包装,使用更粗的研磨
问题:材料通过屏幕掉落
可能的原因:磨得太细
修复:使用粗磨,考虑细网筛更换
摘要:完美的包装
1. 擂至中等精细一致性
2. 清洁装载前的腔室
3. 弥漫适当(全用于传导,3/4 用于对流)
4. 姝轻柔的压力(坚固,未压缩)
5. 程度表面并清洁轮辋
掌握这些基本知识,您的蒸发器将提供其设计的体验。 如有疑问,在较松的包装方面犯错——您总是可以对更多的材料进行捣打,但过度压缩的材料需要重新开始。
本指南是用于教育目的。 大麻法律因司法管辖区而异。
Step 1:
Step 2:
Step 3:
Step 4:
Step 5:
Frequently Asked Questions
中等精细是大多数蒸发器的理想选择 - 像粗盐。 太细的堵塞屏幕并限制气流。 过于粗糙会导致提取不均匀。 根据您的特定蒸发器的要求进行稍微调整。
包装到中等密度 - 坚固但不压缩。 传导蒸发器在更坚固的包装中工作得稍好(更多的表面接触)。 对流蒸发器需要较宽松的包装,以便热空气可以流过材料。
是的,但结果各不相同。 一些蒸发器具有减少的腔室或剂量胶囊以用于较小的负载。 半填充整个室会导致不均匀的加热和不良蒸汽。 检查您的设备是否有微剂量选项。
Related Guides

510 Thread Batteries: Complete Guide to Vape Pen Batteries
Everything you need to know about 510 thread batteries for vape cartridges. Learn about voltage settings, battery types, features to look for, and how to choose the right battery for your cartridges.
Best Vaporizer Temperature Settings: Effects at Each Level
Comprehensive guide about best vaporizer temperature settings: effects at each level. Learn everything you need to know with expert tips and detailed instructions.

Conduction vs Convection Vaporizers: Heating Methods Explained
Understand the difference between conduction and convection heating in vaporizers. Learn how each method affects flavor, vapor quality, efficiency, and which is best for your vaping style.