
如何正確打包乾草藥蒸發器以獲得最佳效果
David Martinez
Concentrate Expert
如何正確打包乾草藥蒸發器以獲得最佳效果
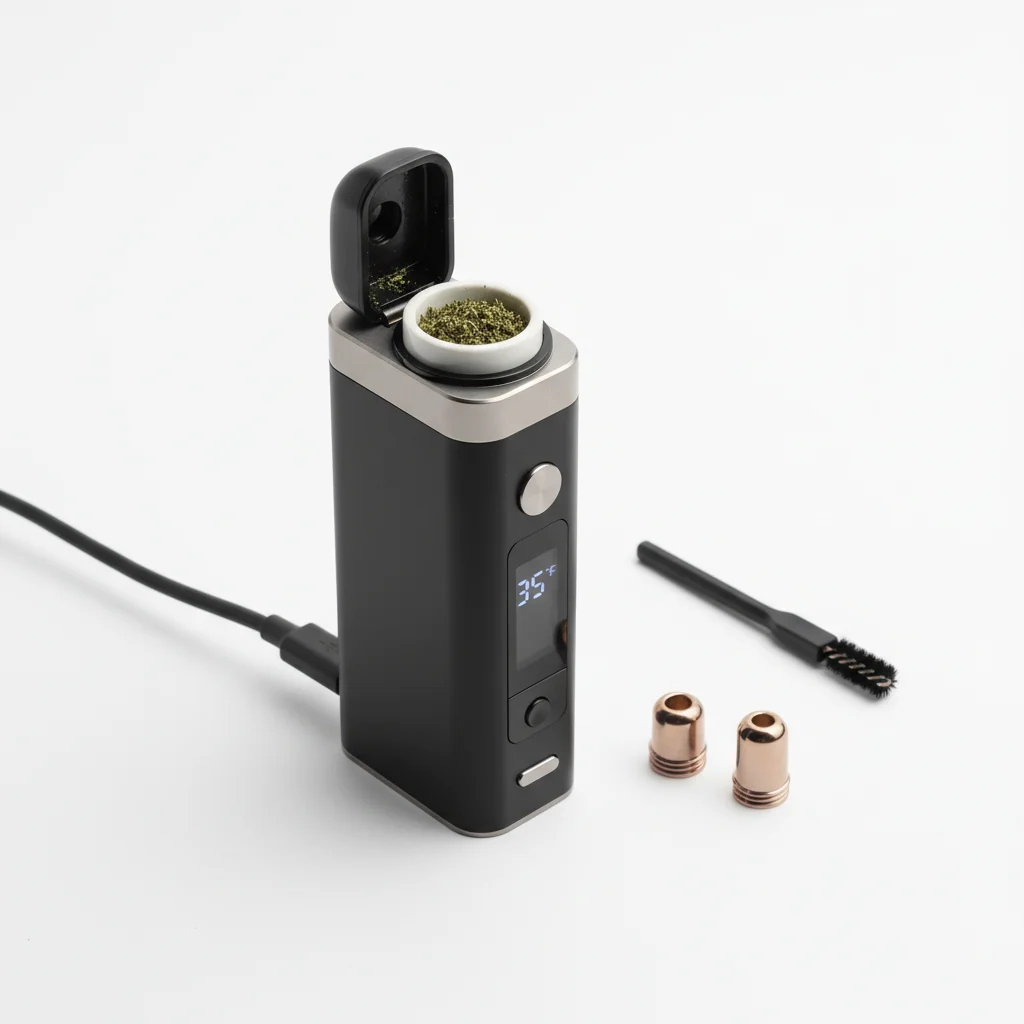
正確的打包技術會顯著影響您的蒸發器性能。打包過緊會限制氣流,打包過鬆則會產生稀薄的蒸汽。本指南教您如何以最佳方式加載蒸發器,以獲得最大風味、蒸汽產量和效率。
快速回答
為了獲得最佳效果:將大麻研磨至中細一致性(如粗鹽),將腔體加載至適當的滿度(導熱時滿,對流時 3/4),並輕壓打包——堅固但不壓縮。材料在按壓時應有輕微的彈性。加熱前始終確保表面乾淨平整。
為什麼打包技術很重要
打包不當是人們對蒸發器感到失望的首要原因。即使是 400 美元的設備,在打包不正確時也會表現不佳。
為了獲得最佳的研磨一致性,使用高品質的 [研磨器 來自 MunchMakers](https://munchmakers.com/product-category/custom-grinders/)。有關蒸發科學, ScienceDirect 提供大麻研究的學術研究。
不良打包會發生什麼:
- 打包過緊:限制氣流,抽吸困難,提取不均
- 打包過鬆:蒸汽弱,材料浪費,提取不完全
- 研磨不當:過濾網堵塞,熱點,風味差
- 表面不均勻:熱量流失,會話不一致
正確打包所帶來的效果:
- 濃郁、充滿風味的蒸氣
- 均勻萃取(無浪費)
- 輕鬆的氣流
- 每個碗都能完整使用
步驟 1:達到合適的研磨
研磨是良好蒸汽的基礎。大多數問題都源於不正確的研磨一致性。
理想研磨:中細
想像粗鹽或乾牛至的質地——蓬鬆但均勻,不是粉末也不是塊狀。
為什麼這樣有效:
- 表面積:足夠的暴露以實現高效萃取
- 氣流:顆粒之間的空隙允許熱空氣通過
- 均勻加熱:相似大小的顆粒均勻加熱
根據蒸發器類型的研磨調整:
需要避免:
過細(粉末):
- 堵塞過濾網和蒸氣通道
- 嚴重限制氣流
- 會掉落過濾網
- 產生刺鼻、熱的蒸氣
過粗(塊狀):
- 萃取不均(外部熟,內部生)
- 浪費材料
- 蒸氣弱且不穩定
- 需要不斷攪拌
步驟 2:準備你的室內
切勿在髒的室內裝置中裝填。殘留物會影響風味並可能限制氣流。
快速會前檢查:
1. 視覺檢查:室內裝置應該看起來乾淨,過濾網清晰
2. 吹氣測試:輕輕吹氣——氣流應該暢通無阻
3. 溫度:裝置在裝填前應保持室溫
4. 清除雜物:刷掉任何剩餘的材料
有助於清理的工具:
- 小刷子(通常隨蒸發器附帶)
- 木牙籤用於清除頑固殘留物
- 壓縮空氣用於過濾網
- 異丙醇酒精濕巾用於深層清潔
步驟 3:裝填室內裝置
裝填技術根據蒸發器類型略有不同。以下是有效的方法:
對於傳導式蒸發器:
裝填水平: 完全裝滿(與頂部平齊)
為什麼: 傳導需要材料與加熱壁接觸。空隙意味著接觸面積減少,產生的蒸氣也會減少。
方法:
1. 用小工具舀取磨碎的大麻
2. 放入室內裝置(添加時不要壓實)
3. 裝填至邊緣
4. 進入壓實步驟
對於對流式蒸發器:
裝填水平: 3/4 滿(留出空間)
為什麼: 熱空氣需要通過材料流動。過度裝填會阻礙氣流。
方法:
1. 舀取磨碎的大麻
2. 裝填至約 3/4 的容量
3. 頂部留出可見空間
4. 開始包裝(輕輕觸碰)
對於混合型蒸發器:
填充水平: 滿但不溢出
方法:
1. 遵循導熱方法
2. 包裝時比純導熱稍輕
3. 確保材料不會壓緊過濾網
步驟 4:包裝至適當密度
這是大多數人出錯的地方。"包裝"並不意味著壓縮——而是讓材料穩定。
正確的壓力:
- 輕微堅固:像按壓咖啡粉,而不是壓碎它們
- 彈性測試:按壓時應該感受到輕微的阻力,而不是堅硬如石
- 氣流檢查:你應該能夠通過吸氣
導熱包裝:
包裝時稍微堅固——你希望與腔體壁有良好接觸。想像將紅糖壓入量杯中。堅固但不實心。
對流包裝:
包裝時非常輕——只需讓材料穩定。熱空氣需要流通,所以要想著"排列"而不是"包裝"。
常見的包裝錯誤:
錯誤:重複捶打
會產生壓縮層,阻礙氣流。一個輕柔的按壓就足夠了。
錯誤:用手指包裝
皮膚上的油脂會影響材料和腔體。使用工具。
錯誤:過量填充後再壓下
這會壓縮材料並且過量填充。先正確填充,然後再穩定。
步驟 5:平整和密封
最後的細節對於一致的會話很重要。
創建平坦的表面:
- 刷子或捶打以平整材料
- 邊緣上沒有峰、谷或鬆散的材料
- 從上方看應該是均勻的
清潔邊緣:
- 移除邊緣/螺紋上的任何材料
- 這裡的雜物會妨礙正確密封
- 使用刷子或手指擦拭乾淨
檢查密封:
- 關閉腔體/嘴部
- 應該順暢地關閉,沒有阻力
- 任何磨擦感 = 螺紋中有雜物
針對不同情況的包裝
微劑量(少量):
許多蒸發器在半滿的腔室中表現不佳。選擇:
- 劑量膠囊:適合腔室的小金屬罐
- 篩網技術:在上面添加第二個篩網以壓縮
- 濃縮墊:用作腔室底部的間隔物
團體會議:
為了更長且一致的會議,稍微堅固地包裝。完全的腔室在傳遞時效果最佳。
單人快速吸食:
考慮按需對流蒸發器——它們對部分腔室的處理更好。
包裝問題排除故障
問題:蒸氣弱/稀薄
可能原因: 包裝過鬆
解決方法: 稍微增加密度,確保腔室滿
問題:難以吸入
可能原因: 包裝過緊
解決方法: 使用較輕的壓力,檢查篩網是否堵塞
問題:萃取不均(有些棕色,有些綠色)
可能原因: 磨碎不當或包裝不均
解決方法: 磨得更細,平整包裝表面,中途攪拌
問題:蒸氣刺鼻、熱
可能原因: 包裝過緊或磨得過細
解決方法: 放鬆包裝,使用較粗的磨粉
問題:材料通過篩網掉落
可能原因: 磨得過細
解決方法: 使用較粗的研磨,考慮更換細網篩
摘要:完美包裝
1. 研磨 至中細的質地
2. 清潔 加載前的室內
3. 適當填充 (導熱時填滿,對流時填滿 3/4)
4. 包裝 時輕輕施壓(堅固,但不壓縮)
5. 平整 表面並清潔邊緣
掌握這些基本原則,你的蒸發器將提供其設計所期望的體驗。若有疑慮,建議選擇較鬆的包裝——你可以隨時再壓實,但過度壓縮的材料需要重新開始。
本指南僅供教育用途。大麻法律因地區而異。
Step 1:
Step 2:
Step 3:
Step 4:
Step 5:
Frequently Asked Questions
中細研磨對於大多數蒸發器是理想的——像粗鹽一樣。研磨得太細會堵塞過濾網並限制氣流。研磨得太粗會導致提取不均勻。根據您特定蒸發器的要求稍作調整。
打包至中等密度——堅固但不壓縮。導熱蒸發器在使用較緊的包裝時效果稍好(接觸面積更大)。對流蒸發器需要較鬆的包裝,以便熱空氣能夠流過材料。
可以,但效果會有所不同。一些蒸發器有減少腔體或劑量膠囊以適應較小的負載。將完整腔體填充一半可能會導致加熱不均和蒸汽效果不佳。檢查您的設備是否有微劑量選項。
Related Guides

510 Thread Batteries: Complete Guide to Vape Pen Batteries
Everything you need to know about 510 thread batteries for vape cartridges. Learn about voltage settings, battery types, features to look for, and how to choose the right battery for your cartridges.
Best Vaporizer Temperature Settings: Effects at Each Level
Comprehensive guide about best vaporizer temperature settings: effects at each level. Learn everything you need to know with expert tips and detailed instructions.

Conduction vs Convection Vaporizers: Heating Methods Explained
Understand the difference between conduction and convection heating in vaporizers. Learn how each method affects flavor, vapor quality, efficiency, and which is best for your vaping style.