
DIY 滾動托盤創意:自訂和再利用選項
James Wilson
Cannabis Culture Writer
DIY 滾動托盤創意:自訂和再利用選項
並非每個滾動托盤都需要來自商店。DIY 滾動托盤 提供個性化、節省成本和創造獨特物品的滿足感。本指南涵蓋了從簡單再利用到自訂製作的創意 DIY 方法。
快速回答
流行的 DIY 滾動托盤選項包括:重新利用的相框搭配自訂藝術、添加功能的木製服務托盤、再利用的雪茄盒、自訂樹脂倒模、裝飾金屬托盤,以及轉換為滾動工作站的書本保險箱。最佳材料是光滑、非多孔的表面,易於清潔。
為什麼要製作 DIY 滾動托盤?
好處:
- 完全自訂
- 節省成本($5-20 對比 $30-100 的高級托盤)
- 獨特的、獨一無二的作品
- 再利用減少浪費
- 完美的禮物選擇
- 表達個人風格
考慮事項:
- 時間投入
- 材料安全(食品安全,無氣體釋放)
- 耐用性各異
- 清潔要求
尋找 DIY 手工靈感, Instructables 提供數千個項目教程。
快速 DIY 選項(30 分鐘內)
1. 相框托盤
你需要:
- 大型相框(帶玻璃,8×10 或更大)
- 自訂藝術、照片或印刷設計
- 可選:毛氈背面
如何做:
1. 移除相框背面
2. 插入自訂藝術作品(面向玻璃)
3. 更換背面
4. 將框架面朝上作為托盤(玻璃可收集材料)
優點: 快速、可自訂的藝術,玻璃易於清潔
缺點: 沒有凸起邊緣,玻璃可能會破裂
2. 服務托盤轉換
所需材料:
- 帶邊緣的木製或金屬服務托盤
- 可選:油漆、貼紙、樹脂飾面
操作步驟:
1. 徹底清潔托盤
2. 如有需要,打磨(木材)
3. 按需裝飾
4. 使用食品安全的飾面密封(可選)
優點: 已經有凸起邊緣,耐用
缺點: 沒有自訂的普通外觀
3. 餅乾烤盤托盤
所需材料:
- 小型金屬餅乾/烘焙烤盤
- 噴漆或乙烯基貼紙(可選)
操作步驟:
1. 徹底清潔
2. 裝飾邊緣或底部(保持滾動表面光滑)
3. 添加乙烯基貼紙以增加抓握或設計
優點: 便宜($2-5),耐用,易於清潔
缺點: 基本外觀,可能會感覺寒冷
中級DIY項目(1-2小時)
4. 雪茄盒滾動站
所需材料:
- 空雪茄盒(首選雪松)
- 砂紙
- 木材飾面或油漆
- 小容器用於分隔
- 磁條(可選)
操作步驟:
1. 砂磨內部光滑
2. 內外塗裝或上漆
3. 添加小容器或隔板
4. 在蓋子內部安裝磁條以放置輕便物品
5. 底部襯上毛氈(可選)
優點: 內建儲物空間,便攜,獨特
缺點: 工作面積較小,木材吸收氣味
5. 磁性夾板托盤
所需材料:
- 夾板(金屬或木製)
- 磁條
- 油漆或乙烯基
- 矽膠墊(可選)
製作方法:
1. 移除夾子或保留以固定文件
2. 裝飾表面
3. 添加磁條以固定金屬工具
4. 附上矽膠墊作為滾動表面
優點: 便攜,磁性工具儲存,成本低
缺點: 表面積小
6. 木製切菜板升級
所需材料:
- 新的木製切菜板(帶邊槽)
- 路由器或鑿子(用於隔間)
- 木燒筆(用於設計)
- 食品安全塗層
製作方法:
1. 使用路由器/鑿子添加隔間
2. 砂磨光滑
3. 使用木燒筆添加設計
4. 用屠夫塊油密封
優點: 耐用,專業外觀,邊槽可收集材料
缺點: 需要工具,木材維護
進階DIY項目(2小時以上)
7. 自訂樹脂倒模托盤
所需材料:
- 木製托盤底座或模具
- 環氧樹脂(食品安全)
- 裝飾物品(乾花、亮片、照片)
- 混合工具
- 熱風槍(去除氣泡)
製作步驟:
1. 準備底座或模具
2. 安排裝飾物品
3. 根據說明混合樹脂
4. 緩慢倒入,避免空氣囊
5. 使用熱風槍去除氣泡
6. 硬化24-72小時
7. 如有需要,打磨邊緣
優點: 驚人的自訂設計,耐用,防水
缺點: 材料昂貴,硬化時間長,需要技巧
安全提示: 使用食品安全/FDA合規的環氧樹脂。在通風良好的地方工作。
8. 書本安全滾動站
所需材料:
- 大型精裝書
- X-Acto 刀或盒子刀
- 直尺
- 膠水
- 毛氈襯裡
製作步驟:
1. 將頁面粘合在一起(除了前幾頁)
2. 標記矩形,留出1英寸邊框
3. 小心切割頁面以創建空心
4. 粘合切割邊緣
5. 用毛氈襯裡
6. 如有需要,添加隔間
優點: 隱蔽,話題之作,內建儲存
缺點: 耗時,工作空間小
9. 自訂木製建造
所需材料:
- 硬木(胡桃木、楓木、櫻桃木)
- 木工工具
- 路由器(用於凹槽/隔間)
- 砂紙(各種砂粒)
- 食品安全的塗料
製作方法:
1. 將木材切割至所需大小
2. 銼磨邊緣以形成凸起邊框
3. 添加凹槽以固定接合
4. 創建隔間
5. 逐漸打磨砂粒(100 → 220 → 400)
6. 塗上食品安全的塗料
7. 拋光至光滑
優點: 專業品質,精確規格,傳家寶
缺點: 需要工具和技能,耗時
材料安全指南
安全材料:
- 未處理的硬木(使用食品安全的塗料)
- 食品級矽膠
- 鋼化玻璃
- 不銹鋼
- 食品安全的環氧樹脂
- 陶瓷
避免:
- 處理過或壓力處理的木材(化學物質)
- 膠合板或刨花板(釋放氣體)
- 未知金屬(潛在塗層)
- 非食品安全的油漆或塗料
- 在加熱時釋放氣體的塑料
塗裝技術
對於木材:
- 屠夫塊油:食品安全,自然,需要重新塗抹
- 蜂蠟:自然,輕微的防水性
- 食品安全的聚氨酯:耐用,防水
- 桐油:天然、耐用、食品安全
金屬用:
- 透明塗層:防止刮傷
- 粉末塗裝:專業、非常耐用
- 保持自然:易於清潔
設計用:
- 乙烯基貼紙:簡單、可移除
- 木燒藝術:永久、藝術性
- 激光雕刻:專業外觀(如果您有設備)
- 壓克力漆 + 透明塗層:色彩繽紛,受保護
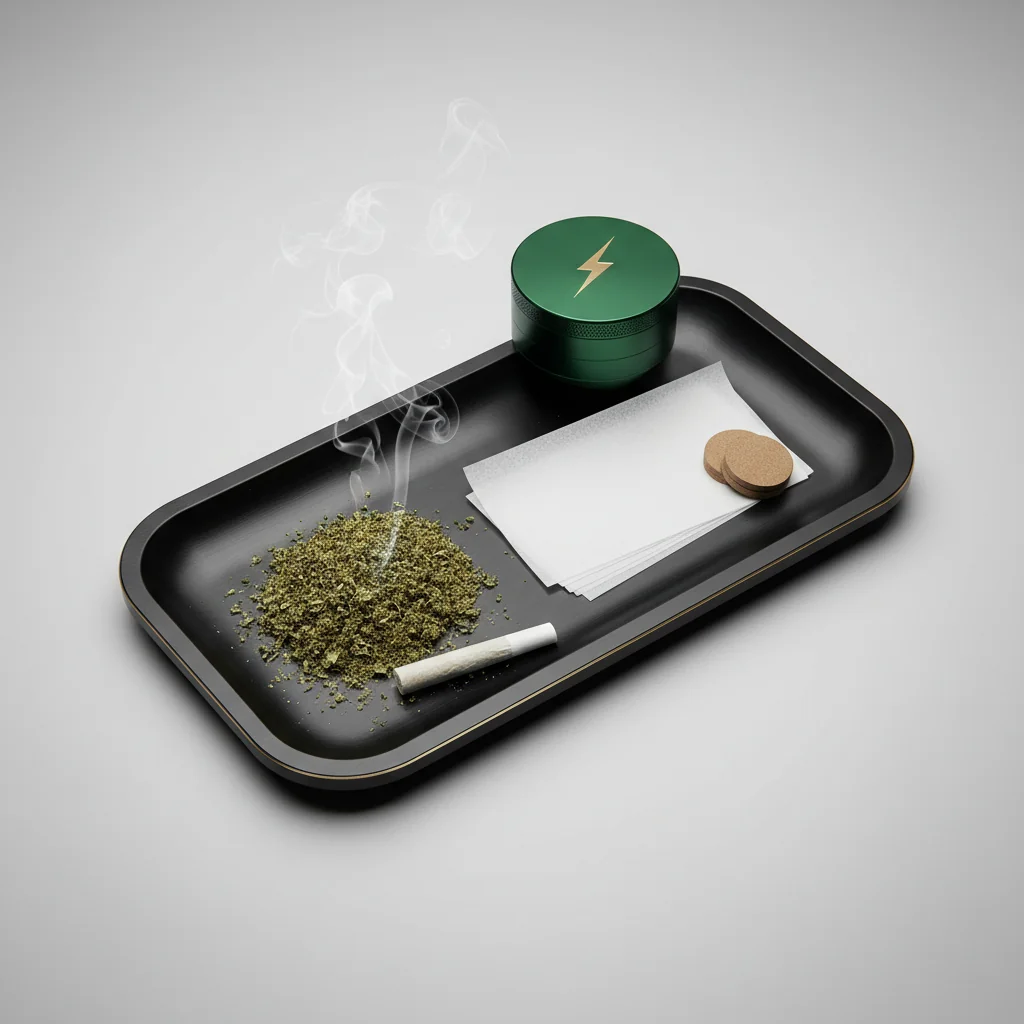
來自 MunchMakers 的定制捲煙盤
對於那些想要專業品質而不想自己動手的人, MunchMakers 提供定制捲煙盤 非常適合:
個人使用:
- 定制設計和藝術作品
- 姓名/首字母
- 高級飾面
商業品牌:
- 藥房標誌
- 品牌顏色
- 批量訂購
活動:
- 派對贈品
- 婚禮禮物
- 促銷物品
聯繫 MunchMakers 以獲取定制捲煙盤的批發價格。
升級再利用的想法
您可以重新利用的物品:
- 舊木製首飾盒
- 復古金屬午餐盒
- 木製抽屜整理器
- 邊緣陶瓷盤
- 玻璃砂鍋蓋
- 復古 煙灰缸 (較大者)
- 裝飾性金屬罐
提示:
- 確保物品乾淨且無異味
- 檢查穩定性(不會翻倒)
- 驗證材料安全性
- 如有需要,添加防滑腳墊
增加功能性
磁性儲存
- 安裝磁條以存放打火機、工具
- 使用磁性香料容器進行儲存
隔間
- 重新利用 冰 冰塊托盤
- 切割木製隔板
- 使用藥丸整理器存放小物品
滾動表面
- 添加矽膠墊以防粘
- 安裝玻璃插入件以便於清潔
- 添加軟木以增強抓握
內建功能
- 煙灰缸區域
- 聯合持有槽
- 磨碎器 井
常見問題
對於初學者來說,最好的DIY托盤是什麼?
相框托盤或服務托盤轉換是最簡單的——兩者都在30分鐘內完成,且不需要特殊工具或技能。
木材或金屬哪個更適合DIY托盤?
金屬更容易清潔,但可能感覺寒冷。木材更溫暖且可自定義,但需要密封和更多維護。根據您的優先事項進行選擇。
我可以出售DIY滾動托盤嗎?
可以,但確保材料安全,表面處理為食品級,並遵守當地商業法規。在合適的市場中,自定義托盤可以獲利。
本指南僅供教育用途。大麻法律因地區而異。
Frequently Asked Questions
相框托盤或服務托盤的轉換是最簡單的——兩者都在 30 分鐘內完成,且不需要特殊工具或技能。
Related Guides
Custom Rolling Trays: Personalize Your Setup
Comprehensive guide about custom rolling trays: personalize your setup. Learn everything you need to know with expert tips and detailed instructions.

How to Clean Your Rolling Tray: Complete Maintenance Guide
Learn how to properly clean and maintain rolling trays made of metal, wood, silicone, and plastic. Includes cleaning schedules, stubborn residue removal, and material-specific care tips.
LED Rolling Trays: Glow-Up Your Rolling Station
Comprehensive guide about led rolling trays: glow-up your rolling station. Learn everything you need to know with expert tips and detailed instructions.