
การม้วนแบบ Inside-Out (Dutch/Backroll) สอน: เทคนิคการม้วนที่ดีที่สุด
Mike Rodriguez
Rolling Expert
การม้วนแบบ Inside-Out (Dutch/Backroll) สอน: เทคนิคการม้วนที่ดีที่สุด
การม้วนแบบ inside-out (ที่เรียกว่าการม้วนดัตช์, backrolling, หรือการม้วนย้อนกลับ) เป็นเทคนิคการม้วนที่ขั้นสูงซึ่งใช้กระดาษน้อยที่สุดเพื่อรสชาติที่สะอาดขึ้นและการเผาไหม้ที่ช้าลง คู่มือนี้สอนให้คุณเชี่ยวชาญในทักษะที่น่าประทับใจนี้
คำตอบด่วน
ในการม้วนแบบ inside-out: พลิกกระดาษกลับด้าน (กาวหันลง), ใส่ฟิลเตอร์และกัญชาแบบปกติ, ม้วนและจัดรูปทรง, ซ่อนขอบด้านล่าง (ไม่ใช่กาว) ลงไป, ม้วนจนเห็นเส้นกาวผ่านกระดาษจากด้านใน, เลียด้านนอกของม้วนเพื่อเปิดใช้งานกาวผ่านกระดาษ, ปิดผนึก, ฉีกกระดาษส่วนเกินออก ใช้กระดาษน้อยกว่าการม้วนปกติ 50%
การม้วนแบบ Inside-Out คืออะไร?
แนวคิด:
การม้วนปกติ:
- เส้นกาวหันขึ้น
- คุณม้วนไปทางกาว
- ปิดผนึกโดยการเลียกาวด้านบน
- ชั้นกระดาษทั้งหมดยังคงอยู่
การม้วนแบบ Inside-Out:
- เส้นกาวหันลง (ไปทางพื้นผิว)
- คุณม้วนออกจากกาวในตอนแรก
- กาวจะอยู่ด้านใน
- เลียกระดาษเพื่อเปิดใช้งานหมากฝรั่ง
- ฉีกชั้นกระดาษด้านนอกที่เกินออก
ผลลัพธ์: กระดาษน้อยลงประมาณ 50% รสชาติสะอาดขึ้น เผาไหม้ช้าลง
ทำไมต้องม้วนด้านในออก?
ข้อดี:
- กระดาษน้อยลง = รสชาติดีกว่า: รสชาติของกัญชามีความโดดเด่น รสชาติของกระดาษน้อยมาก
- เผาไหม้ช้าลง: กระดาษน้อยลงหมายถึงการเผาไหม้ที่ช้าลงและควบคุมได้มากขึ้น
- น่าประทับใจ: แสดงถึงความชำนาญในการม้วน ทำให้ผู้สูบคนอื่นประทับใจ
- ควันนุ่มนวล: ความรุนแรงลดลงจากกระดาษที่น้อยลง
- สะอาดกว่า: ไม่มีรสชาติของกาว (หมากฝรั่งถูกปิดผนึกจากด้านใน)
ข้อเสีย:
- ยาก: ต้องมีทักษะการม้วนที่มั่นคงก่อน
- อัตราความล้มเหลวสูงกว่า: ง่ายที่จะทำผิดพลาดในขณะเรียนรู้
- เสียกระดาษ: คาดหวังว่าจะมีความล้มเหลวมากมายเมื่อเรียนรู้
- ไม่เร็วขึ้น: ใช้เวลานานกว่าการม้วนแบบปกติ
ใครควรลอง: ผู้ที่มีประสบการณ์ในการม้วนที่สามารถม้วนจอยต์ปกติได้อย่างสม่ำเสมอ
เชี่ยวชาญในการม้วนของคุณด้วย กระดาษม้วนแบบกำหนดเองคุณภาพสูง จาก MunchMakers](https://munchmakers.com/product-category/custom-rolling-papers/). สำหรับเทคนิคการม้วนขั้นสูง, 420 Magazine ได้รายงานเกี่ยวกับวัฒนธรรมกัญชาตั้งแต่ปี 1993.
ข้อกำหนดเบื้องต้น
ก่อนที่จะลองม้วนด้านในออก คุณควรสามารถ:
- ม้วนจอยต์ปกติได้สำเร็จ 80% ขึ้นไป
- ม้วนโดยไม่ใช้เครื่องม้วน
- เข้าใจเทคนิคการพับและม้วน
- มีความคล่องแคล่วของนิ้วและการควบคุมกระดาษที่ดี
ถ้าคุณยังไม่สามารถม้วนจอยต์ปกติได้อย่างสม่ำเสมอ: ให้เชี่ยวชาญในการม้วนพื้นฐานก่อน การลองม้วนด้านในออกเร็วเกินไปจะทำให้เสียกระดาษและทำให้คุณหงุดหงิด.
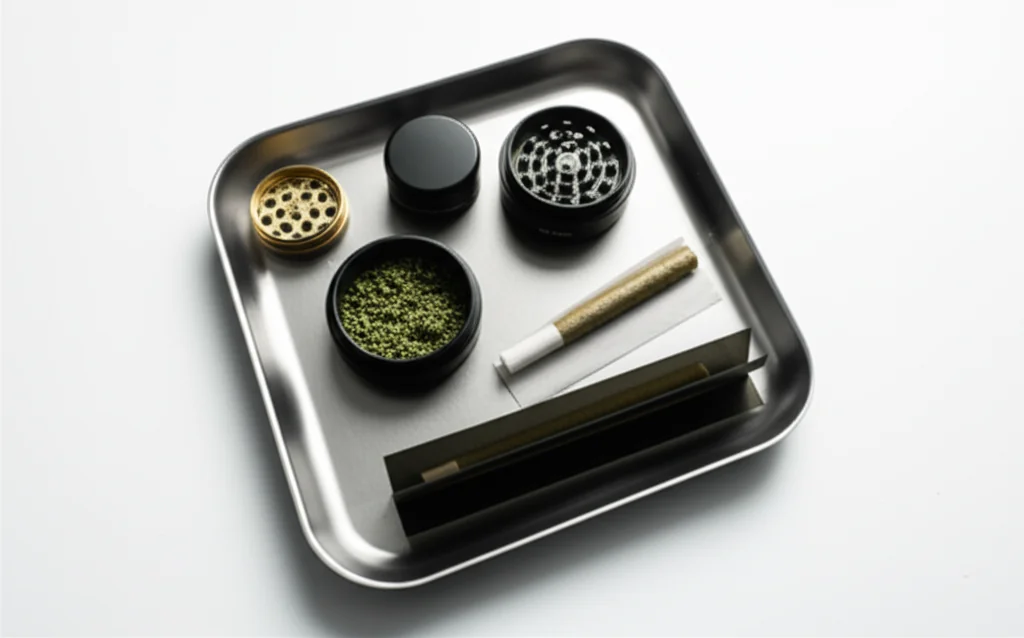
สิ่งที่คุณต้องการ
- กระดาษม้วนบาง (กระดาษข้าวหรือกัญชาบางทำงานได้ดีที่สุด)
- ปลายกรอง
- กัญชาบด (0.5-0.75g)
- เครื่องบด
- กระดาษฝึกหัด (คาดว่าจะเสีย 10-20 แผ่นในการเรียนรู้)
คำแนะนำกระดาษ: OCB, Elements, หรือกระดาษข้าว RAW กระดาษบางช่วยให้คุณเห็นเส้นกาวผ่านมัน (สำคัญสำหรับเทคนิคนี้)
ขั้นตอนทีละขั้นตอน: การม้วนแบบกลับด้าน
ขั้นตอนที่ 1: พลิกกระดาษกลับด้าน
วางกระดาษม้วนโดยให้ เส้นกาวหันลง ไปยังพื้นผิวการม้วน นี่คือการทำในลักษณะที่ตรงกันข้ามกับการม้วนปกติ
ตรวจสอบภาพ: ด้านเหนียวของกาวควรสัมผัสกับถาดม้วนหรือมือของคุณ ไม่ควรหันขึ้นมาหาคุณ
ทำไมสิ่งนี้ถึงสำคัญ: การจัดเรียงนี้ช่วยให้กาวอยู่ด้านในของมวนหลังจากการม้วน
ขั้นตอนที่ 2: วางปลายกรองและกัญชา
เหมือนกับการม้วนปกติ:
- วางปลายกรองที่ปลายหนึ่ง (โดยปกติจะอยู่ทางซ้ายสำหรับคนถนัดขวา)
- กระจายกัญชาบดให้ทั่วกระดาษ
- ปริมาณ: 0.5-0.75g (น้อยกว่าปกติเล็กน้อย - ง่ายต่อการควบคุม)
คำเตือนสำคัญ: กาวอยู่ด้านล่าง/หันลง แต่คุณกำลังจัดเรียงทุกอย่างเหมือนกับมวนปกติ
ขั้นตอนที่ 3: ม้วนและจัดรูปทรง
ม้วนไปมาระหว่างนิ้วโป้งและนิ้วของคุณเพื่อจัดรูปทรงมวน เหมือนกับการม้วนปกติ.
การเคลื่อนไหวในการม้วนเหมือนกัน - คุณแค่ทำงานกับกระดาษที่พลิกกลับ
สำคัญ: จัดรูปทรงให้ดีที่นี่ การจัดรูปทรงที่ดี = ง่ายต่อการพับในขั้นตอนถัดไป
ขั้นตอนที่ 4: การพับที่สำคัญ (แตกต่างจากปกติ)
นี่คือจุดที่การม้วนแบบกลับด้านแตกต่าง:
การม้วนปกติ: พับขอบที่ใกล้คุณ (ด้านกาว) ใต้กัญชา
การม้วนแบบกลับด้าน: พับขอบที่ไกลจากคุณ (ด้านไม่มีกาว) ใต้กัญชา
ทำไม: เนื่องจากกาวหันไปทางด้านล่าง คุณจึงพับขอบตรงข้าม กาวจะม้วนไปรอบ ๆ และมาพบกันจากด้านใน
นี่คือส่วนที่ยากที่สุดในการมองเห็น. ขอบที่ไม่ใช่กาวจะพับเข้าไป ม้วนไปรอบ ๆ กัญชา และในที่สุดกาว (ที่มาจากด้านล่าง) จะปรากฏผ่านกระดาษ
ขั้นตอนที่ 5: ม้วนเพื่อเปิดเผยกาวผ่านกระดาษ
ดำเนินการม้วนมวนให้ปิด เมื่อคุณม้วน:
ดูเส้นกาว: คุณจะเห็นเส้นที่มืดกว่า/เงากว่าเล็กน้อยปรากฏผ่านกระดาษจากด้านใน นี่คือแถบกาวที่แสดงผ่าน
ต้องใช้กระดาษบาง: นี่คือเหตุผลที่กระดาษข้าว/กระดาษกัญชาบางทำงานได้ดีที่สุด - คุณต้องเห็นเส้นกาวผ่านกระดาษ
มันดูเป็นอย่างไร: เส้นที่มืดกว่าเล็กน้อยวิ่งตามความยาวของมวน มองเห็นได้ผ่านชั้นกระดาษด้านนอก
ขั้นตอนที่ 6: เลียผ่านกระดาษ (ขั้นตอนมหัศจรรย์)
เมื่อคุณเห็นเส้นกาวผ่านกระดาษ:
เลียด้านนอก ของมวนตามเส้นนั้น น้ำลายของคุณจะซึมผ่านกระดาษบางและทำให้กาวทำงานจากด้านใน
เทคนิค:
- เลียอย่างเอื้อเฟื้อ (อย่าขี้อาย - น้ำลายต้องซึมผ่านกระดาษ)
- ตามเส้นกาวทั้งหมด
- สามารถเลียเป็นส่วน ๆ หรือทั้งหมดในครั้งเดียว
เกิดอะไรขึ้น: น้ำลาย → ผ่านกระดาษด้านนอก → ทำให้กาวทำงานจากด้านใน → กาวติดกับกัญชา/กระดาษด้านใน
ขั้นตอนที่ 7: ปิดผนึกและถือ
กดแน่นตามเส้นที่เลียไว้เป็นเวลา 5-10 วินาที
คุณกำลังปิดผนึกจากด้านใน: กาวกำลังติดชั้นกระดาษด้านในเข้าด้วยกัน แม้ว่าคุณจะเลียจากด้านนอก
ตรวจสอบ: มวนควรรู้สึกปิดผนึก กาวได้ทำงานผ่านกระดาษ
ขั้นตอนที่ 8: ฉีกกระดาษส่วนเกินออก
ตอนนี้เป็นส่วนที่น่าพอใจ:
กระดาษส่วนเกิน ที่ม้วนรอบด้านนอก (ชั้นเพิ่มเติม) สามารถฉีกออกได้
วิธีการลบ:
- ตัวเลือก A: ฉีกออกอย่างระมัดระวังตามเส้นปิดผนึก
- ตัวเลือก B: เผามันออกเมื่อคุณจุดมวน (เป็นที่นิยมมากกว่า)
- ตัวเลือก C: เลียตามเส้นที่คุณต้องการฉีก จากนั้นฉีก (ความชื้นทำให้มันง่ายขึ้น)
ผลลัพธ์: กระดาษเหลือน้อยมาก - มีเพียงชั้นบาง ๆ รอบ ๆ กัญชาของคุณแทนที่จะเป็นสองชั้น
ปัญหาทั่วไปในการม้วนแบบ Inside-Out
ปัญหา: มองไม่เห็นเส้นกาวผ่านกระดาษ
สาเหตุ: กระดาษหนาเกินไป หรือม้วนไม่พอ
วิธีแก้ไข:
- ใช้กระดาษที่บางกว่า (กระดาษข้าวทำงานได้ดีที่สุด)
- ยกจอยต์ขึ้นส่องไฟเพื่อดูเส้นกาว
- ม้วนให้มากขึ้น - เส้นกาวจะมองเห็นได้เมื่อชั้นในและชั้นนอกทับซ้อนกัน
ปัญหา: กาวไม่ติดเมื่อเลียด้านนอก
สาเหตุ: น้ำลายไม่พอ หรือกระดาษหนาเกินไป
วิธีแก้ไข:
- เลียให้มากขึ้น - ทำให้เปียกจริงๆ
- ใช้กระดาษที่บางกว่า
- ถือและกดนานขึ้น (10-15 วินาที)
- ลองหายใจอากาศร้อนใส่เพื่อช่วยกระตุ้นกาว
ปัญหา: จอยต์หลุดขณะฉีกส่วนเกิน
สาเหตุ: กาวไม่แน่นหนา
วิธีแก้ไข:
- อย่าฉีก - แค่เผาส่วนเกินเมื่อจุดไฟ
- ตรวจสอบให้แน่ใจว่ากาวถูกกระตุ้นเต็มที่ก่อนที่จะฉีก
- กดปิดให้แน่นนานกว่าก่อนที่จะพยายามฉีก
ปัญหา: สับสนเกี่ยวกับขอบที่จะพับ
สาเหตุ: การจัดตำแหน่งกระดาษสับสน
กลเม็ดภาพ:
- ม้วนปกติ: กาวขึ้น → พับใกล้ขอบ
- Inside-out: กาวลง → พับขอบไกล
- พับขอบที่ไม่มีเส้นกาวอยู่ใต้
ปัญหา: เสียกัญชาไปมากเกินไปในความพยายามที่ล้มเหลว
วิธีแก้ไข:
- ฝึกกับยาสูบหรือสมุนไพรผสมก่อน
- ใช้กัญชาน้อยลง (0.3-0.5g) ขณะเรียนรู้
- ยอมรับว่าความล้มเหลวเป็นส่วนหนึ่งของการเรียนรู้
- เก็บกัญชาที่ล้มเหลวไว้สำหรับการลองครั้งถัดไป
Inside-Out กับการม้วนปกติ
รสชาติ:
Inside-Out:
- รสชาติของกระดาษน้อยลง
- รสชาติของกัญชาครองพื้นที่
- ควันสะอาดกว่า
ปกติ:
- รสชาติของกระดาษมากขึ้น
- รสกระดาษผสมกับกัญชา
ผู้ชนะ: ภายใน-ออก (เป็นเรื่องส่วนตัวแต่ได้รับการเห็นด้วยอย่างกว้างขวาง)
อัตราการเผา:
ภายใน-ออก:
- เผาช้าลง (มีการเผากระดาษน้อยลง)
- เซสชันที่ควบคุมได้มากขึ้น
- อยู่ได้นานกว่า
ปกติ:
- เผาเร็วกว่า
- ความยาวเซสชันมาตรฐาน
ผู้ชนะ: ภายใน-ออก
ความยาก:
ภายใน-ออก:
- เทคนิคขั้นสูง
- อัตราความล้มเหลวสูงกว่า
- ต้องการการฝึกฝน
ปกติ:
- ความยากปานกลาง
- ให้อภัยมากกว่า
- เรียนรู้ได้ง่ายกว่า
ผู้ชนะ: ปกติ (สำหรับผู้เริ่มต้น)
ความเป็นจริง:
ภายใน-ออก:
- ใช้เวลานานกว่า
- ต้องการสมาธิมากขึ้น
- ไม่เหมาะสำหรับเซสชันที่รวดเร็ว
ปกติ:
- เร็วกว่า
- สะดวกกว่า
- ดีสำหรับทุกสถานการณ์
ผู้ชนะ: ปกติ (สำหรับความเร็ว)
การเชื่อมต่อวัฒนธรรมดัตช์
การม้วนแบบ Inside-out มีต้นกำเนิดในเนเธอร์แลนด์ (ดังนั้นจึงเรียกว่า "Dutch roll") ซึ่งวัฒนธรรมกัญชามีการเน้นที่:
- ความเรียบง่ายและประสิทธิภาพ
- คุณภาพมากกว่าปริมาณ
- ความชำนาญในเทคนิค
- ประสบการณ์การสูบที่สะอาดและมีรสชาติ
ในร้านกาแฟที่อัมสเตอร์ดัม: การม้วนแบบ Inside-out เป็นเรื่องปกติและคาดหวังได้ในหมู่ผู้สูบที่มีประสบการณ์.
ความสำคัญทางวัฒนธรรม: แสดงให้เห็นว่าคุณรู้ว่าคุณกำลังทำอะไร มีความเคารพในงานฝีมือ
กระดาษที่ดีที่สุดสำหรับการม้วนแบบ Inside-Out
ตัวเลือกที่ดีที่สุด:
1. OCB Premium (ข้าว):
- บางพิเศษ
- เส้นกาวมองเห็นได้ชัดเจน
- มองทะลุได้ง่าย
- ดีที่สุดสำหรับการเรียนรู้
2. Elements Ultra Thin:
- กระดาษข้าว
- บางมาก
- มองเห็นเส้นกาวได้ชัดเจน
- ตัวเลือกมืออาชีพ
3. RAW Black (กัญชงบาง):
- บางกว่ากระดาษ RAW ปกติ
- ใช้ได้กับการม้วนแบบ Inside-out
- ยังคงให้อภัยได้
หลีกเลี่ยง:
- Zig-Zag (หนาเกินไป มองไม่เห็นเส้นกาว)
- กระดาษกัญชงหนา
- กระดาษที่มีรสชาติ (มักจะหนากว่า)
ความก้าวหน้าในการฝึกฝน
สัปดาห์ที่ 1: เข้าใจการพลิก
- เพียงแค่ฝึกพลิกกระดาษและจินตนาการถึงเทคนิค
- ทำการฝึกซ้อมโดยไม่ใช้กัญชา
- ทำให้คุ้นเคยกับการจัดวางกลับหัว
สัปดาห์ที่ 2: ความพยายามครั้งแรกกับยาสูบ
- ลองใช้ยาสูบหรือสมุนไพรผสม (ถูกกว่ากัญชา)
- คาดหวังอัตราความล้มเหลว 90%
- มุ่งเน้นไปที่การมองเห็นเส้นกาวผ่านกระดาษ
สัปดาห์ที่ 3: ปรับปรุงเทคนิค
- อัตราความสำเร็จควรอยู่ที่ 30-40%
- เริ่มใช้กัญชา
- ทำงานให้การม้วนเป็นไปอย่างสม่ำเสมอ
สัปดาห์ที่ 4+: ความเชี่ยวชาญ
- อัตราความสำเร็จ 60-80%
- ม้วนได้เร็วขึ้น
- ฉีกกระดาษส่วนเกินออกอย่างสะอาด
จำนวนม้วนที่ต้องฝึกทั้งหมด: 30-50 ครั้งเพื่อให้ได้ความสม่ำเสมอ
เคล็ดลับขั้นสูง
เคล็ดลับที่ 1: การทดสอบแสง
ถ้าคุณมองไม่เห็นเส้นยาง ให้ถือม้วนขึ้นไปที่แหล่งแสง. ยางจะปรากฏเป็นเส้นที่มืดกว่าผ่านกระดาษ.
เคล็ดลับที่ 2: การควบคุมความชื้น
แห้งเกินไป: ยางจะไม่ทำงานผ่านกระดาษ
เปียกเกินไป: กระดาษขาด, ม้วนหลุดออก
พอดี: ยางทำงาน, กระดาษยังคงอยู่ในสภาพดี
เคล็ดลับที่ 3: เผาอย่าให้ขาด
เมื่อเริ่มต้น, อย่าฉีกกระดาษส่วนเกิน. แค่จุดไฟที่ม้วนและปล่อยให้ส่วนเกินไหม้ไป. ปลอดภัยและง่ายกว่า.
เคล็ดลับที่ 4: ใช้กัญชาน้อยลงเล็กน้อย
ม้วนแบบด้านในออก ม้วนได้ยากกว่า. ใช้ 0.5-0.75g สูงสุดในขณะที่เรียนรู้. ม้วนด้านในออกที่หนาเป็นระดับผู้เชี่ยวชาญ.
เคล็ดลับที่ 5: ใช้ฟิลเตอร์เป็นจุดอ้างอิง
ปลายฟิลเตอร์คือ จุดยึด. รักษาให้แน่นและสมบูรณ์แบบ - สร้างเทคนิคด้านในออกรอบฟิลเตอร์ที่แข็งแรง.
แสดงทักษะของคุณ
การม้วนแบบด้านในออกคือ สามารถจดจำได้ทันที สำหรับผู้สูบที่มีประสบการณ์.
สัญญาณของม้วนด้านในออก:
- กระดาษน้อย
- รูปลักษณ์สะอาด
- ขอบที่ฉีกออกซึ่งเป็นที่ที่มีการตัดส่วนเกินออก
- บางอย่างน่าประทับใจ
ผลกระทบทางสังคม: ผู้สูบบุหรี่คนอื่นจะสังเกตเห็นและเคารพเทคนิคนี้ มันเป็นเทคนิคการม้วนที่เทียบเท่ากับท่าเล่นสเก็ตบอร์ด
ความเข้าใจผิดทั่วไป
ตำนาน: "การม้วนแบบใน-นอกเป็นเพียงการอวด"
ความจริง: มีประโยชน์จริง (รสชาติ, อัตราการเผาไหม้, กระดาษน้อยลง)
ตำนาน: "คุณต้องใช้กระดาษพิเศษ"
ความจริง: กระดาษบางๆ ทุกชนิดใช้ได้ กระดาษข้าวจะมองเห็นได้ง่ายกว่า
ตำนาน: "มันเป็นไปไม่ได้ที่จะเรียนรู้"
ความจริง: ยากแต่ทำได้ด้วยการฝึกฝน - คนส่วนใหญ่สามารถเรียนรู้ได้ใน 20-40 ครั้ง
ตำนาน: "การม้วนแบบใน-นอกแข็งแรง/มีประสิทธิภาพมากกว่า"
ความจริง: มีความเข้มข้นเท่ากัน - เพียงแค่กระดาษน้อยลง รสชาติสะอาดกว่า
เมื่อไหร่ที่จะใช้การม้วนแบบใน-นอก
สถานการณ์ที่ดีที่สุด:
- การสูบคนเดียว (มีเวลาให้มุ่งเน้นที่เทคนิค)
- การสร้างความประทับใจให้กับผู้สูบที่มีประสบการณ์
- เมื่อคุณต้องการรสชาติสูงสุด
- โอกาสพิเศษที่คุณภาพ > ความเร็ว
ข้ามการม้วนแบบใน-นอกเมื่อ:
- รีบ
- สูบกับผู้เริ่มต้น (พวกเขาจะไม่เห็นคุณค่า)
- สภาพลมแรง (ควบคุมได้ยาก)
- ใช้กระดาษหนา (จะไม่ทำงานได้ดี)
คู่มือการแก้ปัญหา
"ฉันพลิกกระดาษแต่ตอนนี้ฉันสับสน"
วิธีแก้ปัญหา: วางมันลง มองไปที่มัน กาวควรหันไปทางโต๊ะ หากคุณเห็นแถบกาวมันเงาเมื่อมองลงไปที่กระดาษ แสดงว่าผิด - พลิกมันกลับ
"ฉันมองไม่เห็นเส้นกาวผ่านกระดาษ"
วิธีแก้ปัญหา:
1. ใช้กระดาษบางกว่า (กระดาษข้าว)
2. ถือให้เข้ากับแสง
3. ม้วนต่อไป - ต้องมีการทับซ้อนมากขึ้นเพื่อให้มองเห็นได้
4. ตรวจสอบว่าคุณไม่ได้ม้วนมันย้อนกลับ
"ข้อต่อหลุดออกเมื่อฉันเลียมัน"
สาเหตุ: น้ำลายมากเกินไป, กระดาษบางเกินไป, ไม่ได้รูปทรงแน่นพอ
วิธีแก้ไข:
- ใช้น้ำลายน้อยลงแต่ทาให้ระมัดระวังมากขึ้น
- จัดรูปทรงให้แน่นขึ้นก่อนปิด
- กดทันทีหลังจากเลีย
"กระดาษส่วนเกินจะไม่ฉีกออกอย่างสะอาด"
นี่เป็นเรื่องปกติ! คนส่วนใหญ่จะเผามันออกเมื่อจุดไฟ การฉีกออกอย่างสะอาดต้องฝึกฝน
ทางเลือก: "กึ่งกลับด้าน"
สำหรับผู้ที่พบว่าการกลับด้านเต็มรูปแบบยากเกินไป:
เทคนิค: พลิกกระดาษกลับด้านแต่ใช้กระดาษส่วนเกินน้อยลง ม้วนให้พอเพียงเพื่อให้ยางถึง เลียผ่าน ปิด แต่มีส่วนเกินน้อยกว่าที่จะฉีก
ประโยชน์: ง่ายกว่าการกลับด้านเต็มรูปแบบ ยังใช้กระดาษน้อยกว่าปกติ
ผลลัพธ์: ยังคงลดกระดาษลงได้ประมาณ 30-40% เมื่อเปรียบเทียบกับการม้วนปกติ
คู่มือนี้มีไว้เพื่อการศึกษา กฎหมายเกี่ยวกับกัญชาจะแตกต่างกันไปตามเขตอำนาจ
Step 1:
Step 2:
Step 3:
Step 4:
Step 5:
Step 6:
Step 7:
Step 8:
Frequently Asked Questions
การม้วนแบบ inside-out ใช้กระดาษน้อยลง (คุณฉีกส่วนเกินออก) ส่งผลให้รสชาติของกัญชาสะอาดขึ้น, เผาไหม้ช้าลง, และน้อยลงในความรุนแรง นอกจากนี้ยังน่าประทับใจเมื่อดูและแสดงถึงความชำนาญในการม้วน
Related Guides
Rolling Paper Sizes Explained: 1 1/4, King Size, and More
Comprehensive guide about rolling paper sizes explained: 1 1/4, king size, and more. Learn everything you need to know with expert tips and detailed instructions.

Best Rolling Papers for Beginners: Complete Buying Guide 2026
Discover the best rolling papers for beginners including RAW, Zig-Zag, and OCB. Learn about sizes, materials (rice vs hemp vs wood pulp), and which papers are easiest to roll with.
Clear Rolling Papers: Are Cellulose Papers Worth It?
Comprehensive guide about clear rolling papers: are cellulose papers worth it?. Learn everything you need to know with expert tips and detailed instructions.