
ไอเดียถาดโรลลิ่ง DIY: ตัวเลือกที่ปรับแต่งและรีไซเคิล
James Wilson
Cannabis Culture Writer
ไอเดียถาดโรลลิ่ง DIY: ตัวเลือกที่ปรับแต่งและรีไซเคิล
ไม่ถาดโรลลิ่งทุกใบต้องมาจากร้านค้า DIY ถาดโรลลิ่ง เสนอการปรับแต่ง, การประหยัดค่าใช้จ่าย, และความพึงพอใจในการสร้างสิ่งที่ไม่เหมือนใคร คู่มือนี้ครอบคลุมวิธีการ DIY ที่สร้างสรรค์ตั้งแต่การรีไซเคิลง่าย ๆ ไปจนถึงการสร้างแบบกำหนดเอง
คำตอบด่วน
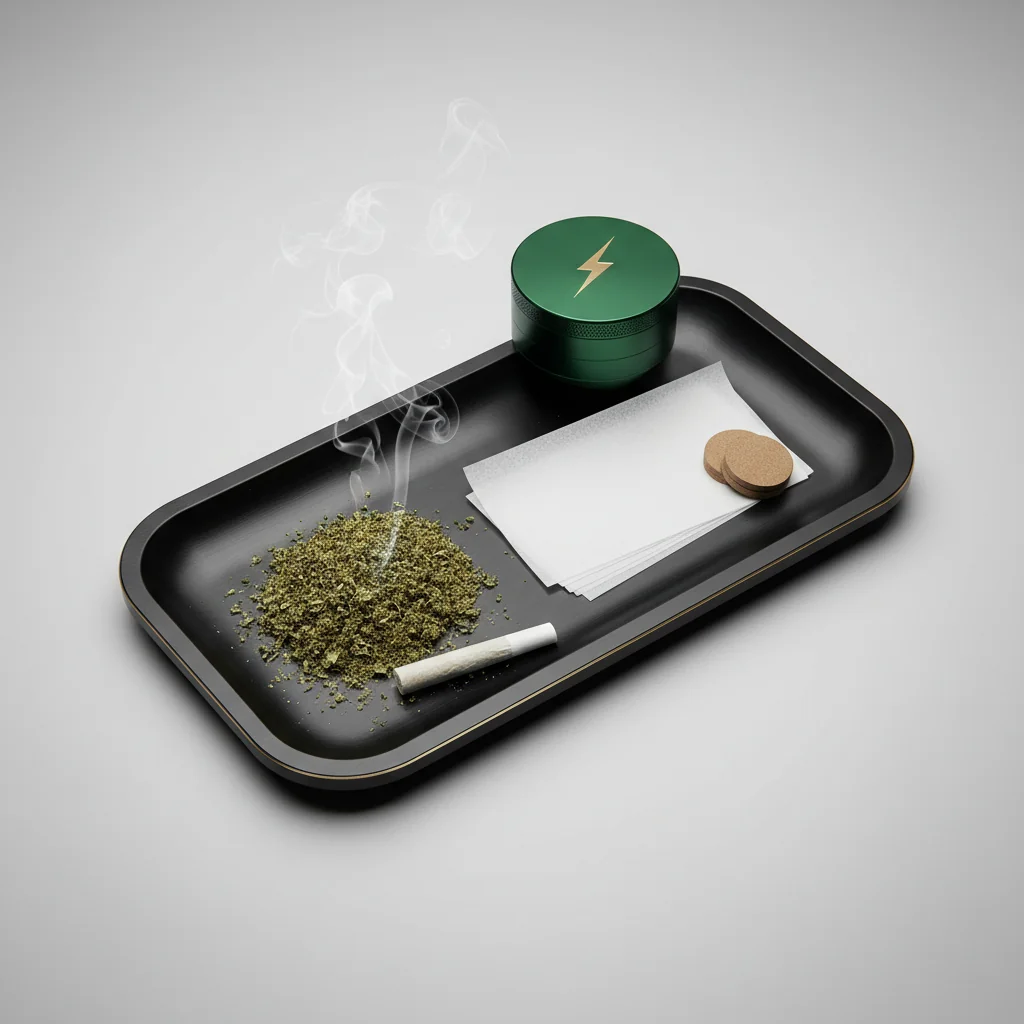
ตัวเลือกถาดโรลลิ่ง DIY ที่ได้รับความนิยมรวมถึง: กรอบรูปที่นำกลับมาใช้ใหม่พร้อมศิลปะที่กำหนดเอง, ถาดไม้ที่มีฟีเจอร์เพิ่มเติม, กล่องซิการ์ที่รีไซเคิล, เทเรซินที่กำหนดเอง, ถาดโลหะที่ตกแต่ง, และหนังสือปลอดภัยที่แปลงเป็นสถานีโรลลิ่ง วัสดุที่ดีที่สุดคือพื้นผิวเรียบที่ไม่ดูดซับซึ่งทำความสะอาดได้ง่าย
ทำไมต้องทำถาดโรลลิ่ง DIY?
ประโยชน์:
- การปรับแต่งอย่างเต็มที่
- การประหยัดค่าใช้จ่าย (5-20 ดอลลาร์ เทียบกับ 30-100 ดอลลาร์สำหรับถาดพรีเมียม)
- ชิ้นงานที่ไม่เหมือนใครและมีเอกลักษณ์
- การรีไซเคิลช่วยลดขยะ
- ตัวเลือกของขวัญที่สมบูรณ์แบบ
- แสดงสไตล์ส่วนตัว
ข้อพิจารณา:
- การลงทุนเวลา
- ความปลอดภัยของวัสดุ (ปลอดภัยสำหรับอาหาร, ไม่มีการปล่อยก๊าซ)
- ความทนทานแตกต่างกัน
- ความต้องการในการทำความสะอาด
สำหรับแรงบันดาลใจในการทำ DIY, Instructables มีบทแนะนำโครงการหลายพันรายการ
ตัวเลือก DIY ด่วน (ภายใน 30 นาที)
1. ถาดกรอบรูป
สิ่งที่คุณต้องการ:
- กรอบรูปขนาดใหญ่พร้อมกระจก (8×10 หรือใหญ่กว่า)
- ศิลปะที่กำหนดเอง, รูปภาพ, หรือการออกแบบที่พิมพ์
- ตัวเลือก: พื้นหลังผ้าสักหลาด
วิธีทำ:
1. ถอดพื้นหลังกรอบออก
2. ใส่ผลงานศิลปะที่กำหนดเอง (หันหน้าเข้าหากระจก)
3. เปลี่ยนพื้นหลัง
4. ใช้กรอบหงายขึ้นเป็นถาด (กระจกจับวัสดุ)
ข้อดี: รวดเร็ว, ศิลปะที่ปรับแต่งได้, กระจกทำความสะอาดง่าย
ข้อเสีย: ไม่มีขอบยกสูง, กระจกอาจแตก
2. การแปลงถาดเสิร์ฟ
สิ่งที่คุณต้องการ:
- ถาดเสิร์ฟไม้หรือโลหะที่มีขอบ
- ตัวเลือก: สี, สติ๊กเกอร์, เคลือบเรซิน
วิธีทำ:
1. ทำความสะอาดถาดให้ทั่ว
2. ขัดถ้าจำเป็น (ไม้)
3. ตกแต่งตามต้องการ
4. เคลือบด้วยฟินิชที่ปลอดภัยสำหรับอาหาร (ตัวเลือก)
ข้อดี: มีขอบยกสูงแล้ว, ทนทาน
ข้อเสีย: รูปลักษณ์ทั่วไปโดยไม่มีการปรับแต่ง
3. ถาดคุกกี้
สิ่งที่คุณต้องการ:
- ถาดคุกกี้/อบโลหะขนาดเล็ก
- สเปรย์สีหรือสติ๊กเกอร์ไวนิล (ตัวเลือก)
วิธีทำ:
1. ทำความสะอาดให้ทั่ว
2. ตกแต่งขอบหรือด้านล่าง (รักษาพื้นผิวที่กลิ้งให้เรียบ)
3. เพิ่มสติ๊กเกอร์ไวนิลเพื่อการจับหรือการออกแบบ
ข้อดี: ราคาถูก (2-5 ดอลลาร์), ทนทาน, ทำความสะอาดง่าย
ข้อเสีย: รูปลักษณ์พื้นฐาน, อาจรู้สึกเย็น
โครงการ DIY ระดับกลาง (1-2 ชั่วโมง)
4. สถานีม้วนซิการ์
สิ่งที่คุณต้องการ:
- กล่องซิการ์เปล่า (ไม้ซีดาร์จะดีกว่า)
- กระดาษทราย
- ฟินิชไม้หรือสี
- ภาชนะขนาดเล็กสำหรับช่องเก็บ
- แถบแม่เหล็ก (ตัวเลือก)
วิธีทำ:
1. ขัดภายในให้เรียบ
2. ทาหรือทาสีทั้งภายในและภายนอก
3. เพิ่มภาชนะขนาดเล็กหรือช่องแบ่ง
4. ติดแถบแม่เหล็กภายในฝาเพื่อเก็บไฟแช็ก
5. ปูพื้นด้วยผ้าสักหลาด (ไม่บังคับ)
ข้อดี: มีที่เก็บของในตัว, พกพาสะดวก, มีเอกลักษณ์
ข้อเสีย: พื้นที่ทำงานเล็ก, ไม้ดูดซับกลิ่น
5. ถาดคลิปแม่เหล็ก
สิ่งที่คุณต้องการ:
- คลิปบอร์ด (โลหะหรือไม้)
- แถบแม่เหล็ก
- สีหรือไวนิล
- แผ่นซิลิโคน (ไม่บังคับ)
วิธีทำ:
1. ถอดคลิปหรือเก็บไว้สำหรับถือเอกสาร
2. ตกแต่งพื้นผิว
3. เพิ่มแถบแม่เหล็กสำหรับถือเครื่องมือโลหะ
4. ติดแผ่นซิลิโคนสำหรับพื้นผิวการกลิ้ง
ข้อดี: พกพาสะดวก, ที่เก็บเครื่องมือแม่เหล็ก, ราคาต่ำ
ข้อเสีย: พื้นที่ผิวเล็ก
6. อัปเกรดเขียงไม้
สิ่งที่คุณต้องการ:
- เขียงไม้ใหม่ (มีร่องขอบ)
- เครื่องตัดหรือมีด (สำหรับช่องแบ่ง)
- เครื่องเผาไม้ (สำหรับลวดลาย)
- การเคลือบที่ปลอดภัยสำหรับอาหาร
วิธีทำ:
1. เพิ่มช่องแบ่งด้วยเครื่องตัด/มีด
2. ขัดให้เรียบ
3. เพิ่มลวดลายด้วยเครื่องเผาไม้
4. เคลือบด้วยน้ำมันบัตเตอร์บล็อก
ข้อดี: ทนทาน, ดูเป็นมืออาชีพ, ร่องขอบจับวัสดุได้
ข้อเสีย: ต้องใช้เครื่องมือ, การบำรุงรักษาไม้
โครงการ DIY ขั้นสูง (2+ ชั่วโมง)
7. ถาดเทเรซินแบบกำหนดเอง
สิ่งที่คุณต้องการ:
- ฐานถาดไม้หรือแม่พิมพ์
- เรซินอีพ็อกซี่ (ปลอดภัยสำหรับอาหาร)
- ของตกแต่ง (ดอกไม้แห้ง, กลิตเตอร์, รูปภาพ)
- อุปกรณ์ผสม
- ปืนความร้อน (สำหรับกำจัดฟองอากาศ)
วิธีทำ:
1. เตรียมฐานหรือแม่พิมพ์
2. จัดเรียงของตกแต่ง
3. ผสมเรซินตามคำแนะนำ
4. เทอย่างช้า ๆ หลีกเลี่ยงฟองอากาศ
5. กำจัดฟองอากาศด้วยปืนความร้อน
6. รอให้แห้ง 24-72 ชั่วโมง
7. ขัดขอบถ้าจำเป็น
ข้อดี: การออกแบบที่น่าทึ่ง, ทนทาน, กันน้ำ
ข้อเสีย: วัสดุราคาแพง, ใช้เวลารอคอยนาน, ต้องใช้เทคนิค
หมายเหตุด้านความปลอดภัย: ใช้เรซินอีพ็อกซี่ที่ปลอดภัยสำหรับอาหาร/เป็นไปตามมาตรฐาน FDA ทำงานในพื้นที่ที่มีการระบายอากาศดี.
8. สถานีโรลลิ่งสำหรับหนังสือปลอดภัย
สิ่งที่คุณต้องการ:
- หนังสือปกแข็งขนาดใหญ่
- มีด X-Acto หรือมีดกล่อง
- ไม้บรรทัด
- กาว
- ผ้าฟิลต์
วิธีทำ:
1. กาวหน้ากระดาษเข้าด้วยกัน (ยกเว้นไม่กี่หน้าแรก)
2. ทำเครื่องหมายสี่เหลี่ยมผืนผ้าโดยเว้นขอบ 1"
3. ตัดหน้ากระดาษอย่างระมัดระวังเพื่อสร้างช่องว่าง
4. กาวขอบที่ตัด
5. ปูด้วยผ้าฟิลต์
6. เพิ่มช่องเก็บของถ้าต้องการ
ข้อดี: ไม่เด่นชัด, เป็นจุดสนทนา, มีที่เก็บของในตัว
ข้อเสีย: ใช้เวลานาน, พื้นที่ทำงานเล็ก
9. การสร้างไม้แบบกำหนดเอง
สิ่งที่คุณต้องการ:
- ไม้เนื้อแข็ง (วอลนัท, เมเปิ้ล, เชอร์รี่)
- เครื่องมือช่างไม้
- เครื่องรีด (สำหรับร่อง/ช่อง)
- กระดาษทราย (หลายเกรด)
- ฟินิชที่ปลอดภัยสำหรับอาหาร
วิธีทำ:
1. ตัดไม้ให้ได้ขนาดที่ต้องการ
2. รีดขอบเพื่อสร้างขอบยก
3. เพิ่มร่องสำหรับการยึดร่วม
4. สร้างช่องเก็บของ
5. ขัดผ่านเกรด (100 → 220 → 400)
6. ทาฟินิชที่ปลอดภัยสำหรับอาหาร
7. ขัดให้เรียบ
ข้อดี: คุณภาพระดับมืออาชีพ, ขนาดที่แน่นอน, ชิ้นงานที่สืบทอด
ข้อเสีย: ต้องการเครื่องมือและทักษะ, ใช้เวลานาน
คู่มือความปลอดภัยของวัสดุ
วัสดุที่ปลอดภัย:
- ไม้เนื้อแข็งที่ไม่ได้รับการบำบัด (พร้อมฟินิชที่ปลอดภัยสำหรับอาหาร)
- ซิลิโคนเกรดอาหาร
- กระจกเทมเปอร์
- สแตนเลสสตีล
- เรซินอีพ็อกซี่ที่ปลอดภัยสำหรับอาหาร
- เซรามิก
หลีกเลี่ยง:
- ไม้ที่ได้รับการบำบัดหรือไม้ที่ผ่านการกด (สารเคมี)
- ไม้อัดหรือบอร์ดอนุภาค (การปล่อยก๊าซ)
- โลหะที่ไม่รู้จัก (การเคลือบที่อาจเกิดขึ้น)
- สีหรือฟินิชที่ไม่ปลอดภัยสำหรับอาหาร
- พลาสติกที่ปล่อยก๊าซเมื่อร้อน
เทคนิคการทำฟินิช
สำหรับไม้:
- น้ำมันบล็อกเชฟ: ปลอดภัยสำหรับอาหาร, ธรรมชาติ, ต้องทาซ้ำ
- ขี้ผึ้ง: ธรรมชาติ, กันน้ำเล็กน้อย
- โพลียูรีเทนที่ปลอดภัยสำหรับอาหาร: ทนทาน, กันน้ำ
- น้ำมันตัง: ธรรมชาติ, ทนทาน, ปลอดภัยสำหรับอาหาร
สำหรับโลหะ:
- เคลือบใส: ป้องกันรอยขีดข่วน
- การเคลือบผง: มืออาชีพ, ทนทานมาก
- ทิ้งไว้ตามธรรมชาติ: ทำความสะอาดง่าย
สำหรับการออกแบบ:
- สติ๊กเกอร์ไวนิล: ง่าย, ถอดออกได้
- การเผาไม้: ถาวร, ศิลปะ
- การแกะสลักด้วยเลเซอร์: ดูเป็นมืออาชีพ (ถ้าคุณมีอุปกรณ์)
- สีอะคริลิก + เคลือบใส: มีสีสัน, ป้องกัน
ถาดม้วนแบบกำหนดเองจาก MunchMakers
สำหรับผู้ที่ต้องการคุณภาพระดับมืออาชีพโดยไม่ต้องทำเอง, MunchMakers มีถาดม้วนแบบกำหนดเอง เหมาะสำหรับ:
การใช้งานส่วนตัว:
- การออกแบบและงานศิลปะที่กำหนดเอง
- ชื่อ/อักษรย่อ
- การตกแต่งระดับพรีเมียม
การสร้างแบรนด์ธุรกิจ:
- โลโก้ร้านขายยา
- สีแบรนด์
- การสั่งซื้อจำนวนมาก
กิจกรรม:
- ของขวัญงานเลี้ยง
- ของขวัญแต่งงาน
- ของแจกส่งเสริมการขาย
ติดต่อ MunchMakers เพื่อขอราคาส่งสำหรับถาดม้วนแบบกำหนดเอง.
แนวคิดการนำกลับมาใช้ใหม่
รายการที่คุณสามารถนำกลับมาใช้ใหม่:
- กล่องเครื่องประดับไม้เก่า
- กล่องอาหารโลหะวินเทจ
- ที่จัดระเบียบลิ้นชักไม้
- จานเซรามิกที่มีขอบ
- ฝาแก้วสำหรับจานอบ
- วินเทจ ที่เขี่ยบุหรี่ (ขนาดใหญ่กว่า)
- กระป๋องโลหะตกแต่ง
เคล็ดลับ:
- ตรวจสอบให้แน่ใจว่าสินค้าสะอาดและไม่มีกลิ่น
- ตรวจสอบความมั่นคง (ไม่ล้ม)
- ตรวจสอบความปลอดภัยของวัสดุ
- เพิ่มขาไม่ลื่นถ้าจำเป็น
เพิ่มฟังก์ชันการใช้งาน
การจัดเก็บแม่เหล็ก
- ติดตั้งแถบแม่เหล็กสำหรับไฟแช็กและเครื่องมือ
- ใช้ภาชนะเครื่องเทศแม่เหล็กสำหรับการจัดเก็บ
ช่องเก็บของ
- นำกลับมาใช้ใหม่ น้ำแข็ง ถาดน้ำแข็ง
- ตัดไม้แบ่ง
- ใช้ที่จัดยาเพื่อเก็บของเล็กๆ
พื้นผิวที่กลิ้งได้
- เพิ่มแผ่นซิลิโคนเพื่อไม่ให้ติด
- ติดตั้งกระจกเพื่อทำความสะอาดง่าย
- เพิ่มจุกไม้ก๊อกเพื่อการจับ
ฟีเจอร์ในตัว
- ส่วนที่เขี่ยบุหรี่
- ช่องสำหรับถือร่วม
- เครื่องบด ดี
คำถามที่พบบ่อย
ถาด DIY ที่ดีที่สุดสำหรับผู้เริ่มต้นคืออะไร?
ถาดกรอบรูปหรือการแปลงถาดเสิร์ฟเป็นสิ่งที่ง่ายที่สุด—ทั้งสองอย่างใช้เวลาน้อยกว่า 30 นาทีและไม่ต้องการเครื่องมือหรือทักษะพิเศษ
ไม้หรือโลหะดีกว่าสำหรับถาด DIY หรือไม่?
โลหะทำความสะอาดง่ายกว่าแต่สามารถรู้สึกเย็น ไม้อุ่นกว่าและปรับแต่งได้มากกว่าแต่ต้องการการเคลือบและการบำรุงรักษามากขึ้น เลือกตามความสำคัญของคุณ
ฉันสามารถขายถาดกลิ้ง DIY ได้หรือไม่?
ใช่ แต่ต้องมั่นใจว่าวัสดุปลอดภัย การตกแต่งเป็นเกรดอาหาร และคุณปฏิบัติตามกฎระเบียบทางธุรกิจในท้องถิ่น ถาดที่กำหนดเองสามารถทำกำไรได้ในตลาดที่เหมาะสม
คู่มือนี้มีไว้เพื่อการศึกษา กฎหมายเกี่ยวกับกัญชาจะแตกต่างกันไปตามเขตอำนาจ
Frequently Asked Questions
ถาดกรอบรูปหรือการแปลงถาดเสิร์ฟเป็นตัวเลือกที่ง่ายที่สุด—ทั้งสองอย่างใช้เวลาน้อยกว่า 30 นาทีและไม่ต้องการเครื่องมือหรือทักษะพิเศษ
Related Guides
Custom Rolling Trays: Personalize Your Setup
Comprehensive guide about custom rolling trays: personalize your setup. Learn everything you need to know with expert tips and detailed instructions.

How to Clean Your Rolling Tray: Complete Maintenance Guide
Learn how to properly clean and maintain rolling trays made of metal, wood, silicone, and plastic. Includes cleaning schedules, stubborn residue removal, and material-specific care tips.
LED Rolling Trays: Glow-Up Your Rolling Station
Comprehensive guide about led rolling trays: glow-up your rolling station. Learn everything you need to know with expert tips and detailed instructions.