
Tutorial de rolamento interno (holandês/backroll): a técnica definitiva da articulação
Mike Rodriguez
Rolling Expert
Tutorial de rolamento interno (holandês/backroll): a técnica definitiva da articulação
O rolamento de dentro para fora (também chamado de rolamento holandês, retrocesso ou rolamento reverso) é uma técnica avançada de rolamento de juntas que usa papel mínimo para um sabor mais limpo e uma queima mais lenta. Este guia ensina como dominar essa habilidade impressionante.
resposta rápida
Para rolar de dentro para fora: vire o papel de cabeça para baixo (goma virada para baixo), adicione filtro e cannabis normalmente, enrole e mole, dobre a borda inferior (não gengiva), enrole até que a linha da gengiva apareça pelo papel de dentro, lamba fora da articulação para ativar o papel, selar, selar o excesso de papel. Usa 50% menos papel do que o rolamento normal.
O que é rolar de dentro para fora?
O conceito:
Rolamento normal:
- Tira de goma virada para cima
- Você rola em direção à gengiva
- Sele lambendo o chiclete por cima
- Todas as camadas de papel permanecem
Rolamento de dentro para fora:
- A faixa de goma virada para baixo (em direção à superfície)
- Você rola para longe da gengiva inicialmente
- A gengiva acaba por dentro
- Lamba o papel para ativar a gengiva
- Rasgue o excesso de camada de papel exterior
conseqüência: cerca de 50% menos papel, sabor mais limpo, queimadura mais lenta
Por que rolar de dentro para fora?
Vantagens:
- Menos papel = melhor sabor: o sabor da cannabis domina, o sabor mínimo de papel
- queima mais lenta: menos papel significa queimadura mais lenta e controlada
- impressionante: mostra o domínio do rolamento, impressiona outros fumantes
- fumaça mais suave: Reduziu a dureza de menos papel
- faxineira: Sem gosto adesivo (goma selada por dentro)
Desvantagens:
- difícil: requer primeiro conhecimento de rolamento sólido
- Maior taxa de falha: Fácil de estragar enquanto aprende
- papéis de desperdício: espere muitas falhas ao aprender
- não mais rápido: demora mais do que o rolamento regular
Quem deve tentar: Rolos experientes que podem rolar consistentemente juntas regulares
Domine sua rolagem com qualidadePersonalizado [ papéis rolantesDe Munchmakers](https://munchmakers.com/product-category/custom-rollling-papers/). Para técnicas avançadas de rolamento,Revista 420Atua na cultura da cannabis desde 1993.
Pré-requisitos
Antes de tentar de dentro para fora, você deve ser capaz de:
- Role uma junta regular com sucesso, mais de 80% do tempo
- Role sem uma máquina de enrolar
- Entenda a técnica do tuck and roll
- Tenha boa destreza com os dedos e controle de papel
Se você ainda não pode rolar as articulações regulares de forma consistente: Master Rolling Basic primeiro. Tentar adentrar muito cedo vai desperdiçar papéis e frustrá-lo.
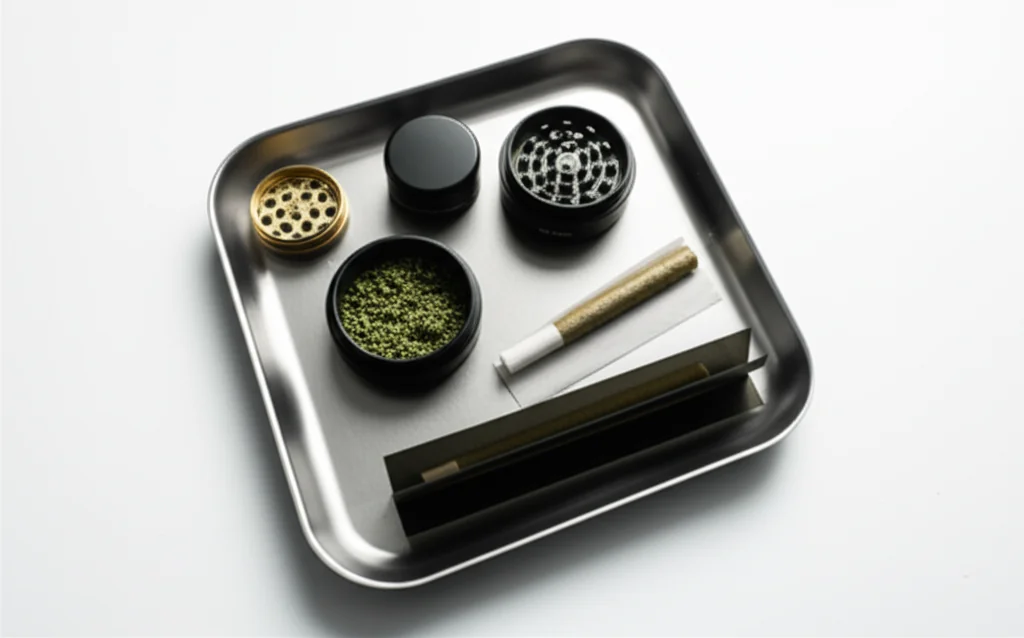
O que você precisa
- Papel de enrolar fino(arroz ou cânhamo fino funcionam melhor)
- dicas de filtro
- Cannabis moída (0,5-0,75g)
- retificador
- Papéis de prática (espere em desperdício de 10 a 20 anos)
Recomendação de papel: OCB, elementos ou papéis de arroz cru. Papel fino permite que você veja a linha da gengiva através deles (crítico para esta técnica).
Passo a passo: rolamento de dentro para fora
Passo 1: Virar o papel de cabeça para baixo
Coloque o papel de enrolar com oTira de goma virada para baixoem direção à superfície de rolamento. Isso é o oposto do rolamento normal.
verificação visual: O lado pegajoso da gengiva deve tocar sua bandeja ou dedos, sem olhar para cima.
Por que isso importa: Esta orientação permite que a gengiva acabe no interior da junta após o rolamento.
Etapa 2: filtro de posição e cannabis
Exatamente como rolamento normal:
- Coloque o filtro em uma extremidade (geralmente à esquerda para destros)
- Distribua o canábis moído uniformemente ao longo do papel
- Quantidade: 0,5-0,75g (um pouco menos que o normal - mais fácil de controlar)
Lembrete-chave: A gengiva está embaixo/para baixo, mas você está posicionando tudo da mesma forma que uma articulação normal.
Passo 3: Role e dê forma
Role para frente e para trás entre os polegares e os dedos para dar forma à articulação,exatamente como rolamento normal.
O movimento de rolamento é idêntico- Você está apenas trabalhando com o papel virado.
importante: Molde-o bem aqui. Boa modelagem = mais fácil dobro na próxima etapa.
Passo 4: A dobra crítica (diferente do normal)
Aqui é onde o interior para fora difere:
rolamento normal: Dobre a borda de você (lado de goma) sob a cannabis
de dentro para fora: Dobre a borda mais longe de você (lado não gengival) sob a cannabis
por que: Como a gengiva está virada para baixo, você dobra a borda oposta. A gengiva vai aparecer e se encontrará por dentro.
Esta é a parte mais difícil de visualizar. A borda não gengival se dobra, rola ao redor da cannabis e, eventualmente, a gengiva (vindo de baixo) aparecerá no papel.
Passo 5: Role para expor a gengiva através do papel
Continue rolando a junta fechada. Enquanto você rola:
Cuidado com a linha da gengiva: Você verá uma linha ligeiramente mais escura/brilhante aparecer no papel de dentro. Esta é a faixa de gengiva aparecendo.
Papel fino necessário: É por isso que os papéis de arroz/hápidos finos funcionam melhor - você deve ver a linha da gengiva no papel.
como parece: uma linha tênue mais escura que percorre o comprimento da junta, visível através da camada de papel externo.
Passo 6: lamba o papel (o passo mágico)
Depois de ver a linha da gengiva através do papel:
lamber o lado de forada articulação nessa linha. Sua saliva vai mergulhar no papel fino e ativar a gengiva por dentro.
Técnica:
- Lamber generosa (não seja tímido - a saliva deve penetrar no papel)
- Siga toda a linha da gengiva
- Pode lamber em seções ou de uma só vez
O que está acontecendo: Saliva → Através do papel externo → Ativa a gengiva por dentro → A goma gruda na cannabis/papel interno
Passo 7: Selar e segurar
Pressione firmemente ao longo da linha lambida por 5 a 10 segundos.
você está selando por dentro: A gengiva está grudando as camadas internas do papel, mesmo que você tenha lambido do lado de fora.
reprimir: A junta deve ser selada. A gengiva foi ativada através do papel.
Etapa 8: rasgar o excesso de papel
Agora a parte satisfatória:
o excesso de papelQue rolou por fora (a camada extra) pode ser arrancada.
Como remover:
- Opção A: rasgue-o cuidadosamente ao longo da linha de vedação
- Opção B: Queime-o quando acender a articulação (mais comum)
- Opção C: lamber a linha que deseja rasgar e depois rasgar (a umidade torna mais fácil)
conseqüência: Papel mínimo restante - apenas uma camada fina em torno de sua cannabis em vez de duas.
Problemas comuns de rolamento de dentro para fora
Problema: não consigo ver a linha da gengiva através do papel
causar: Papel muito grosso ou não rolou o suficiente
Solução:
- Use papéis mais finos (papéis de arroz funcionam melhor)
- Segure a articulação com a luz para ver a linha da gengiva
- Role ainda mais - a linha da gengiva se torna visível quando as camadas internas e externas se sobrepõem
Problema: chiclete não gruda ao lamber do lado de fora
causar: saliva insuficiente ou papel muito grosso
Solução:
- Lamba mais generosamente - realmente molhe
- Use papéis mais finos
- Segure e pressione mais (10 a 15 segundos)
- tente respirar ar quente nele para ajudar a ativar a gengiva
Problema: a articulação desmorona enquanto rasga o excesso
causar: chiclete não selou corretamente
Solução:
- Não rasgue - apenas queime o excesso ao acender
- Certifique-se de que a gengiva totalmente ativada antes de rasgar
- Pressione o selo por mais tempo antes de tentar rasgar
Problema: confuso sobre qual borda dobrar
causar: desorientação da orientação do papel
Truque visual:
- Rolo normal: engordar → dobrar perto da borda
- De dentro para fora: gengibre para baixo → dobrar a borda distante
- Dobre a borda que não tem chiclete por baixo
Problema: desperdice muita cannabis durante tentativas fracassadas
Solução:
- Pratique primeiro com tabaco ou mistura de ervas
- Use menos cannabis (0,3 a 0,5 g) enquanto aprende
- Aceite que as falhas fazem parte do aprendizado
- Salvar tentativas com falha de cannabis para a próxima tentativa
Inside-out x rolamento regular
Sabor:
De dentro para fora:
- Menos sabor de papel
- O sabor da cannabis domina
- fumaça mais limpa
regular:
- Mais sabor de papel
- Sabor de papel misturado com canábis
vencedor: de dentro para fora (subjetivo, mas amplamente aceito)
Taxa de queima:
De dentro para fora:
- Queima mais lenta (menos papel para queimar)
- Sessão mais controlada
- dura mais
regular:
- queima mais rápido
- Comprimento padrão da sessão
vencedor: de dentro para fora
Dificuldade:
De dentro para fora:
- Técnica avançada
- Maior taxa de falha
- requer prática
regular:
- dificuldade moderada
- mais indulgente
- mais fácil de aprender
vencedor: regular (para iniciantes)
Praticidade:
De dentro para fora:
- demora mais
- Mais foco necessário
- Não é ideal para sessões rápidas
regular:
- mais rápido
- mais conveniente
- Bom para qualquer situação
vencedor: regular (para velocidade)
A conexão da cultura holandesa
O rolamento de dentro para fora teve origem na Holanda (daí "Rolo Holandês"), onde a cultura da cannabis enfatiza:
- Minimalismo e eficiência
- Qualidade sobre a quantidade
- Domínio da técnica
- Experiência de fumar limpa e saborosa
Em cafeterias de Amsterdã: O rolamento de dentro para fora é comum e esperado entre os fumantes experientes.
significado cultural: mostra que você sabe o que está fazendo, respeito pelo artesanato
Melhores papéis para rolar de dentro para fora
Principais opções:
1. OCB Premium (arroz):
- ultrafino
- linha gengival muito visível
- Fácil de ver através
- Melhor para aprender
2 . Elementos ultra finos:
- papel de arroz
- muito fino
- Visibilidade clara da linha da gengiva
- escolha profissional
3. preto cru (hâneses finos):
- Mais fino que o normal
- Funciona para dentro para fora
- Ainda perdoando
evitar:
- Zig-zag (muito grosso, não consigo ver chiclete)
- papéis de cânhamo grossos
- Papel com sabor (geralmente mais grosso)
Progressão da prática
Semana 1: Entendendo o Flip
- Basta praticar o inverter o papel e visualizar a técnica
- Faça corridas secas sem maconha
- Fique confortável com a orientação invertida
Semana 2: primeiras tentativas com tabaco
- Experimente com tabaco ou mistura de ervas (mais barato que a cannabis)
- Espere 90% da taxa de falha
- Concentre-se em ver a linha da gengiva através do papel
Semana 3: Técnica de refinação
- A taxa de sucesso deve atingir 30-40%
- Comece a usar canábis
- Trabalhe na dobra consistente
Semana 4+: Maestria
- Taxa de sucesso 60-80%
- rolamento mais rápido
- Limpe o rasgo do excesso de papel
Necessárias juntas de prática total: 30-50 tentativas de obter consistente
Dicas avançadas
Dica 1: o teste de luz
Se você não consegue ver a linha da gengiva,Segure a junta até uma fonte de luz. A gengiva aparecerá como uma linha mais escura através do papel.
Dica 2: Controle de umidade
muito seco: chiclete não ativa através do papel
Muito molhado: rasga de papel, junta cai
certo: gengiva ativa, papel permanece intacto
Dica 3: Queime não rasgue
Ao iniciar,Não rasgue o excesso de papel. Basta acender a junta e deixar o excesso de queimar. Mais seguro e mais fácil.
Dica 4: Use um pouco menos de cannabis
As juntas internas sãoMais difícil de rolar gordura. Use 0,5-0,75 g no máximo enquanto aprende. As juntas de dentro para fora de gordura são de nível especializado.
Dica 5: Filtro como ponto de referência
A extremidade do filtro é suaâncora. Mantenha-o firme e perfeito - construa a técnica de dentro para fora em torno de um filtro sólido.
Mostrando suas habilidades
A rolagem de dentro para fora éimediatamente reconhecívelpara fumantes experientes.
Sinais de uma articulação de dentro para fora:
- papel mínimo
- aparência limpa
- Borda rasgada onde o excesso foi removido
- impressionantemente magro
impacto social: Outros fumantes notarão e respeitarão a técnica. É o equivalente em rolamento de uma skate.
equívocos comuns
mito: "Inside-Out é apenas para se exibir"
realidade: Existem benefícios reais (gosto, taxa de queima, menos papel)
mito: "Você precisa de papéis especiais"
realidade: qualquer papel fino funciona, os papéis de arroz são mais fáceis de ver através
mito: "É impossível aprender"
realidade: Difícil, mas alcançável com a prática - a maioria das pessoas pode aprender em 20 a 40 tentativas
mito: "As juntas de dentro para fora são mais fortes/mais potentes"
realidade: mesma potência - apenas menos papel, sabor mais limpo
Quando usar rolamento de dentro para fora
Melhores situações:
- Fumo solo (tempo para se concentrar na técnica)
- Impressionando fumantes experientes
- Quando você deseja o sabor máximo
- Ocasiões especiais onde qualidade > velocidade
Pule de dentro para fora quando:
- com pressa
- Fumar com iniciantes (eles não vão gostar disso)
- Condições de vento (mais difícil de controlar)
- Usando papéis grossos (não funcionará bem)
Guia de solução de problemas
"Eu virei o papel, mas agora estou confuso"
solução: Coloque-o para baixo. Olhe para isso. A gengiva deve estar de frente para a mesa. Se você pode ver a faixa de chiclete brilhante olhando para o papel, está errado - vire-o.
"Não consigo ver nenhuma linha de gengiva no papel"
Soluções:
1. Use papéis mais finos (arroz)
2. Segure na luz
3. Role ainda mais - precisa de mais sobreposição para ver através
4. Verifique se você não rolou para trás
"O baseado desmoronou quando eu lambi"
causar: muita saliva, papel muito fino, sem forma suficiente
Solução:
- Use menos saliva, mas aplique com mais cuidado
- Molde mais apertado antes de selar
- Pressione imediatamente após lamber
"O excesso de papel não rasga de forma limpa"
Isso é normal!A maioria das pessoas simplesmente o queima ao acender. Rasgar de forma limpa requer prática.
Alternativa: o "semi-de dentro para fora"
Para aqueles que acham muito difícil de dentro para fora:
técnica: Vire o papel de cabeça para baixo, mas use menos papel em excesso. Role apenas o suficiente para que a gengiva alcance, lamba, sele, mas há menos excessos para rasgar.
benefício: mais fácil do que de dentro para fora, ainda usa menos papel do que o normal
conseqüência: ainda reduz o papel em ~30-40% em relação ao rolamento normal
Este guia é para fins educacionais. As leis de cannabis variam de acordo com a jurisdição.
Step 1:
Step 2:
Step 3:
Step 4:
Step 5:
Step 6:
Step 7:
Step 8:
Frequently Asked Questions
O rolamento de dentro para fora usa menos papel (você arranca o excesso), resultando em um sabor mais limpo de cannabis, queima mais lenta e menos dureza. Também é impressionante assistir e mostra o domínio do rolamento.
Related Guides
Rolling Paper Sizes Explained: 1 1/4, King Size, and More
Comprehensive guide about rolling paper sizes explained: 1 1/4, king size, and more. Learn everything you need to know with expert tips and detailed instructions.

Best Rolling Papers for Beginners: Complete Buying Guide 2026
Discover the best rolling papers for beginners including RAW, Zig-Zag, and OCB. Learn about sizes, materials (rice vs hemp vs wood pulp), and which papers are easiest to roll with.
Clear Rolling Papers: Are Cellulose Papers Worth It?
Comprehensive guide about clear rolling papers: are cellulose papers worth it?. Learn everything you need to know with expert tips and detailed instructions.