
Tutorial dotyczący zwijania od wewnątrz na zewnątrz (styl holenderski/backroll): Ostateczna technika zwijania jointów
Mike Rodriguez
Rolling Expert
Tutorial dotyczący zwijania od wewnątrz na zewnątrz (styl holenderski/backroll): Ostateczna technika zwijania jointów
Zwijanie od wewnątrz na zewnątrz (znane również jako zwijanie holenderskie, backrolling lub zwijanie odwrotne) to zaawansowana technika zwijania jointów, która wykorzystuje minimalną ilość papieru dla czystszego smaku i wolniejszego palenia. Ten przewodnik nauczy Cię, jak opanować tę imponującą umiejętność.
Szybka odpowiedź
Aby zwijać od wewnątrz na zewnątrz: Odwróć papier do góry nogami (klej skierowany w DÓŁ), dodaj filtr i konopie normalnie, zwijaj i formuj, schowaj dolny (nieklejony) brzeg pod spód, zwijaj, aż linia kleju będzie widoczna przez papier od wewnątrz, polizuj ZEWNETRZNĄ stronę jointa, aby aktywować klej przez papier, uszczelnij, odetnij nadmiar papieru. Używa 50% mniej papieru niż normalne zwijanie.
Czym jest zwijanie od wewnątrz na zewnątrz?
Koncepcja:
Normalne zwijanie:
- Pasmo kleju skierowane w GÓRĘ
- Zwijasz w kierunku kleju
- Uszczelnij, liżąc klej na górze
- Wszystkie warstwy papieru pozostają
Zwijanie od wewnątrz na zewnątrz:
- Pasmo kleju skierowane w DÓŁ (w kierunku powierzchni)
- Początkowo zwijasz OD kleju
- Klej znajduje się wewnątrz
- Licknij przez papier, aby aktywować gumę
- Zerwij nadmiar zewnętrznej warstwy papieru
Wynik: Około 50% mniej papieru, czystszy smak, wolniejsze palenie
Dlaczego rolować na odwrót?
Zalety:
- Mniej papieru = Lepszy smak: Smak konopi dominuje, minimalny smak papieru
- Wolniejsze palenie: Mniej papieru oznacza wolniejsze, bardziej kontrolowane palenie
- Imponujące: Pokazuje mistrzostwo w rolowaniu, imponuje innym palaczom
- Gładszy dym: Zredukowana ostrość dzięki mniejszej ilości papieru
- Czystszy: Brak smaku kleju (guma uszczelniona od wewnątrz)
Wady:
- Trudne: Wymaga solidnych umiejętności rolowania na początku
- Wyższy wskaźnik niepowodzeń: Łatwo się pomylić podczas nauki
- Marnuje papier: Spodziewaj się wielu niepowodzeń podczas nauki
- Nie szybsze: Zajmuje więcej czasu niż tradycyjne rolowanie
Kto powinien spróbować: Doświadczeni rolownicy, którzy potrafią konsekwentnie rolować zwykłe jointy
Opanuj swoje rolowanie z jakością niestandardowych [papierów do rolowania od MunchMakers](https://munchmakers.com/product-category/custom-rolling-papers/). Dla zaawansowanych technik rolowania, 420 Magazine relacjonuje kulturę konopi od 1993 roku.
Wymagania wstępne
Przed próbą rolowania na odwrót powinieneś być w stanie:
- Z powodzeniem rolować zwykłego jointa w 80%+ przypadków
- Rolować bez maszyny do rolowania
- Rozumieć technikę tuck-and-roll
- Mieć dobrą zręczność palców i kontrolę nad papierem
Jeśli jeszcze nie potrafisz konsekwentnie rolować zwykłych jointów: Najpierw opanuj podstawowe rolowanie. Próba rolowania na odwrót zbyt wcześnie tylko zmarnuje papier i cię sfrustruje.
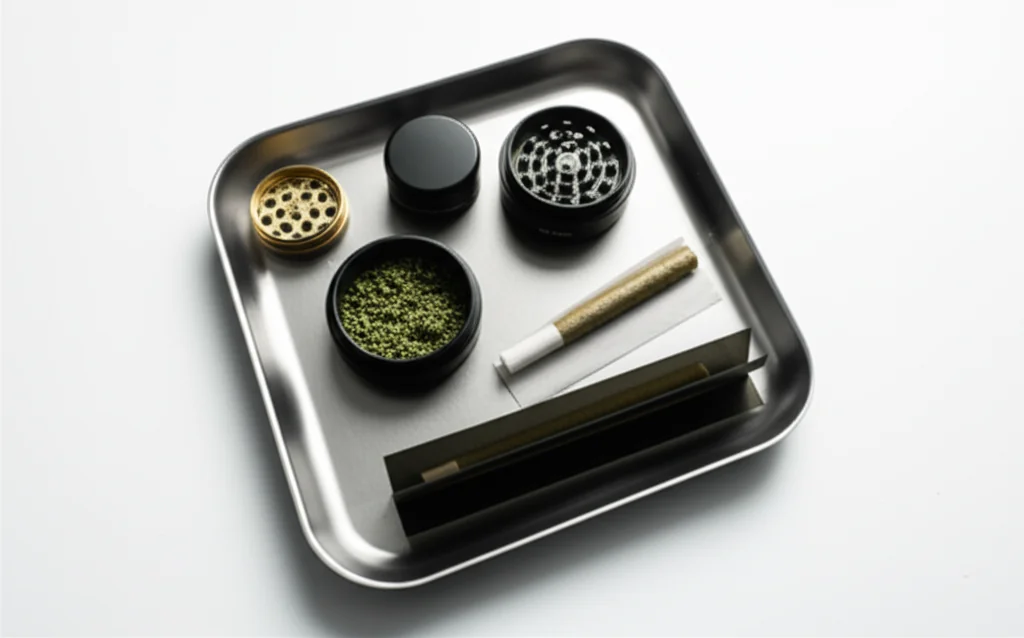
Co potrzebujesz
- Cienkie bibułki do zwijania (najlepsze są bibułki ryżowe lub cienkie konopne)
- Filtry
- Zmielona marihuana (0,5-0,75g)
- Młynek
- Bibułki do ćwiczeń (spodziewaj się zmarnować 10-20 podczas nauki)
Rekomendacja bibułek: OCB, Elements lub bibułki ryżowe RAW. Cienkie bibułki pozwalają zobaczyć linię kleju przez nie (kluczowe dla tej techniki).
Krok po kroku: Zwijanie na odwrót
Krok 1: Odwróć bibułkę do góry nogami
Umieść bibułkę do zwijania z stroną klejącą DO DOŁU w kierunku powierzchni do zwijania. To jest przeciwieństwo normalnego zwijania.
Wizualna kontrola: Klejąca strona powinna dotykać twojej tacki do zwijania lub palców, a NIE być skierowana w górę w twoją stronę.
Dlaczego to ma znaczenie: Ta orientacja pozwala, aby klej znalazł się wewnątrz jointa po zwinięciu.
Krok 2: Ustaw filtr i marihuanę
Dokładnie jak przy normalnym zwijaniu:
- Umieść filtr na jednym końcu (zwykle po lewej stronie dla praworęcznych)
- Rozłóż zmieloną marihuanę równomiernie wzdłuż bibułki
- Ilość: 0,5-0,75g (nieco mniej niż normalnie - łatwiej do kontrolowania)
Kluczowe przypomnienie: Klej jest pod spodem/skierowany w dół, ale wszystko ustawiasz tak samo jak przy normalnym jointie.
Krok 3: Zwijanie i formowanie
Zwijaj tam i z powrotem między kciukami a palcami, aby uformować joint, dokładnie jak przy normalnym zwijaniu..
Ruch zwijania jest identyczny - po prostu pracujesz z bibułką odwróconą.
Ważne: Uformuj go dobrze tutaj. Dobre formowanie = łatwiejsze schowanie w następnym kroku.
Krok 4: Krytyczne schowanie (inne niż normalne)
Tutaj różni się zwijanie na odwrót:
Normalne zwijanie: Schowaj krawędź BLIŻEJ siebie (strona klejąca) pod marihuaną
Zwijanie na odwrót: Schowaj krawędź DALEJ od siebie (strona bez kleju) pod marihuaną
Dlaczego: Ponieważ klej jest skierowany w dół, zaginaj przeciwną krawędź. Klej obróci się i spotka od wewnątrz.
To jest najtrudniejsza część do zwizualizowania. Krawędź bez kleju zaginana jest pod spód, owija się wokół konopi, a ostatecznie klej (przychodzący od dołu) będzie widoczny przez papier.
Krok 5: Zwijaj, aby odsłonić klej przez papier
Kontynuuj zwijanie skręta. Podczas zwijania:
Zwróć uwagę na linię kleju: Zobaczysz lekko ciemniejszą/błyszczącą linię pojawiającą się przez papier od wewnątrz. To jest pasek kleju pokazujący się.
Wymagane cienkie papiery: Dlatego papiery ryżowe/cienkie konopne działają najlepiej - MUSISZ widzieć linię kleju przez papier.
Jak to wygląda: Słaba ciemniejsza linia biegnąca wzdłuż skręta, widoczna przez zewnętrzną warstwę papieru.
Krok 6: Lick Through the Paper (Magiczny Krok)
Gdy zobaczysz linię kleju przez papier:
Lick the OUTSIDE skręta wzdłuż tej linii. Twoja ślina przesiąknie przez cienki papier i aktywuje klej od wewnątrz.
Technika:
- Hojne lizanie (nie bądź nieśmiały - ślina musi przeniknąć przez papier)
- Podążaj za całą linią kleju
- Możesz lizać w sekcjach lub wszystko na raz
Co się dzieje: Ślina → przez zewnętrzny papier → aktywuje klej od wewnątrz → klej przylega do konopi/wewnętrznego papieru
Krok 7: Uszczelnij i trzymaj
Naciśnij mocno wzdłuż polizanej linii przez 5-10 sekund.
Uszczelniasz od wewnątrz: Klej łączy wewnętrzne warstwy papieru, mimo że lizałeś od zewnątrz.
Sprawdź: Skręt powinien być uszczelniony. Klej aktywował się przez papier.
Krok 8: Oderwij nadmiar papieru
Teraz satysfakcjonująca część:
Nadmiar papieru który owijał się wokół zewnątrz (dodatkowa warstwa) można oderwać.
Jak usunąć:
- Opcja A: Ostrożnie oderwij wzdłuż linii uszczelnienia
- Opcja B: Spal to, gdy zapalisz skręta (bardziej powszechne)
- Opcja C: Polizaj wzdłuż linii, którą chcesz oderwać, a następnie oderwij (wilgoć ułatwia to)
Wynik: Minimalna ilość papieru pozostała - tylko jedna cienka warstwa wokół twoich konopi zamiast dwóch.
Typowe problemy z rolowaniem od wewnątrz na zewnątrz
Problem: Nie widać linii kleju przez papier
Przyczyna: Papier zbyt gruby lub nie został wystarczająco zwinięty
Rozwiązanie:
- Użyj cieńszych papierów (najlepiej sprawdzają się papiery ryżowe)
- Trzymaj jointa pod światło, aby zobaczyć linię kleju
- Roluj dalej - linia kleju staje się widoczna, gdy wewnętrzne i zewnętrzne warstwy się nakładają
Problem: Klej nie trzyma się po polaniu zewnętrznej strony
Przyczyna: Za mało śliny lub papier zbyt gruby
Rozwiązanie:
- Lickaj bardziej hojnie - naprawdę go zmocz
- Użyj cieńszych papierów
- Trzymaj i przyciśnij dłużej (10-15 sekund)
- Spróbuj dmuchać na to ciepłym powietrzem, aby pomóc aktywować klej
Problem: Joint rozpada się podczas odrywania nadmiaru
Przyczyna: Klej nie został prawidłowo uszczelniony
Rozwiązanie:
- Nie odrywaj - po prostu spal nadmiar podczas zapalania
- Upewnij się, że klej jest w pełni aktywowany przed odrywaniem
- Naciskaj uszczelnienie dłużej przed próbą odrywania
Problem: Zdezorientowany, którą krawędź schować
Przyczyna: Dezinformacja dotycząca orientacji papieru
Sztuczka wizualna:
- Normalne rolowanie: Klej DO GÓRY → schowaj bliską krawędź
- Od wewnątrz na zewnątrz: Klej DO DOŁU → schowaj daleką krawędź
- Schowaj krawędź, która NIE ma kleju pod spodem
Problem: Marnujesz zbyt dużo konopi podczas nieudanych prób
Rozwiązanie:
- Ćwicz najpierw z tytoniem lub mieszanką ziołową
- Użyj mniej konopi (0,3-0,5g) podczas nauki
- Zaakceptuj, że niepowodzenia są częścią nauki
- Zachowaj konopie z nieudanych prób na następną próbę
Od wewnątrz na zewnątrz vs zwykłe rolowanie
Smak:
Od wewnątrz na zewnątrz:
- Mniej smaku papieru
- Dominujący smak konopi
- Czystszy dym
Zwykły:
- Więcej smaku papieru
- Smak papieru zmieszany z konopiami
Zwycięzca: Inside-out (subiektywne, ale powszechnie uznawane)
Tempo spalania:
Inside-Out:
- Wolniejsze spalanie (mniej papieru do spalenia)
- Bardziej kontrolowana sesja
- Trwa dłużej
Zwykły:
- Szybsze spalanie
- Standardowa długość sesji
Zwycięzca: Inside-out
Trudność:
Inside-Out:
- Zaawansowana technika
- Wyższy wskaźnik niepowodzeń
- Wymaga praktyki
Zwykły:
- Umiarkowana trudność
- Bardziej wybaczająca
- Łatwiejsza do nauczenia
Zwycięzca: Zwykły (dla początkujących)
Praktyczność:
Inside-Out:
- Zajmuje więcej czasu
- Wymaga większej koncentracji
- Nieidealne do szybkich sesji
Zwykły:
- Szybsze
- Bardziej wygodne
- Dobre na każdą sytuację
Zwycięzca: Zwykły (dla szybkości)
Holenderskie Połączenie Kulturowe
Rolowanie od wewnątrz na zewnątrz pochodzi z Holandii (stąd "Dutch roll"), gdzie kultura konopi kładzie nacisk na:
- Minimalizm i efektywność
- Jakość ponad ilość
- Mistrzostwo techniki
- Czyste, aromatyczne doznania podczas palenia
W kawiarniach w Amsterdamie: Rolowanie od wewnątrz na zewnątrz jest powszechne i oczekiwane wśród doświadczonych palaczy.
Znaczenie kulturowe: Pokazuje, że wiesz, co robisz, szacunek dla rzemiosła
Najlepsze papiery do rolowania od wewnątrz na zewnątrz
Najlepsze wybory:
1. OCB Premium (Ryżowe):
- Ultra-cienkie
- Linia kleju bardzo widoczna
- Łatwe do przejrzenia
- Najlepsze do nauki
2. Elements Ultra Thin:
- Papier ryżowy
- Bardzo cienki
- Widoczność linii kleju
- Wybór profesjonalistów
3. RAW Black (Cienki konopny):
- Cieńszy niż zwykły RAW
- Działa do rolowania od wewnątrz na zewnątrz
- Wciąż wybaczający
Unikaj:
- Zig-Zag (za gruby, nie widać kleju)
- Grube papiery konopne
- Papiery aromatyzowane (zwykle grubsze)
Postęp w praktyce
Tydzień 1: Zrozumienie przewrotu
- Po prostu ćwicz przewracanie papieru i wizualizowanie techniki
- Zrób próby bez konopi
- Przyzwyczaj się do odwróconej orientacji
Tydzień 2: Pierwsze próby z tytoniem
- Spróbuj z tytoniem lub mieszanką ziołową (tańsze niż konopie)
- Spodziewaj się 90% wskaźnika niepowodzeń
- Skup się na widzeniu linii kleju przez papier
Tydzień 3: Udoskonalanie techniki
- Wskaźnik sukcesu powinien wynosić 30-40%
- Zacznij używać konopi
- Pracuj nad konsekwentnym zwijaniem
Tydzień 4+: Mistrzostwo
- Wskaźnik sukcesu 60-80%
- Szybsze zwijanie
- Czyste odrywanie nadmiaru papieru
Łączna liczba jointów do ćwiczeń: 30-50 prób, aby uzyskać konsekwencję
Zaawansowane wskazówki
Wskazówka 1: Test Światła
Jeśli nie widzisz linii kleju, trzymaj jointa przy źródle światła. Linia kleju będzie widoczna jako ciemniejsza linia przez papier.
Wskazówka 2: Kontrola Wilgoci
Zbyt suche: Klej nie aktywuje się przez papier
Zbyt mokre: Papier się rwie, joint się rozpada
Idealnie: Klej aktywuje się, papier pozostaje nienaruszony
Wskazówka 3: Pal, nie rwij
Na początku, nie rwij nadmiaru papieru. Po prostu zapal jointa i pozwól, aby nadmiar się spalił. Bezpieczniej i łatwiej.
Wskazówka 4: Użyj Nieco Mniej Konopi
Jointy odwrócone są trudniejsze do zwijania grube. Używaj maksymalnie 0,5-0,75g podczas nauki. Grube jointy odwrócone są na poziomie eksperckim.
Wskazówka 5: Filtr jako Punkt Odniesienia
Koniec z filtrem to twój punkt zaczepienia. Trzymaj go mocno i idealnie - buduj technikę odwróconą wokół solidnego filtra.
Pokazywanie Swoich Umiejętności
Zwijanie odwrócone jest natychmiast rozpoznawalne dla doświadczonych palaczy.
Znaki jointa odwróconego:
- Minimalna ilość papieru
- Czysty wygląd
- Postrzępiony brzeg, gdzie usunięto nadmiar
- Imponująco cienki
Wpływ społeczny: Inni palacze zauważą i uszanują tę technikę. To odpowiednik sztuczki na deskorolce w zwijaniu jointów.
Powszechne nieporozumienia
Mit: "Zwijanie na odwrót jest tylko po to, aby się popisać"
Rzeczywistość: Istnieją prawdziwe korzyści (smak, tempo palenia, mniej papieru)
Mit: "Potrzebujesz specjalnych papierów"
Rzeczywistość: Jakiekolwiek cienkie papiery działają, papiery ryżowe są po prostu łatwiejsze do przejrzenia
Mit: "To niemożliwe do nauczenia"
Rzeczywistość: Trudne, ale osiągalne z praktyką - większość ludzi może się nauczyć w 20-40 próbach
Mit: "Jointy na odwrót są mocniejsze/bardziej intensywne"
Rzeczywistość: Ta sama moc - po prostu mniej papieru, czystszy smak
Kiedy używać zwijania na odwrót
Najlepsze sytuacje:
- Palenie solo (czas na skupienie się na technice)
- Imponowanie doświadczonym palaczom
- Kiedy chcesz maksymalnego smaku
- Specjalne okazje, gdzie jakość > szybkość
Pomiń zwijanie na odwrót, gdy:
- Jesteś w pośpiechu
- Palisz z początkującymi (nie docenią tego)
- W wietrze (trudniej kontrolować)
- Używasz grubych papierów (nie zadziała dobrze)
Przewodnik rozwiązywania problemów
"Odwróciłem papier, ale teraz jestem zdezorientowany"
Rozwiązanie: Połóż go. Spójrz na niego. Klej powinien być skierowany w stronę stołu. Jeśli widzisz błyszczący pasek kleju patrząc w dół na papier, jest ŹLE - odwróć go.
"Nie widzę żadnej linii kleju przez papier"
Rozwiązania:
1. Użyj cieńszych papierów (ryżowych)
2. Przytrzymaj do światła
3. Roluj dalej - potrzebuje więcej nakładki, aby zobaczyć przez to
4. Sprawdź, czy nie rolowałeś tego do tyłu
"Złącze się rozpadło, gdy je polizałem"
Przyczyna: Zbyt dużo śliny, papier zbyt cienki, nie uformowany wystarczająco ciasno
Rozwiązanie:
- Użyj mniej śliny, ale nałóż ją bardziej ostrożnie
- Uformuj ciasniej przed zamknięciem
- Naciśnij natychmiast po polizaniu
"Nadmiar papieru nie oderwie się czysto"
To normalne! Większość ludzi po prostu spala to podczas zapalania. Czyste odrywanie wymaga praktyki.
Alternatywa: "Pół na zewnątrz"
Dla tych, którzy uważają, że pełne na zewnątrz jest zbyt trudne:
Technika: Odwróć papier do góry nogami, ale użyj MNIEJ nadmiaru papieru. Roluj tylko na tyle, aby guma sięgnęła, polizaj, zamknij, ale jest mniej nadmiaru do oderwania.
Korzyść: Łatwiejsze niż pełne na zewnątrz, nadal używa mniej papieru niż normalnie
Wynik: Nadal zmniejsza ilość papieru o ~30-40% w porównaniu do normalnego rolowania
Ten przewodnik ma na celu cel edukacyjny. Prawo dotyczące konopi różni się w zależności od jurysdykcji.
Step 1:
Step 2:
Step 3:
Step 4:
Step 5:
Step 6:
Step 7:
Step 8:
Frequently Asked Questions
Zwijanie od wewnątrz na zewnątrz zużywa mniej papieru (odrywasz nadmiar), co skutkuje czystszym smakiem konopi, wolniejszym paleniem i mniejszą szorstkością. To także imponujące do oglądania i pokazuje mistrzostwo w zwijaniu.
Related Guides
Rolling Paper Sizes Explained: 1 1/4, King Size, and More
Comprehensive guide about rolling paper sizes explained: 1 1/4, king size, and more. Learn everything you need to know with expert tips and detailed instructions.

Best Rolling Papers for Beginners: Complete Buying Guide 2026
Discover the best rolling papers for beginners including RAW, Zig-Zag, and OCB. Learn about sizes, materials (rice vs hemp vs wood pulp), and which papers are easiest to roll with.
Clear Rolling Papers: Are Cellulose Papers Worth It?
Comprehensive guide about clear rolling papers: are cellulose papers worth it?. Learn everything you need to know with expert tips and detailed instructions.