
Hoe je een perfecte joint rolt voor beginners: Stapsgewijze tutorial 2026
Mike Rodriguez
Rolling Expert
Hoe je een perfecte joint rolt voor beginners: Stapsgewijze tutorial 2026
Een joint rollen is een fundamentele cannabisvaardigheid die intimiderend lijkt, maar natuurlijk wordt met oefening. Volgens cannabisdocenten behaalt de gemiddelde persoon consistente resultaten na 10-15 oefenpogingen. Deze uitgebreide tutorial van 2026 leidt je door elke stap van het rollen van een klassieke joint, van het selecteren van papieren en het voorbereiden van je filter tot de uiteindelijke afdichting. Met de juiste techniek en een beetje geduld, rol je in een mum van tijd consistente, rookbare joints.
Gerelateerde gidsen: Voordat je begint, bekijk onze gidsen over het kiezen van de juiste [grinder](https://guides.munchmakers.com/guide/grinder-maintenance-schedule) en het selecteren van [rolling papers](https://guides.munchmakers.com/guide/best-rolling-papers-beginners) voor de beste resultaten.
Snelle antwoord
Om een joint te rollen: maak een accordeongevouwen filter, maal je cannabis gelijkmatig, plaats het filter in het papier, verdeel de cannabis langs de vouw, vorm het tot een cilinder door heen en weer te rollen, stop de niet-gummirand onder de cannabis, rol omhoog naar de gummistrook, lik en sluit af. Het kost oefening, maar de meeste mensen kunnen binnen 3-5 pogingen een rookbare joint rollen.
Video Tutorial
Bekijk deze stapsgewijze visuele gids om het hele rolproces in actie te zien:
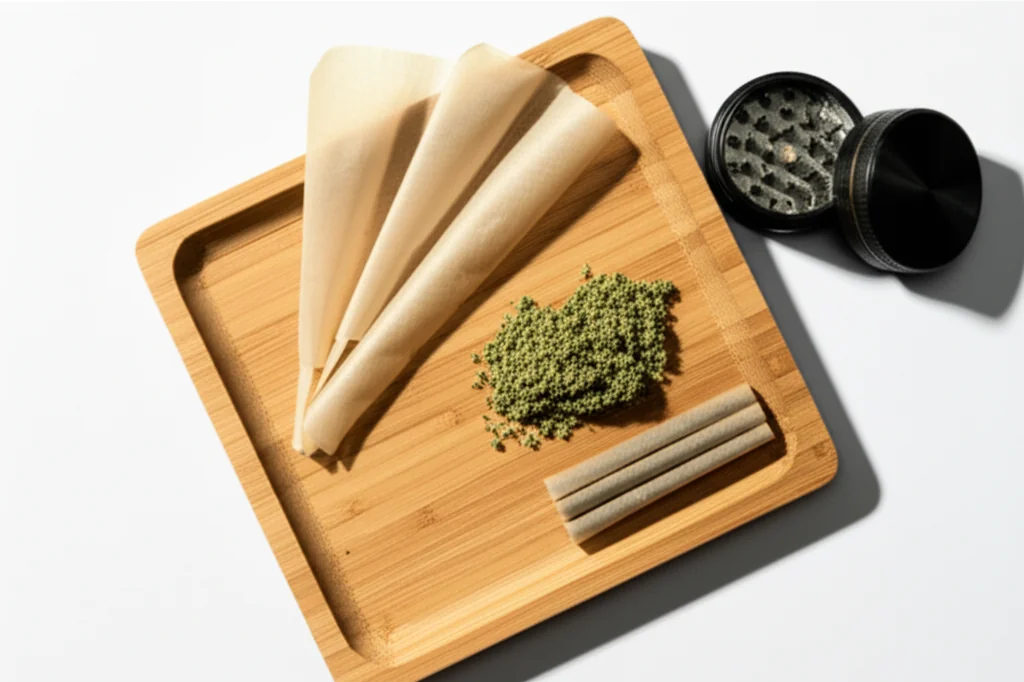
Wat je nodig hebt
Vereist:
- Rolling papers (1¼ formaat aanbevolen voor beginners)
- Gemalen cannabis (0,5-0,75 gram)
- Filtertips (dunne karton, kan een visitekaartje gebruiken)
- Grinder (of vingers indien nodig)
- Aanstekers
Aanbevolen:
- Rolling tray (of schoon boek/tijdschrift)
- Pen of verpakkingshulpmiddel
- Extra papers voor oefening
Papierselectie voor beginners
Voor premium rolling supplies, kijk bij op maat gemaakte rolling papers van MunchMakers. Voor algemene tips over rolling technieken, wikiHow biedt geïllustreerde gidsen.
Beste keuzes voor 2026:
- RAW Organic Hemp - Natuurlijk, gemakkelijk te gebruiken, vergevingsgezind voor beginners. Het meest aanbevolen door cannabisdocenten voor het leren.
- Elements Rice Papers - Dun maar stevig, langzaam brandend, minimale smaakinterferentie
- Zig-Zag 1¼ - Klassiek, breed beschikbaar, betaalbaar. Industriestandaard voor tientallen jaren.
- OCB Organic - Ultra-dun, natuurlijke gom, de voorkeur van ervaren rollers
Grootte: Begin met 1¼ (78mm). King size kan onhandig zijn voor het leren. Expert tip: Kleinere papers dwingen tot betere techniekontwikkeling.
Leer meer: Bekijk onze uitgebreide gids over beste rolling papers voor beginners voor gedetailleerde vergelijkingen.
Stapsgewijze rolling proces
Stap 1: Bereid je filtertip voor
De filter (ook wel crutch of tip genoemd) biedt structuur, voorkomt dat cannabis in je mond komt, en geeft je iets om vast te houden.
Hoe te Vouwen:
1. Scheur of snijd filterpapier tot ongeveer 1,5 cm breed en 5 cm lang
2. Vouw aan één kant 3-4 keer heen en weer (accordeonpatroon)
3. Rol de rest van het papier om de accordeon
4. Moet een cilinder zijn met een diameter van een potlood
Waarom de accordeon belangrijk is: Zorgt voor stabiliteit en luchtstroom. Zonder dit kan het filter inzakken tijdens het roken.
Stap 2: Maal je Cannabis
Expert Inzicht: De consistentie van het malen is de belangrijkste factor die de brandkwaliteit beïnvloedt. Professionele rollers benadrukken dat goed malen belangrijker is dan de roletechniek zelf.
Gebruik een kwaliteitsmolen om een consistente, luchtige textuur te bereiken:
- Niet te fijn: Poederachtige consistentie trekt door het papier en beperkt de luchtstroom. Veroorzaakt harde trekjes.
- Niet te grof: Grote stukken creëren klonten en ongelijkmatig branden. Veroorzaakt "lopers" of "kanalen."
- Juist goed: Luchtige, gelijkmatige stukjes vergelijkbaar met de textuur van gedroogde oregano. Moet zijn vorm behouden wanneer het wordt samengedrukt.
Verwijder stelen: Ze creëren gaten in de joint en smaken scherp. Zelfs kleine stelen beïnvloeden de brandkwaliteit.
Hoeveelheid: 0,5-0,75 gram voor een standaard joint. Het is beter om kleiner te beginnen - je kunt altijd een andere rollen.
Aanbeveling voor molen: Een kwaliteitsmolen met 4 delen met [kief opvang](https://munchmakers.com/blog/the-ultimate-guide-to-weed-grinders-with-kief-catchers-2/) zorgt voor consistente resultaten. Zie onze gids over beste molens voor cannabis of blader door premium molens op MunchMakers.
Stap 3: Maak de Vouw
Houd het papier met de gomstrip aan de bovenkant, naar jou gericht. Plaats je voorbereide filter aan één kant (meestal de linkerkant voor rechtshandigen).
Creëer een kanaal: Vouw het papier voorzichtig in de lengte om een lichte V-vorm of goot te creëren. Deze vouw houdt je cannabis vast en maakt het rollen gemakkelijker.
Stap 4: Vul met Gemalen Cannabis
Verdeel de gemalen cannabis gelijkmatig langs de vouw:
- Meer in het midden, iets taps toelopend naar de uiteinden
- Laat ruimte bij de gomstrip en nabij het filter
- Vul niet te vol - minder is gemakkelijker te rollen dan meer
Veelgemaakte fout: Veel te veel cannabis laden. Je kunt altijd een tweede joint rollen. Overgevulde joints zijn bijna onmogelijk voor beginners om goed te rollen.
Stap 5: Vorm de Joint
Hier ontwikkelt de rolvaardigheid zich:
De beweging:
- Knijp het papier tussen je duimen en wijsvingers aan beide zijden van de cannabis
- Rol voorzichtig heen en weer (NIET van zij naar zij - heen en weer beweging)
- De cannabis moet zich vormen en in een cilinder worden verpakt
- De filter helpt de vorm aan die kant te behouden
Doel: Een gelijkmatig verpakte cilinder van cannabis die stevig maar niet samengeperst is.
Tijd nodig: 15-30 seconden voor het vormen. Haast je niet.
Stap 6: De Tuck (Kritieke Stap)
Hier hebben de meeste beginners moeite. De tuck bepaalt succes of falen.
Hoe te tucken:
1. Werk vanaf de filterkant (gemakkelijker)
2. Tuck de onderrand van het papier (niet-kleefzijde) onder de cannabis en over de filter
3. Gebruik je duimen om te tucken terwijl je wijsvingers zachte druk naar beneden uitoefenen
4. Zodra je begonnen bent, moet de tuck doorgaan langs de lengte terwijl je rolt
Het gevoel: Je zou moeten voelen dat het papier onder de cannabis grijpt. Als het niet tuckt, vorm de cannabis dan strakker.
Veelvoorkomend probleem: Papier dat over zichzelf vouwt zonder onder de cannabis te grijpen. Oplossing: Pak de cannabis eerst strakker in de cilinder vorm.
Stap 7: Rol naar de Kleefstrip
Zodra de tuck is begonnen:
1. Blijf omhoog rollen met gelijkmatige druk
2. Het papier moet om de cannabis cilinder wikkelen
3. Rol totdat alleen de kleefstrip zichtbaar is
4. Houd de spanning consistent over de hele lengte
Controleer: Voordat je het sluit, kijk langs de lengte. Het moet gelijkmatig zijn, niet bobbelig of los.
Stap 8: Sluit de Joint
Likken van de kleefstrip:
- Lick de hele kleefstrip royaal (wees niet verlegen)
- Sommige papieren hebben meer vocht nodig dan andere
- Begin aan één kant en werk naar de andere kant
- Druk stevig terwijl je sluit
- Houd de gesloten joint 5-10 seconden vast
Moderne alternatieve: Sommigen gebruiken een vochtige doek in plaats van te likken voor hygiëne.
Stap 9: Inpakken en Afmaken
Het open einde inpakken:
- Gebruik een pen, klein stokje of je pink
- Druk de cannabis voorzichtig naar beneden vanaf het open einde
- Dit maakt de hele joint strakker en zorgt voor een gelijkmatige verbranding
- Druk niet zo hard dat de luchtstroom wordt beperkt
De punt sluiten:
- Draai het overtollige papier dicht (klassieke methode)
- Of laat het open en brand voorzichtig het overtollige af bij het aansteken
- De gedraaide punt voorkomt dat de cannabis eruit valt
Stap 10: Kwaliteitscontrole
Een goede joint:
- Stevig maar niet keihard
- Gelijke dikte over de lengte
- Kan gemakkelijk lucht doorlaten
- Volledig afgesloten zonder gaten
- Filter is veilig en draait niet
Als het mislukt, controleer: Rook het toch! "Lelijk maar functioneel" leert je meer dan het weggooien.
Veelvoorkomende Rolproblemen en Oplossingen
Probleem: Joint is Bobbelig/Oneven
Oorzaak: Oneven cannabisverdeling of onvoldoende vormgeving voor het rollen.
Oplossing: Besteed meer tijd aan Stap 5 voor het vormen. Herverdeel de cannabis indien nodig voordat je het inpakt.
Probleem: Joint Te Los, valt uit elkaar
Oorzaak: Niet genoeg spanning tijdens het rollen, of te vol.
Oplossing: Gebruik de volgende keer minder cannabis. Pas een consistentere druk toe tijdens het rollen.
Probleem: Joint Te Strak, trekt niet
Oorzaak: Samengeperste cannabis of te stevig ingepakt.
Oplossing: Pak zachter in. Test de trek voordat je het afsluit - er moet een gemakkelijke luchtstroom zijn.
Probleem: Papier Scheurt Tijdens het Rollen
Oorzaak: Te veel druk, droge handen of papier van lage kwaliteit.
Oplossing: Gebruik een zachtere aanraking. Maak de vingertoppen licht vochtig. Koop betere papieren.
Probleem: Filter valt eruit
Oorzaak: Filter te klein of niet goed geïntegreerd in de joint.
Oplossing: Maak het filter iets groter in diameter. Zorg ervoor dat het IN de joint is gerold, niet alleen aan het einde is geplaatst.
Probleem: Kegelvorm in plaats van Cilinder
Oorzaak: Meer cannabis aan de ene kant dan aan de andere.
Oplossing: Dit is eigenlijk prima! Kegel-joints zijn populair (dikke kant, smalle filterkant). Veel mensen geven de voorkeur aan deze vorm.
Probleem: Joint loopt of kano's
Oorzaak: Ongelijke verpakking of wind tijdens het roken.
Oplossing: Focus op een gelijkmatige verdeling in Stap 4. Draai de joint tijdens het aansteken om een gelijkmatige gloed te garanderen.
Roltips van Experts
Tip 1: Begin met Meer Papier Dan Je Denkt
Beginners gebruiken vaak papieren die te klein zijn. 1¼ maat geeft je ruimte om te werken.
Tip 2: Oefen Eerst met Tabak of Kruiden
Sommige mensen oefenen de roltechniek met goedkope tabak of gedroogde kruiden voordat ze cannabis "verspillen". Dit ontwikkelt spiergeheugen.
Tip 3: Gebruik een Dollarbiljet Rolmethode
Plaats filter en cannabis in een dollarbiljet, vorm het, schuif dan het papier in het biljet en gebruik het biljet als rolgids. Trainingswielen voor het leren.
Tip 4: Vooraf Gemaakte Kegels Bestaan
Geen schaamte in het gebruik van vooraf gerolde kegels die je gewoon vult. Veel ervaren rollers gebruiken ze voor consistentie.
Tip 5: De Eerste 10 Zullen Lelijk Zijn
Accepteer dat vroege pogingen op zijn best functioneel zullen zijn. Joint rollen is een vaardigheid die oefening vereist. Nummer 15-20 is wanneer de meeste mensen consistentie bereiken.
Geavanceerde Overwegingen
Invloed van Papier Type
Henneppapieren: Langzame, gelijkmatige verbranding. Natuurlijke smaak. Dikker zodat het vergevingsgezind is.
Rijstpapieren: Zeer dun. Schonere smaak. Minder vergevingsgezind voor beginners.
Houtpulp: Klassieke papieren. Snellere verbranding. Sterke smaak.
Rollen Zonder Filter
Sommigen geven de voorkeur aan joint zonder filter. Knijp het uiteinde dicht of vouw het om. Biedt iets betere luchtstroom maar vereist voorzichtig roken om te voorkomen dat losse cannabis in de mond komt.
De Conemethode
In plaats van een cilinder, vorm opzettelijk een kegel (breder aan de punt, smaller bij het filter). Veel mensen vinden dit gemakkelijker. Vul het brede uiteinde met meer cannabis, waardoor er een natuurlijke taper ontstaat.
Oefening Baart Kunst
Realistische Tijdlijn:
- Joint 1-3: Waarschijnlijk lelijk, misschien rokenbaar
- Joint 4-7: Functioneel, verbetert
- Joint 8-15: Consistent rokenbaar
- Joint 15+: Je persoonlijke stijl ontwikkelen
Geef niet op! Zelfs ervaren rollers herinneren zich dat ze in het begin moeite hadden. Het is een fysieke vaardigheid zoals schoenen strikken - lijkt onmogelijk totdat het ineens lukt.
Alternatieven voor Handrollen
Vooraf Gemaakte Kegels:
- Koop het papier dat al in de juiste vorm is
- Vul gewoon met gemalen cannabis
- Pak en draai
- Consistente resultaten elke keer
- Leer meer: Bekijk onze vergelijking van vooraf gemaakte kegels vs handrollen
Rolmachines:
- $5-10 apparaat dat voor je rolt
- Laad papier en cannabis, draai aan de hendel
- Perfecte cilinders maar minder bevredigend dan handrollen
- Beste opties: Bekijk onze gids voor jointrollers
Vraag Iemand om te Rollen:
- Geen schaamte om een ervaren vriend voor je te laten rollen terwijl je leert
- Bekijk hun techniek goed
Expert Tips voor Betere Resultaten
Van Professionele Rollers (2026 Editie):
1. Temperatuur is belangrijk: Licht warme, droge handen werken het beste. Koude of klamme handen zorgen ervoor dat papier ongemakkelijk plakt.
2. De lichttechniek beïnvloedt de kwaliteit van de rol: Zelfs de beste gerolde joint heeft goede verlichting nodig. Steek de punt aan terwijl je draait om een gelijkmatige gloed te garanderen.
3. Opslagbehoud: Goed gerolde joints kunnen maandenlang worden bewaard. Leer over cannabisopslagtechnieken om voorgerolde joints vers te houden.
4. Upgrade je setup: Investeer in een kwaliteits- rolblad om je materialen te organiseren en verspilling te voorkomen.
Gerelateerde Roltechnieken
Zodra je de basis joint onder de knie hebt, verken dan deze geavanceerde technieken:
- Hoe een Cones Joint te Rollen - Tapse vorm voor soepelere hits
- Inside-Out Rollen (Nederlandse Stijl) - Minder papier, schonere smaak
- Hoe een [Cross Joint te Rollen](https://guides.munchmakers.com/guide/how-to-roll-cross-joint) - Geavanceerde techniek voor speciale gelegenheden
- Rollen Zonder Filter - Traditionele methode
Koop Kwaliteitsbenodigdheden: Blader door aangepaste vloei, premium grinders, en rolaccessoires bij MunchMakers.
Deze gids is bedoeld voor educatieve doeleinden in regio's waar cannabis legaal is. Cannabiswetten variëren per jurisdictie. Controleer altijd de lokale regelgeving.
Step 1:
Step 2:
Step 3:
Step 4:
Step 5:
Step 6:
Step 7:
Step 8:
Frequently Asked Questions
1¼ maat papieren (78mm) zijn ideaal voor beginners. Ze zijn groot genoeg om mee te werken, maar niet zo groot dat je cannabis verspilt. King size kan intimiderend zijn voor de eerste pogingen.
Related Guides
Rolling Paper Sizes Explained: 1 1/4, King Size, and More
Comprehensive guide about rolling paper sizes explained: 1 1/4, king size, and more. Learn everything you need to know with expert tips and detailed instructions.

Best Rolling Papers for Beginners: Complete Buying Guide 2026
Discover the best rolling papers for beginners including RAW, Zig-Zag, and OCB. Learn about sizes, materials (rice vs hemp vs wood pulp), and which papers are easiest to roll with.
Clear Rolling Papers: Are Cellulose Papers Worth It?
Comprehensive guide about clear rolling papers: are cellulose papers worth it?. Learn everything you need to know with expert tips and detailed instructions.