
완벽한 롤링 스테이션을 설정하는 방법
James Wilson
Cannabis Culture Writer
완벽한 롤링 스테이션을 설정하는 방법
잘 조직된 롤링 스테이션은 흩어져 있는 엉망진창에서 흡연 경험을 부드럽고 효율적인 의식으로 바꿉니다. 매일 롤러를 사용하든 가끔 매니아를 하든, 적절한 도구를 갖춘 전용 공간을 확보하면 모든 세션이 더 좋아집니다. 이 가이드는 최고의 롤링 설정을 만드는 데 필요한 모든 것을 다룹니다.
빠른 답변
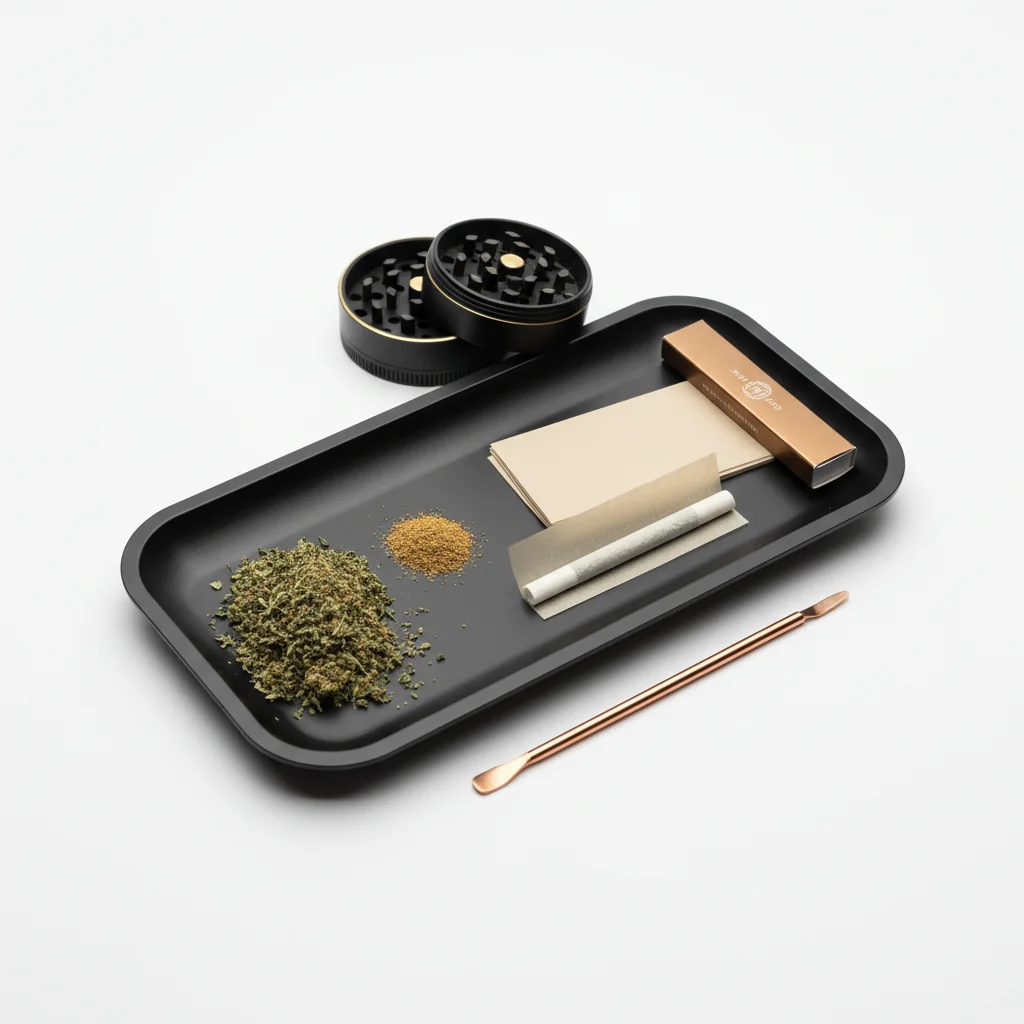
완벽한 롤링 스테이션에는 다음이 포함됩니다. 품질의 롤링 트레이(금속 또는 목재),가는 사람, 종이 및 필터, 저장 항아리,습도 팩, 라이터, 청소 브러시 및 탬핑 도구 및재떨이. 사용 빈도에 따라 도구를 구성하고 팔이 닿을 수 있는 필수품과 근처에 보관된 백업 용품을 보관하십시오.
전용 롤링 스테이션이 중요한 이유
조직의 이점:
- 더 빠른 롤링(손이 닿는 모든 것)
- 엎질러진 대마초(공원 포함)
- 더 깨끗한 경험(유지 관리하기 쉬움)
- 더 나은 의식 (의도적, 마음챙김 사용)
- 전문적인 결과(오른쪽 도구 사용 가능)
조직 팁을 위해,가문비훌륭한 홈 조직 조언을 제공합니다.
조직 없이:
- 용품을 찾는 데 시간을 낭비했습니다
- 표면에 잃어버린 대마초
- 잘못 배치된 액세서리
- 답답하고 급한 세션
필수 구성 요소
1. 롤링 트레이(기초)
모든 작업이 발생하는 중심은 트레이입니다.
크기 권장 사항:
- 솔로 사용: 소형(7"×5") 또는 중간(10"×6")
- 그룹 세션: 대형(12"×8") 또는 초대형
- 여행하다: 뚜껑이 있는 컴팩트
재료 옵션:
- 금속의: 가장 인기있는, 청소하기 쉬운, 내구성
- 나무를 주다: 미적, 따뜻한 느낌, 더 많은 관리가 필요합니다
- 실리콘: 유연하고, 산산이 부서지기 쉬운, 저렴한 가격
- 유리를 끼우: 프리미엄 룩, 무거운, 깨지기 쉬운
찾아야 할 기능:
- 돌출된 모서리(유출 방지)
- 곡선 모서리(쉬운 컬렉션)
- 매끄러운 표면(대마초 붙지 않음)
2. 그라인더
트레이 다음으로 두 번째로 중요한 도구입니다.
권장 설정:
- 일차의: 4종 금속 그라인더키프수집물
- 지원: 여행용 소형 2피스
장소: 트레이에 있거나 바로 인접해 있습니다. 매 세션마다 사용합니다.
3. 종이와 필터
조직 팁: 다양한 준비를 하되 정리하십시오.
재고 서류:
- 선호하는 기본 사이즈(1¼, 킹 사이즈 등)
- 하나의 백업 브랜드
- 행사를 위한 전문 논문
필터 팁:
- 트레이에 미리 만들어진 소책자
- 근처에 저장된 백업 책자
저장 솔루션: 작은 용기 또는 서랍 구분선은 용지를 평평하고 손상되지 않은 상태로 유지합니다.
4. 저장 용기
대마초는 역 근처에 적절한 집이 필요합니다.
최상의 옵션:
- 밀폐된 밀폐형 유리병
- UV 차단 용기
- 습도 조절식 보관함
습도 팩으로: 62% RH의 Boveda 또는 Integra는 대마초를 신선하게 유지합니다.
장소: 팔이 닿을 수 있는 거리에 있지만 트레이 자체에는 없습니다(작업 공간 저장).
5. 라이터 또는 대마 심지
여러 가지를 유지하십시오:
- 트레이에 기본 라이터
- 서랍에 백업
- 선택 사항: 더 깨끗한 맛을 위한 대마 심지
팁: 당신의 스테이션에 라이터를 헌정하십시오. 그들은 사라지지 않을 것입니다.
유용한 액세서리
탬핑 도구 / 포커
조인트 및 클리어링 볼용.
옵션:
- 전용 포장 도구
- 깨끗한 펜이나 연필
- 정밀 작업을 위한 이쑤시개
청소용 브러시
대마초를 쓸기 위한 작은 브러시와 그라인더 청소.
최고의 유형:
- 부드러운 칫솔모 메이크업 브러쉬
- 전용 그라인더 브러시
- 작은 붓
재떨이
역에서 담배를 피우는 경우 재를 보관하십시오.
특징:
- 재에 충분히 깊다
- 관절 휴식 노치
- 내열재
규모(선택사항)
정확한 투여 또는 추적 사용을 위해.
장소: 메인 트레이가 아닌 근처 서랍.
돋보기(옵션)
트리홈을 검사하거나 대마초를 감상합니다.
레이아웃 및 조직
"영역" 시스템
스테이션을 기능 영역으로 구성:
구역 1: 활성 롤링 영역(트레이의 중앙)
- 연삭 및 롤링이 발생하는 곳
- 롤 준비가 될 때까지 명확하게 유지
- 이것은 당신의 작업 공간입니다
영역 2: 즉각적인 도구(트레이 모서리)
- 가는 사람
- 서류
- 여과
- 성우
- 모든 세션에서 가져오는 도구
3구역: 저장공간(트레이 옆)
- 대마초 용기
- 백업 용품
- 청소 도구
- 덜 사용하는 액세서리
구역 4: 폐기물/폐기(가장자리)
- 재떨이
- 작은 쓰레기통
- 사용된 필터 재료
오른손잡이와 왼손잡이 설정
오른손잡이 롤러:
- 왼쪽의 그라인더(먼저 갈은 다음 오른손잡이로 굴림)
- 오른쪽에 있는 논문
- 왼쪽에 보관함
왼손잡이 롤러:
- 설정 미러링
- 오른쪽에 그라인더
- 왼쪽에 있는 논문
워크플로 최적화
자연적인 흐름을 위해 배열:
1. 창고에서 대마초를 잡아라
2. 분쇄(그라인더 위치)
3. 종이와 필터를 잡고
4. 클리어 센터에서 롤
5. 가볍고 즐기기
모든 것이 순서를 따릅니다.- 작업 공간에서 도달할 수 없습니다.
저장 및 디스플레이 옵션
오픈 스테이션(디스플레이)
재량이 필요하지 않은 전용 공간용.
장점:
- 볼 수 있고 액세스할 수 있는 모든 것
- 빠른 세션
- 의도적으로 보인다
설정:
- 책상/테이블에 롤링 트레이
- 그 주위에 배치된 용품
- 미적 용기 및 액세서리
폐쇄된 역(이산)
공유 공간 또는 개인 정보 보호가 중요한 경우.
옵션:
- 뚜껑이 있는 롤링 트레이(올인원)
- 서랍 정리함
- 전용 상자 또는 케이스
- 구획이 있는 가구
...의 기적: 모든 것이 함께 저장되고 빠르게 배포됩니다.
하이브리드 접근
대부분의 사람들은 몇 가지 조합을 사용합니다.
- 사용중 트레이 아웃
- 사용하지 않을 때 서랍/컨테이너에 보관된 물품
- 빠른 설정/고장
청소 및 유지 보수
일일 유지 보수
각 세션 후:
- 느슨한 대마초를 용기에 다시 붓습니다.
- 트레이 표면 닦기
- 도구를 위치로 되돌리기
30초 소요, 스테이션을 깨끗한 상태로 유지합니다.
주간 딥클린
일주일에 한 번:
- 그라인더 치아를 깨끗하게
- 이소프로필 알코올로 트레이 닦기
- 용품 정리 및 재입고
- 습도 팩 확인
월간 작업
- 딥클린 그라인더(완전 분해)
- 종이 신선도 확인
- 재입고를 위한 재고 공급
예산 고려 사항
예산 설정($30-50)
- 기본 금속 트레이($10-15)
- 2피스 그라인더($10-15)
- 논문 및 필터($5)
- 작은 유리병 ($5-10)
- 라이터($2)
작업을 완료합니다나중에 업그레이드할 수 있는 공간이 있습니다.
중급 설정($75-150)
- 품질 중간 트레이 ($ 25-40)
- 4피스 메탈 그라인더(30~50달러)
- 프리미엄 논문 다양성 ($15)
- 밀폐 UV 항아리 ($15-25)
- 액세서리(브러시, 포커 등) ($15-20)
솔리드 설정몇 년 동안 지속됩니다.
프리미엄 설정($200+)
- 대형 목재 또는 맞춤형 트레이($50-100)
- 산타크루즈 또는 고급 그라인더($75-150)
- 여러 프리미엄 종이 브랜드($25)
- CVault 또는 프리미엄 스토리지($40-60)
- 전체 액세서리 키트($30-50)
궁극의 경험매니아를 위해.
뭉툭한 양롤링 트레이
품질의 롤링 트레이를 위해,Munchmakers는 다양한 맞춤형 롤링 트레이를 제공합니다.기능과 미학을 모두 고려하여 설계되었습니다. 그들의 트레이는 융기된 가장자리, 매끄러운 표면, 모든 롤링 스테이션에 완벽한 내구성 있는 구조를 특징으로 합니다.
인기있는 옵션:
- 맞춤형 롤링 트레이- 자신의 디자인 또는 브랜딩으로 개인화
- 마그네틱 뚜껑이 있는 사용자 정의 롤링 트레이-보관용 마그네틱 마그네틱 마그네틱으로 고급 옵션
- 바이오트레이 생분해성 트레이- 지속가능한 재료로 만든 친환경 옵션
- 맞춤형 생분해성 롤링 트레이- 맞춤형 브랜딩과 환경적 책임을 결합
개인 스테이션을 설치하든 진료소에 설치하든 상관없이 Munchmaker는 모든 필요와 예산에 맞는 롤링 트레이 옵션을 제공합니다.
일반적인 설정 실수
실수 1: 트레이에 너무 많은
문제: 어수선한 작업 공간, 실제로 굴릴 공간이 없음
용액: 트레이에 필수 도구만 있습니다. 그 위에 보관하지 않고 근처에 보관하십시오.
실수 2: 잘못된 크기 트레이
문제: 너무 작음 = 유출, 너무 큰 = 공간 낭비
용액: 트레이 크기를 일반적인 사용 사례와 일치시킵니다.
실수 3: 조명 불량
문제: 특히 어두운 대마초로 무엇을 하고 있는지 알 수 없습니다.
용액: 자연광 근처에 위치하거나 책상 램프를 추가합니다.
실수 4: 습도 조절을 잊어버리다
문제: 대마초가 건조해지고 가혹한 연기가 나다
용액: 항상 습도 팩을 보관하십시오.
다양한 상황에 대한 팁
아파트/작은 공간
- 뚜껑이 있는 컴팩트한 트레이
- 수직 보관
- 다목적 가구
- 빠른 설정/고장 루틴
전용실/공간
- 전체 영구 설정
- 디스플레이 품질의 액세서리
- 다양한 목적을 위한 여러 트레이
- 근처에 편안한 좌석
공유 생활
- 개별 스토리지 솔루션
- 빠른 팩 어웨이 시스템
- 냄새 방지 용기
- 룸메이트의 공간을 존중하십시오
시간이 지남에 따라 컬렉션 구축
한 번에 모든 것이 필요하지 않습니다. 기본 사항으로 시작하여 시간이 지남에 따라 추가하십시오.
1단계: 트레이, 그라인더, 종이, 보관
2단계: 그라인더 업그레이드, 액세서리 추가
3단계: 프리미엄 트레이, 특수 도구
4단계: 다양한 목적을 위한 다양한 설정
양보다 품질- 하나의 훌륭한 그라인더는 세 개의 저렴한 것을 능가합니다.
이 가이드는 교육 목적입니다. 대마초법은 관할권에 따라 다릅니다.
Frequently Asked Questions
품질의 롤링 트레이, 그라인더, 종이 및 필터, 습도 팩, 라이터 및 청소 브러시가 있는 보관 항아리. 추가 옵션에는 탬핑 도구, 재떨이 및 스케일이 포함됩니다.
Related Guides
Custom Rolling Trays: Personalize Your Setup
Comprehensive guide about custom rolling trays: personalize your setup. Learn everything you need to know with expert tips and detailed instructions.

DIY Rolling Tray Ideas: Custom and Upcycled Options
Creative DIY rolling tray projects from simple upcycling to custom builds. Learn to make picture frame trays, resin pours, cigar box stations, and more with material safety guide.

How to Clean Your Rolling Tray: Complete Maintenance Guide
Learn how to properly clean and maintain rolling trays made of metal, wood, silicone, and plastic. Includes cleaning schedules, stubborn residue removal, and material-specific care tips.