
크로스 조인트를 굴리는 방법: 상징적인 잡초 십자가를 위한 완전한 튜토리얼
Mike Rodriguez
Rolling Expert
크로스 조인트를 굴리는 방법: 상징적인 잡초 십자가를 위한 완전한 튜토리얼
십자 관절(이를 유명하게파인애플 익스프레스)는 롤링 기술의 왕관 보석입니다. 90도에서 교차하는 두 개의 조인트가 동시에 세 지점에서 연소됩니다. 이 전문가 수준의 기술은 도전적이지만 믿을 수 없을 정도로 인상적입니다.
빠른 답변
크로스 조인트를 굴리려면: 하나의 두꺼운 주 조인트와 하나의 얇은 크로스 조인트를 굴리고, 두꺼운 조인트의 중심에 구멍을 뚫고, 구멍을 통해 얇은 조인트를 삽입하고, 십자 모양을 만들고, 젖은 롤링 페이퍼 조각으로 교차를 밀봉하고, 세 끝에서 모두에서 공기 흐름을 테스트하고, 세 가지 모두를 동시에 조명합니다. 총 1.5-2g 대마초 및 전문 롤링 기술이 필요합니다.
크로스 조인트란?
구조:
- 하나의 두꺼운 "주" 조인트(수직)
- 하나의 얇은 "십자가" 관절(수평)
- 90도 각도로 교차
- 세 끝이 동시에 타오른다
유명해졌다: 파인애플 익스프레스 영화 (세스 로건과 제임스 프랭코)
어려움: 전문가 수준 - 견고한 롤링 기초가 필요합니다.
크로스 조인트 용품의 경우 확인하십시오.사용자 정의 [ 구르는 종이먼치메이커에서](https://munchmaker.com/product-category/custom-rolling-papers/). 고급 롤링 튜토리얼의 경우,IMDB의 파인애플 익스프레스이 상징적 인 기술을 유명하게 만들었습니다.
왜 크로스 조인트를 굴립니까?
이유:
- 궁극의 과시 기술
- 인상적인 시각적 매력
- 독특한 흡연 경험 (3 체리)
- 공학 과제
- 특별한 날/축하
실용적이지 않은: 크로스 조인트는 낭비적이고 어렵고 비실용적입니다. 그들은 효율성이 아니라 재미와 스펙터클을 위한 것입니다.
전제 조건
시도하기 전에 다음을 수행할 수 있어야 합니다.
- 일반 조인트를 완벽하게 굴립니다(90%+ 성공률)
- 롤 콘 조인트
- 조인트를 단단하고 고르게 포장하십시오.
- 롤링 페이퍼로 섬세하게 작업
당신이 할 수 없다면: 최소 한 달 동안 정기적인 관절을 연습하십시오. 크로스 조인트는 당신을 좌절시키고 대마초를 낭비할 뿐입니다.
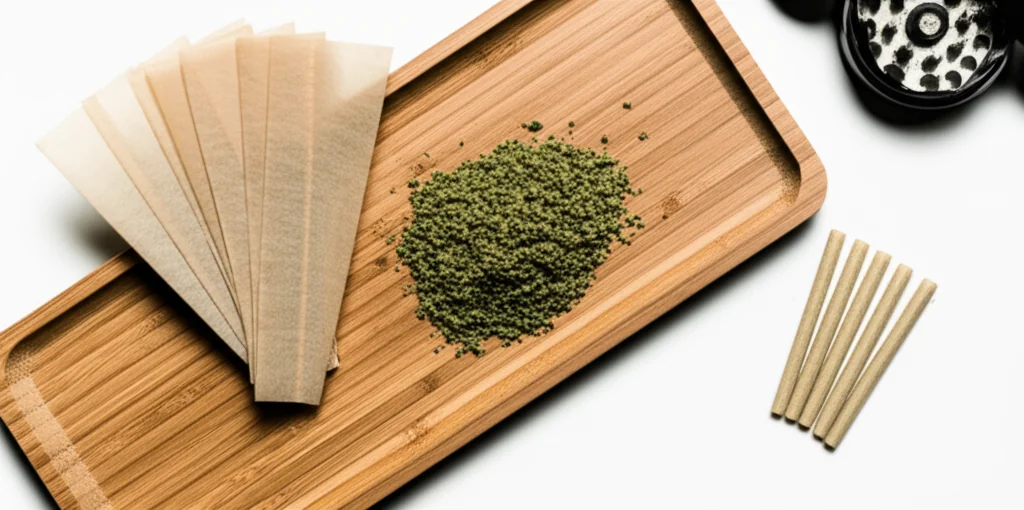
필요한 재료
- 킹 사이즈 롤링 페이퍼(2-3개)
- 일반 1¼ 용지 (2 2 )
- 필터/크러치 (2)
- 대마초(총 1.5-2g)
- 클립 또는 포커 도구
- 패치를 위한 여분의 롤링 페이퍼
- 인내
단계별: 크로스 조인트 롤링
1단계: 두 개의 개별 조인트를 굴립니다.
주 조인트(수직):
- 킹 사이즈 용지 사용
- 두껍고 단단하게 롤
- 1-1.5g 대마초 포장
- 그것을 뚱뚱하게 만드십시오 - 구조적 무결성이 필요합니다
교차 조인트(수평):
- 1¼ 종이 사용
- 메인보다 얇게 굴러
- 팩 0.5-0.75g
- 메인 조인트 홀을 통해 맞아야 합니다.
둘 다 다음과 같아야 합니다.
- 꽉 포장
- 고르게 분포
- 완전히 밀봉
- 부드러운 반점이 없다
2단계: 중심점 찾기
두꺼운 주 조인트에서:
- 정확한 중심을 찾기 위해 측정
- 손가락으로 가볍게 표시
- 교차 조인트가 교차하는 곳입니다.
위기의: 중심점 = 양쪽에 화상조차
3단계: 구멍을 뚫다
클립 또는 포커 사용:
1. 표시된 중심점에 삽입
2 . 다른 쪽으로 똑바로 밀어
3. 약간의 구멍을 넓히기 위해 흔들기
4. 교차 조인트 직경보다 넓어야 합니다.
조심하다: 관절을 찢지 말고 깨끗한 구멍을 만드십시오.
4단계: 크로스 조인트 삽입
얇은 조인트를 통해 조심스럽게 밀어 넣습니다.
- 천천히 밀어
- 꼭 맞아야 하지만 강요되어서는 안 된다
- 양쪽의 길이가 동일
- 주관절에 90도 각도
체크 무늬의: 십자가는 양쪽에 고르게 튀어나와야 합니다.
5단계: 교차로를 봉인
이것은 중요하다- 공기 누출 방지:
1. 작은 둥근 종이 조각을 찢어 (썸네일 크기)
2 끈적하게 만들기 위해 철저히 핥아
3. 관절이 만나는 교차로를 감싸십시오.
4. 주조합과 크로스 조인트 사이의 모든 간격을 커버하십시오.
5. 밀봉하기 위해 단단히 누르십시오
3~4종의 종이를 사용다양한 각도에서 포장
6단계: 공기 흐름 테스트
조명 전, 세 가지 끝에서 모두 테스트 그리기 :
1. 메인 조인트 팁에서 그리기
2. 왼쪽 크로스 엔드에서 그리기
3. 오른쪽 크로스 끝에서 그리기
셋 모두 공기를 끌어야 한다. 차단된 것이 있으면 더 많은 종이 패치로 누출을 찾아 밀봉하십시오.
7단계: 세 가지 끝을 모두 밝히다
인상적인 부분:
방법 1(솔로):
- 라이트 메인 팁 먼저
- 양쪽 끝을 빠르게 켜십시오.
- 속도와 조정이 필요합니다
방법 2(친구와 함께):
- 2-3명 각 조명이 동시에 한쪽 끝
- 더 쉽고 안정적인
목표로 향하다: 체리 3개 모두 동시에 불타는
8단계: 연기와 회전
흡연 기술:
- 주조합에서만 드로잉(크로스 엔드에서 담배를 피우지 마십시오)
- 세면이 모두 고르게 타오르도록 회전
- 엔지니어링의 작동을 지켜보십시오.
십자가는 불타버린다그리고 주관절에 연기를 공급
일반적인 크로스 조인트 문제
문제: 크로스 조인트가 구멍에서 떨어졌습니다.
...한소리: 구멍이 너무 크며, 크로스 조인트가 너무 얇음
용액: 교차 조인트를 두껍게 만들거나 교차로에서 더 많은 밀봉 용지를 사용하십시오.
문제: 공기가 흐르지 않는다
...한소리: 교차로가 너무 조여져 공기 흐름을 차단
용액: 밀봉 패치에 작은 구멍을 뚫어 기류를 허용하거나 밀봉 용지를 덜 사용합니다.
문제: 관절이 켜져 있지 않습니다
...한소리: 너무 느슨하거나, 고르지 않은 패킹 또는 공기 누출
용액: 조립 전에 두 조인트를 더 단단히 포장하고 모든 틈을 철저히 밀봉하십시오.
문제: 고르지 않은 화상(앞쪽의 한쪽)
...한소리: 크로스 조인트가 중앙에 있지 않거나 한쪽이 더 조여져 있습니다.
용액: 크로스 조인트가 완벽하게 중앙에 있는지 확인하고 양쪽에 고르게 포장
잡초를 얼마나 사용합니까?
총계가 ...: 1.5-2.5 그램
고장:
- 메인 조인트: 1-1.5g
- 크로스 조인트: 0.5-1g
비교를 위해:
- 일반 조인트: 0.5-0.75g
- 일반 blunt: 1-2g
크로스 조인트는 더 많이 사용합니다대마초와 더 빨리 타십시오 (3 점 연소)
낭비입니까?
예, 매우 낭비:
- 세 지점에서 동시에 화상
- 대마초는 담배를 피울 수 있는 것보다 더 빨리 연소합니다.
- 사용하지 않은 많은 연기가 빠져나갑니다.
- 효율적인 소비가 되지 않는
어쨌든 할 때: 특별한 날, 축하, 과시, 재미있는 엔지니어링 챌린지
변이
예수 합동(4방향 십자가)
더욱 고급:
- 주 조인트를 교차하는 두 개의 교차 조인트
- 5개의 흡연 포인트를 만듭니다.
- 3-4g 대마초 필요
- 매우 어렵다
진정한 마스터에게만
브레이드 조인트
대체 인상적인 기술:
- 함께 땋은 세 개의 관절
- 다양한 시각적 매력
- 크로스보다 다소 쉽습니다
성공을 위한 팁
팁 1: 먼저 일반 관절을 완성하십시오
95%의 시간 동안 완벽한 일반 관절을 굴릴 수 없다면 크로스 조인트에 대한 준비가 되어 있지 않습니다.
팁 2: 메인 조인트를 thicc로 만드십시오.
두꺼운 조인트는 크로스 조인트를 지지하기 위해 구조적 무결성이 필요합니다. 대마초를 부끄러워하지 마십시오.
팁 3: 넉넉하게 밀봉
과도한 밀봉이 언더 씰링보다 낫습니다. 항상 과도한 패치를 제거할 수 있지만 공기 누출은 크로스 조인트를 망칩니다.
팁 4: 조명 전 테스트
조명 전에 항상 모든 끝에서 공기 흐름을 테스트하십시오. 조명 후 문제 찾기 = 크로스 조인트 실패.
팁 5: 실패 수용
경험이 풍부한 롤러도 크로스 조인트 시도의 30-40%가 실패합니다. 도전의 일부입니다.
문화적 중요성
파인애플 익스프레스: 주류 의식에 크로스 조인트를 가져왔습니다.
세스 로건: "관련 공학의 소용돌이의 정점입니다"
대마초 커뮤니티: 크로스 조인트는 존경받는 롤링 업적입니다.
상징: 공예에 대한 헌신, 엔지니어링 사고방식, 예술을 위해 대마초를 낭비하려는 의지를 보여줍니다.
이 가이드는 교육 목적입니다. 대마초법은 관할권에 따라 다릅니다.
Step 1:
Step 2:
Step 3:
Step 4:
Step 5:
Step 6:
Frequently Asked Questions
예, 크로스 조인트는 전문가 수준입니다. 견고한 관절 굴림 기술, 꾸준한 손, 인내가 필요합니다. 학습할 때 여러 번 실패한 시도가 예상됩니다. 먼저 일반 관절을 연습하십시오.
Related Guides
Rolling Paper Sizes Explained: 1 1/4, King Size, and More
Comprehensive guide about rolling paper sizes explained: 1 1/4, king size, and more. Learn everything you need to know with expert tips and detailed instructions.

Best Rolling Papers for Beginners: Complete Buying Guide 2026
Discover the best rolling papers for beginners including RAW, Zig-Zag, and OCB. Learn about sizes, materials (rice vs hemp vs wood pulp), and which papers are easiest to roll with.
Clear Rolling Papers: Are Cellulose Papers Worth It?
Comprehensive guide about clear rolling papers: are cellulose papers worth it?. Learn everything you need to know with expert tips and detailed instructions.