
최상의 결과를 위해 건조 허브 기화기를 포장하는 방법
David Martinez
Concentrate Expert
최상의 결과를 위해 건조 허브 기화기를 포장하는 방법
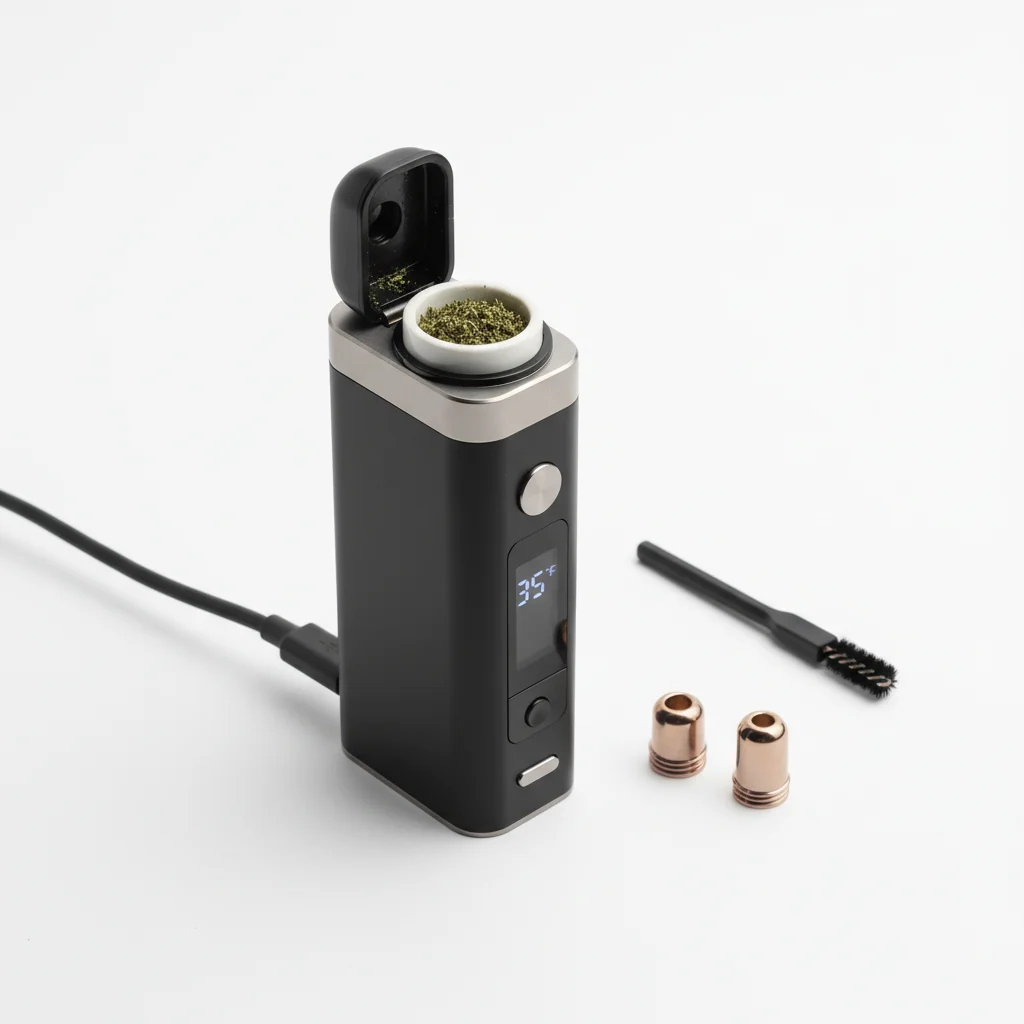
적절한 패킹 기술은 기화기의 성능에 큰 영향을 미칩니다. 너무 꽉 조이면 공기 흐름이 제한됩니다. 너무 느슨하면 위스피 증기가됩니다. 이 가이드는 최대의 풍미, 증기 생성 및 효율성을 위해 기화기를 적재하는 최적의 방법을 알려줍니다.
빠른 답변
최상의 결과를 얻으려면 대마초를 중간 미세한 농도(거친 소금과 같은 일관성으로)로 연마하고, 챔버를 적절한 충만함(전도의 경우 3/4, 대류의 경우 3/4)으로 적재하고 부드러운 압력으로 포장합니다. 단단하지만 압축되지는 않습니다. 재질은 눌렀을 때 약간의 주어져야 합니다. 가열하기 전에 항상 깨끗하고 평평한 표면을 확인하십시오.
포장 기술이 중요한 이유
열악한 포장은 사람들이 기화기에 실망하는 첫 번째 이유입니다. 400달러짜리 기기라도 잘못 포장하면 성능이 저하됩니다.
최상의 그라인드 일관성을 위해 품질을 사용하십시오.[ 에 대한 가는 사람from munchmaker](https://munchmaker.com/product-category/custom-grinders/). 기화 과학의 경우,사이언스다이렉대마초 연구 연구를 주최합니다.
잘못된 포장에 무슨 일이 일어나는지:
- 너무 꽉: 기류 제한, 거친 드로우, 고르지 못한 추출
- 너무 느슨한: 약한 증기, 낭비되는 재료, 불완전한 추출
- 잘못된 그라인드: 막힌 스크린, 핫스팟, 가난한 맛
- 고르지 않은 표면: 열이스케이프, 일관성 없는 세션
적절한 포장이 제공하는 것:
- 촘촘하고 향이 나는 증기
- 균일 추출(폐기물 없음)
- 쉬운 기류
- 각 그릇의 전체 세션
1단계: 올바른 연마 달성
그라인드는 좋은 베이핑의 기초입니다. 대부분의 문제는 잘못된 그라인드 일관성으로 거슬러 올라갑니다.
이상적인 그라인드: 중간 벌금
거친 소금 또는 말린 오레가노의 일관성을 생각해 보십시오. 푹신하지만 균일하며 가루나 덩어리가 아닙니다.
이것이 작동하는 이유:
- 면적: 효율적인 추출을 위한 충분한 노출
- 기류: 입자 사이의 공간이 뜨거운 공기를 통과시킵니다.
- 일관된 난방: 비슷한 크기의 조각이 고르게 가열됩니다.
기화기 유형별 그라인드 조정:
피해야 할 것:
너무 미세함(가루):
- 막힌 스크린 및 증기 경로
- 기류를 심각하게 제한
- 화면을 통해 떨어짐
- 가혹하고 뜨거운 증기를 생성
너무 거칠다(청키):
- 고르지 못한 추출(외부 요리, 원시 내부)
- 낭비되는 재료
- 약하고 일관성이 없는 증기
- 지속적인 교반이 필요합니다
2단계: 챔버 준비
더러운 챔버에 절대 포장하지 마십시오. 잔류물은 풍미에 영향을 미치며 기류를 제한할 수 있습니다.
빠른 사전 세션 확인:
1. 육안 검사: 챔버가 깨끗해 보이고 화면이 깨끗해져야 합니다.
2. 타격 테스트: 부드럽게 불어넣어 - 공기가 자유롭게 흐를 것
3. 체온: 챔버를 적재하기 전에 실온에 있어야 합니다.
4. 잔해 제거: 남은 재료를 닦아내십시오.
도움이 되는 도구:
- 작은 브러시(종종 기화기 포함)
- 끈적한 잔여물을 위한 나무 이쑤시개
- 화면용 압축 공기
- 깊은 청소를위한 이소프로필 알코올 물티슈
3단계: 챔버 로드
로딩 기술은 기화기 유형에 따라 약간 다릅니다. 작동하는 내용은 다음과 같습니다.
전도 기화기의 경우:
채우기 레벨:전체 챔버(상단이 있는 레벨)
이유:전도는 가열된 벽에 접촉하기 위해 재료가 필요합니다. 빈 공간은 표면 접촉이 적고 증기가 적다는 것을 의미합니다.
방법:
1. 작은 도구로 땅 대마초를 퍼내다
2. 챔버에 떨어뜨림(추가하는 동안 누르지 않음)
3. 림에 채우기
4. 포장 단계로 진행
대류 기화기의 경우:
채우기 레벨:3/4 가득함(헤드스페이스를 떠나)
이유:뜨거운 공기는 재료를 통해 흐를 필요가 있습니다. 과포장 블록의 공기 흐름.
방법:
1. 대마초를 국자
2. 약 3/4 용량으로 채우십시오.
3. 상단에 보이는 공간을 남겨주세요
4. 포장을 진행합니다(매우 가벼운 터치로).
하이브리드 기화기의 경우:
채우기 레벨:가득 차 있지만 넘치지 않음
방법:
1. 전도 접근 방식을 따르십시오
2. 순수한 전도보다 약간 가벼운 포장
3. 화면에 대해 재료가 압축되지 않도록 하십시오.
4단계: 적절한 밀도로 포장
이것은 대부분의 사람들이 잘못하는 곳입니다. "포장"은 압축을 의미하는 것이 아니라 정착을 의미합니다.
올바른 압력:
- 중대: 커피 찌꺼기를 누르지 않고 눌렀다.
- 테스트를 제공: 프레스는 암석 경도가 아닌 부드러운 저항을 충족해야 합니다.
- 기류 점검: 공기를 빼서 공기를 뽑아야 합니다.
전도 패킹:
약간 더 단단하게 포장하십시오. 챔버 벽과의 접촉이 원활합니다. 계량컵에 흑설탕을 넣는 것을 생각해 보십시오. 단단하지만 단단하지 않습니다.
대류 포장:
아주 가볍게 포장하십시오. 재료를 고정하십시오. 뜨거운 공기가 흐르도록 해야 하므로 "포장"보다 "정리"를 더 많이 생각하십시오.
일반적인 포장 실수:
실수: 반복적으로 탬핑
공기 흐름을 차단하는 압축 레이어를 만듭니다. 부드러운 프레스 한 번이면 충분합니다.
실수: 손가락 포장
피부의 오일은 물질과 챔버에 영향을 줄 수 있습니다. 도구를 사용합니다.
실수: 과도하게 채우고 누르기
이것은 재료와 과충전을 압축합니다. 먼저 올바르게 채우고 정착하십시오.
5단계: 레벨 및 밀봉
최종 세부 사항은 일관된 세션에 중요합니다.
평평한 표면 만들기:
- 재료를 수평으로 맞추기 위해 브러시 또는 탬핑
- 가장자리에 봉우리, 계곡 또는 느슨한 재료가 없습니다.
- 위에서 균일하게 보여야합니다
림 청소:
- 가장자리/스레드에서 모든 재료 제거
- 여기의 파편은 적절한 밀봉을 방지합니다
- 브러시나 손가락을 사용하여 깨끗하게 닦으십시오.
씰을 확인하십시오.
- 챔버/마우스피스 닫기
- 저항없이 부드럽게 닫혀야합니다
- 모든 연삭 감각 = 실의 파편
다양한 상황에 대한 포장
마이크로투스(소량):
많은 기화기는 반으로 포장된 챔버로 어려움을 겪고 있습니다. 옵션:
- 투약 캡슐: 챔버에 맞는 작은 금속 포드
- 스크린 테크닉: 압축을 위해 상단에 두 번째 화면 추가
- 농축 패드: 챔버 바닥에 스페이서로 사용
그룹 세션:
더 길고 일관된 세션을 위해 약간 더 단단하게 포장하십시오. 전체 챔버는 통과할 때 가장 잘 작동합니다.
솔로 퀵 히트:
주문형 대류 기화기를 고려하십시오. 부분 챔버를 더 잘 처리합니다.
포장 문제 해결
문제: 약/위스피 증기
가능한 원인:팩이 너무 느슨하다
수정:밀도를 약간 높이고 전체 챔버를 확인하십시오.
문제: 그리기 어렵다
가능한 원인:포장이 너무 꽉
수정:더 가벼운 압력을 사용하고 막힘이 있는지 화면을 확인하십시오
문제: 고르지 않은 추출(일부 갈색, 일부 녹색)
가능한 원인:잘못된 분쇄 또는 고르지 않은 팩
수정:더 미세한 연마, 레벨 팩 표면, 중간 세션 교반
문제: 가혹하고 뜨거운 증기
가능한 원인:포장을 너무 꽉 조이거나 너무 잘게 빻는다.
수정:팩을 풀고, 더 거친 그라인드를 사용하십시오.
문제: 화면을 통해 떨어지는 재료
가능한 원인:너무 미세하게 갈다
수정:더 거친 그라인드를 사용하고 미세한 메쉬 스크린 교체를 고려하십시오
요약: 완벽한 팩
1. 갈기중간 수준의 일관성으로
2. 청정한로딩 전 챔버
3. 가득 따르다적절하게 (전도의 경우 전체, 대류의 경우 3/4)
4. 한패부드러운 압력으로 (압축되지 않음)
5. 수평으로표면을 청소하고 림을 청소하십시오
이러한 기본 사항을 마스터하면 기화기가 설계된 경험을 제공합니다. 확실한 경우에는 느슨한 패킹 측면에서 오류가 발생합니다. 항상 더 많이 탬핑할 수 있지만 과도하게 압축된 재료는 다시 시작해야 합니다.
이 가이드는 교육 목적입니다. 대마초법은 관할권에 따라 다릅니다.
Step 1:
Step 2:
Step 3:
Step 4:
Step 5:
Frequently Asked Questions
중간 미세는 거친 소금과 같은 대부분의 기화기에 이상적입니다. 너무 미세한 화면이 막히고 공기 흐름을 제한합니다. 너무 거친 결과는 고르지 못한 추출을 초래합니다. 특정 기화기의 요구 사항에 따라 약간 조정합니다.
중간 밀도로 포장 - 단단하지만 압축되지 않습니다. 전도 기화기는 더 단단한 팩(더 많은 표면 접촉)에서 약간 더 잘 작동합니다. 대류 기화기는 뜨거운 공기가 재료를 통해 흐를 수 있도록 더 느슨한 팩이 필요합니다.
예, 하지만 결과는 다릅니다. 일부 기화기는 더 작은 부하에 대해 감소된 챔버 또는 투여 캡슐을 가지고 있습니다. 전체 챔버를 반으로 채우면 고르지 않은 가열과 열악한 증기가 발생할 수 있습니다. 장치에 마이크로투스 옵션이 있는지 확인하십시오.
Related Guides

510 Thread Batteries: Complete Guide to Vape Pen Batteries
Everything you need to know about 510 thread batteries for vape cartridges. Learn about voltage settings, battery types, features to look for, and how to choose the right battery for your cartridges.
Best Vaporizer Temperature Settings: Effects at Each Level
Comprehensive guide about best vaporizer temperature settings: effects at each level. Learn everything you need to know with expert tips and detailed instructions.

Conduction vs Convection Vaporizers: Heating Methods Explained
Understand the difference between conduction and convection heating in vaporizers. Learn how each method affects flavor, vapor quality, efficiency, and which is best for your vaping style.