
봉을 청소하는 방법: 단계별 가이드 완료
Emma Chen
Glass Specialist
봉을 청소하는 방법: 단계별 가이드 완료
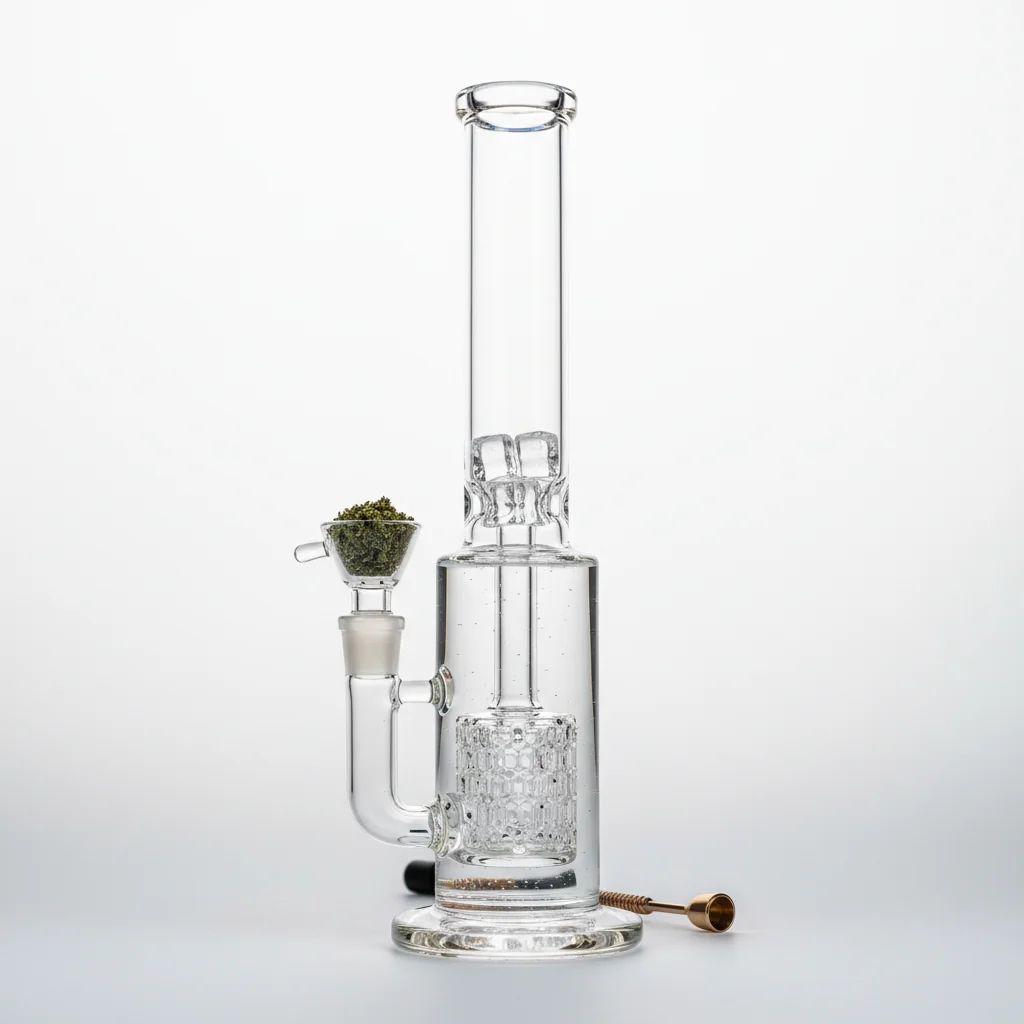
더러운 봉은 나쁘게 보일 뿐만 아니라 대마초의 맛을 망치고 박테리아를 품고 더 가혹한 타격을 가합니다. ... 에 따르면CDC 청소 지침, 재사용 가능한 품목의 정기적인 청소는 박테리아 성장을 방지합니다. 정기적인 청소는 봉을 최적으로 유지하고 전달하도록 설계된 부드럽고 풍미 있는 히트를 얻을 수 있도록 합니다. 이 가이드는 빠른 매일 헹굼부터 딥 클리닝 완고한 축적에 이르기까지 모든 것을 다룹니다.
빠른 답변
봉을 청소하려면 모든 탈착식 조각을 분해하고 따뜻한 물로 헹구고 각 조각에 이소프로필 알코올 (91 % 이상)과 거친 소금을 넣고 구멍을 덮고 2-3 분 동안 세게 흔들고 용액이있는 지퍼백에 작은 조각을 담그고 파이프 클리너로 완고한 부분을 문지르고 알코올 냄새가 남지 않을 때까지 철저히 헹굽니다. 최상의 결과를 얻으려면 매일 사용하는 경우 매주 청소하십시오.
한당신의 봉을 청소정기적으로?
건강 이유:
- 24시간 이내에 고인 물에서 박테리아가 자랍니다.
- 수지 축적에서 곰팡이가 발생할 수 있습니다.
- 더러운 유리에 생물막이 형성
- 오염된 물은 흡입시 입자를 방출합니다.
품질 이유:
- 신선한 맛(수지의 얼룩 맛)
- 더 부드러운 히트(빌드업은 공기 흐름을 제한)
- 더 나은 여과(청정수 필터가 더 좋습니다)
- 적절한 여과기 기능
실용적인 이유:
- 무거운 축적물을 제거하는 것보다 정기적으로 청소하기가 더 쉽습니다.
- 영구적인 얼룩 방지
- 봉봉 수명 연장
사용 사이에 보관할 수 있도록 대마초를 신선하게 보관하십시오.유리를 끼우 [상장 항아리](https://munchmaker.com/product-category/glass-stash-jars/).
필요한 것
필수 용품:
- 이소프로필 알코올(91% 이상 - 99% 이상)
- 굵은 소금(코셔, 바다 소금 또는 암염)
- 뜨거운 물
- 지퍼백(작은 조각용)
- 파이프 클리너 또는 병 브러시
선택적이지만 도움이 되는 것:
- 고무 플러그 또는 플라스틱 랩
- 고무줄
- 상업용 봉 클리너(알코올/소금 대체)
- 면봉
작동하는 소금 유형:
- 굵은 코셔 소금(최고)
- 바다 소금
- 암염
- 엡섬 소금
식탁용 소금을 사용하지 마십시오- 너무 곱고 너무 빨리 녹습니다.
알코올과 소금 방법 (가장 효과적인)
1단계: 모든 것을 분해
모든 이동식 부품 제거:
- 둥근 모양
- 다운템
- 모든 재 캐처 또는 첨부 파일
- 여과기 삽입물(탈착 가능)
이유:각 조각은 개별적인 관심이 필요합니다. 조인트에 조립된 트랩 잔류물을 청소합니다.
2단계: 따뜻한 물로 헹구십시오.
모든 조각에 따뜻한(뜨거운 물이 아닌) 물을 흐르게 합니다.
- 신선한 잔류물을 느슨하게
- 경화된 축적을 부드럽게 합니다.
- 세척액을 위한 표면 준비
팁:무거운 축적의 경우 먼저 5분 동안 봉에 따뜻한 물을 둡니다.
3단계: 봉에 알코올과 소금을 넣는다.
메인 봉 챔버의 경우 :
1. 이소프로필 알코올을 붓습니다 - 얼룩진 부분을 덮을 수 있을 만큼
2 . 굵은 소금 2~3큰술 넣어
3. 소금은 연마제 역할을 합니다(알코올에 녹지 않음).
필요한 금액:
- 작은 봉 : 알코올 1/2컵, 소금 2큰술
- 미디엄 봉 : 알코올 1컵, 소금 3큰술
- 큰 봉 : 알코올 1.5 컵, 소금 4 tbsp 이상
4단계: 뚜껑을 덮고 흔들어
탈착식 그릇이 있는 봉의 경우:
1. 손바닥이나 플러그로 마우스피스를 덮으십시오.
2. 아래로 스템 구멍을 손가락이나 플러그로 덮으십시오.
3. 2~3분간 세게 흔들어 주세요.
4. 알코올이 수지를 녹이는 동안 소금을 스크럽
흔들기 기술:
- 부드러운 소용돌이로 시작
- 더 열심히 흔들기 진행
- 모든 표면에 도달하기 위해 봉을 회전
- 눈에 띄게 얼룩진 부분에 초점
5단계: 작은 조각을 청소하십시오(그릇과 아래로)
지퍼백 방법:
1. 한 가방에 그릇을 넣고 다른 가방에 아래로 내려 놓으십시오.
2 . 커버 조각에 알코올 추가
3. 한 봉지에 소금 1큰술을 넣는다.
4. 1~2분간 밀봉하고 흔들어
5. 완고한 조각이 30분 이상 담가도록 하십시오.
확산된 다운스템의 경우:
슬릿에 각별히 주의하십시오. 쉽게 막힐 수 있습니다. 담근 후 파이프 클리너를 사용하십시오.
6단계: 문제 영역 스크럽
흔들거나 담그고 나면 완고한 부분에 도구를 사용하십시오.
- 파이프 클리너:다운스템과 작은 구멍에 적합
- 병 브러쉬:메인 챔버에 적합
- 면봉:조인트 연결 및 좁은 부분을 위해
- 칫솔:여과기 팔의 경우
여과기는 추가 주의가 필요합니다- 퍼크 구멍을 통해 용액을 직접 흔들어 주세요.
7단계: 철저히 헹구십시오
이 단계는 중요합니다.
1. 2분 이상 따뜻한 물로 헹구어 주세요
2 알코올 냄새가 남지 않도록
3. 모든 물을 흔들어
4. 작은 조각을 흐르는 물에 헹굽니다.
철저한 헹굼이 중요한 이유:
- 잔류 알코올 맛이 끔찍하다
- 알코올 연기를 흡입하는 것은 해롭다
- 염분 잔류물은 다음 세션에 영향을 미칩니다
8단계: 건조 및 재조립
1. 과도한 물을 흔들어
2. 공기를 완전히 말리십시오(또는 종이 타월 사용).
3. 건조되면 다시 조립
4. 사용하기 전에 신선한 물을 추가하십시오
다양한 봉 유형 청소
유리 봉
- 가장 내성적인 청소 방법
- 고농도 알코올을 사용할 수 있습니다
- 소금 마모가 긁히지 않습니다
- 표준 알코올/염법으로 최상의 결과
실리콘 봉
하세요:
- 따뜻한 비눗물을 사용하십시오
- 얼린 후 잔류물을 흔들어
- 실리콘 안전 세제 사용
하지 마세요:
- 알코올 사용 (시간이 지남에 따라 실리콘 분해)
- 연마 스크러버 사용
- 고온 적용
아크릴 봉
하세요:
- 따뜻한 물과 주방세제를 사용하세요
- 상업용 아크릴 안전 클리너 사용
- 뜨거운 물에 불려주세요(끓지 않는)
하지 마세요:
- 알코올 사용(탁/균열의 원인)
- 거친 연마재 사용
- 극한의 온도에 노출
퀵클린 vs 딥클린
매일 퀵 클린 (2분)
각 세션 후:
1. 즉시 오래된 물을 비우십시오
2 따뜻한 물로 헹구십시오.
3. 느슨한 잔류물을 제거하기 위해 흔들어
4. 신선한 물을 추가
5. 마우스피스의 빠른 닦음
주요 축적을 방지그리고 봉을 기능적으로 유지합니다.
주간 딥클린(15~20분)
매일 사용하는 경우:
1. 완전 알코올/소금 방법
2. 모든 조각을 별도로 청소
3. 스크럽 문제 영역
4. 철저한 헹굼
최적의 성능 유지그리고 건강 문제를 예방합니다.
월간 집중 청소
무거운 사용자의 경우:
1. 연장된 담금(1시간 이상)
2. 여러 쉐이크 세션
3. 여과기의 상세한 스크러빙
4. 영구적 얼룩 검사
여과기 청소
여과기는 도달하기 어려운 지역에 잔류물을 가둡니다.
일반적인 접근 방식:
1. PERC 수준 이상의 세척액으로 봉을 채우십시오.
2. 구멍을 덮고 흔들어 주세요 - 솔루션이 Perc를 통해 이동합니다.
3. 더 오래 담가두십시오(완전한 축적의 경우 1시간 이상)
4. 접근 가능한 지역에 얇은 파이프 클리너를 사용하십시오.
5. 필요에 따라 쉐이크 사이클을 반복합니다.
PERC 유형별:
- 나무 퍼크:가장 어렵습니다. 여러 개의 팔을 덫에 걸려 잔류물 연장 담금 필수.
- 벌집 퍼크:작은 구멍이 막힙니다. 구멍을 통해 용액을 직접 흔들어 주세요.
- 샤워기 퍼크:청소하기가 더 쉽습니다. 솔루션은 자연스럽게 흐릅니다.
- 인라인 퍼크:일반적으로 접근 가능합니다. 파이프 클리너는 잘 작동합니다.
상업용 봉 클리너
사용 시기:
- 알코올/소금의 대체품
- 실리콘 또는 아크릴 조각
- 알코올을 사용할 수 없을 때
- 과도한 충성력을 위해
인기있는 옵션:
- 공식 420
- 그런물 밖에 있다
- 랜디의 블랙레이블
- 오렌지 만성
장점:목적에 맞게 설계된 일부는 재사용 가능
단점:알코올/소금보다 비싸다
얼마나 자주 청소해야
지금 청소해야 하는 신호:
- 눈에 보이는 잔류물 축적
- 물이 흐리거나 변색됨
- 낡거나 잊혀진 맛
- 제한된 기류
- 악취
축적 방지
물을 자주 갈아주세요:
- 매회 신선한 물(이상)
- 최소한 물을 24시간 이상 그대로 두지 마십시오.
애쉬 포수 사용:
- 메인 챔버 앞에서 파편을 잡는다
- 전체 봉보다 청소가 훨씬 쉽습니다.
- 메인 봉 청소를 크게 줄입니다
그릇을 너무 많이 채우지 마십시오.
- 봉에 덜 들어가는 파편
- 더 깨끗한 굽기
사용 후 빠른 헹굼:
- 30초간 헹구면 축적을 막아줍니다
- 건조된 수지를 제거하는 것보다 훨씬 쉽습니다.
문제 해결
문제: 얼룩이 나오지 않습니다
- 더 오래 담가보세요(밤새)
- 고농축 알코올 사용
- 상업용 클리너를 시도하십시오
- 일부 얼룩은 무시하면 영구적으로 됩니다.
문제: 여과기 내부에 도달할 수 없습니다.
- 장기간 담그다
- 퍼크 구멍을 통해 용액을 흔들어
- 일부 영역을 수락하면 약간 얼룩이 남을 수 있습니다.
문제: 수지 축적이 빠르게 반환됩니다.
- 저품질 대마초를 사용하고 있을 수 있습니다.
- 물을 더 자주 갈아주세요
- 매번 사용 후 빠르게 헹구십시오.
문제: 청소 후 흐린 유리
- 경수 침전물 - 증류수 헹굼 사용
- 알코올 잔류물 - 더 철저하게 헹굽니다
- 오래된 건물에서 영구 에칭
안전 참고 사항
- 환기알코올을 사용할 때
- 절대 알코올을 가열하지 마십시오- 화재 위험
- 완전히 헹구다사용전
- 폐기물을 적절하게 처리- 수지에 수지를 붓지 마십시오.
- 화염에서 멀리 유지알코올이 증발할 때까지
이 가이드는 교육 목적입니다. 대마초법은 관할권에 따라 다릅니다.
Step 1:
Step 2:
Step 3:
Step 4:
Step 5:
Step 6:
Frequently Asked Questions
일일 사용자의 경우 각 세션 후 빠른 헹굼 및 매주 딥 클린. 가끔 사용하는 사용자의 경우 몇 번의 세션마다 딥 클린을 사용합니다. 물이 흐리거나 썩은 맛이 나면 청소할 차례입니다.
거친 소금(코셔, 바다 소금 또는 암염)은 연마재로 훨씬 더 잘 작동합니다. 식탁용 소금은 너무 미세하고 너무 빨리 녹습니다. 엡솜 소금도 잘 작동합니다.
91% 이상은 훨씬 더 빠르고 더 잘 작동합니다. 70%는 더 많은 물을 함유하고 있어 청소력을 감소시킵니다. 무거운 축적의 경우 99% 이소프로필이 이상적입니다.
Related Guides
Ash Catcher Guide: Keep Your Bong Clean Longer
Complete guide to ash catchers for bongs: what they do, types including dry and percolator ash catchers, joint sizes and angles, how to use and clean them, and how to choose the right one.

Ash Catchers: What They Do and Why Use One
Learn what ash catchers do, how they keep your bong clean, and whether you need one. Understand different types, how to choose the right size, and maintenance tips.
Beaker vs Straight Tube Bongs: Which Style is Better?
Comprehensive guide about beaker vs straight tube bongs: which style is better?. Learn everything you need to know with expert tips and detailed instructions.