
クロス ジョイントを転がす方法: 象徴的な雑草十字の完全なチュートリアル
Mike Rodriguez
Rolling Expert
クロス ジョイントを転がす方法: 象徴的な雑草十字の完全なチュートリアル
クロスジョイント(有名になった)パイナップル エクスプレス) は、ローリング テクニックの最高の宝石です。2 つのジョイントが 90 度で交差し、3 点から同時に燃えます。 このエキスパート レベルのテクニックはやりがいがありますが、非常に印象的
迅速な答え
クロス ジョイントをロールするには: 1 つの厚いメイン ジョイントと 1 つのより薄いクロス ジョイントを転がし、厚いジョイントの中心に穴を開け、穴に細いジョイントを挿入してクロス シェイプを作成し、ウェット ローリング ペーパー ピースで交差点をシールし、3 つの端からすべてのエアフローを同時にテストします。 1.5-2G 大麻の合計および専門家のローリング スキルが必要です。
クロスジョイントとは何ですか?
構造:
- 1 つの厚い「メイン」ジョイント (垂直)
- 1 つの薄い「クロス」ジョイント (水平)
- 90 度の角度で交差します
- 3 つの端が同時に燃えます
有名にした: パイナップル エクスプレス ムービー (セス ローゲンとジェームズ フランコ)
難易度: エキスパートレベル - しっかりとしたローリングの基礎が必要
クロス ジョイント用品については、チェックアウトしてくださいカスタム[ ローリングペーパーMunchmakers より](https://munchmakers.com/product-category/custom-rolling-papers/)。 高度なローリングチュートリアルの場合、IMDB のパイナップル エクスプレスこの象徴的なテクニックを有名にしました。
なぜクロスジョイントを巻くのですか?
理由:
- 究極の見せびらかしテクニック
- 印象的な視覚的魅力
- ユニークな喫煙体験 (3 つのサクランボ)
- エンジニアリングの課題
- 特別な日/お祝い
実用的ではない: クロス ジョイントは無駄で、難しく、実用的ではありません。 それらは、楽しみとスペクタクルを目的としており、効率性ではありません。
前提条件
試す前に、次の操作を実行できる必要があります。
- 通常の関節を完全に転がす (90% 以上の成功率)
- ロールコーンジョイント
- ジョイントをきつく、均一に詰める
- ローリング ペーパーで繊細に作業する
できないなら: 最低でも 1 か月間定期的に関節を練習します。 クロス ジョイントは、あなたを苛立たせ、大麻を無駄にします。
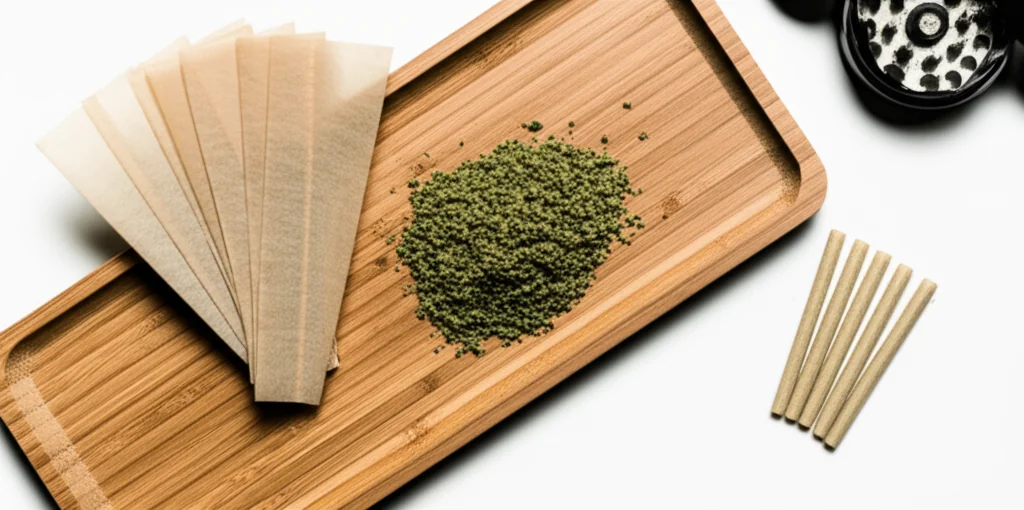
必要な材料
- キングサイズのローリングペーパー (2-3 紙)
- 通常の 1¼ 用紙 (2 紙)
- フィルター/松葉杖 (2)
- 大麻を挽いた (合計 1.5-2g)
- ペーパークリップまたはポーカー ツール
- パッチ用の余分な転がり紙
- 忍耐
ステップバイステップ: クロス ジョイントをローリングする
ステップ 1: 2 つの別々のジョイントをロール
メインジョイント (垂直):
- キングサイズの紙を使う
- 厚くて固い
- 1-1.5g 大麻パック
- 太らせる - 構造的完全性が必要
クロスジョイント (横):
- 1¼ 用紙を使用
- メインよりも細くロール
- パック 0.5-0.75g
- メインジョイントホールに嵌め込む必要があります
どちらも次のようにする必要が
- ぎゅっと詰まっている
- 均等に分散
- 完全に密封されています
- ソフトスポットはありません
ステップ 2: 中心点を見つける
厚いメインジョイントでは、
- 正確な中心を求めるための測定
- 指で軽く印をつける
- これは、クロス ジョイントが交差する場所です
クリティカル: 中心点 = 両面に均一に焼ける
ステップ 3: 穴を開ける
ペーパークリップまたはポーカーを使用する:
1. マークされた中心点に挿入
2です . 真っ直ぐ反対側に押し込む
3. 小刻みにして穴を少し広げます
4. クロスジョイントの直径よりもちょうど広いはずです
気をつけてね: 関節を引き裂かず、きれいな穴を開けてください
ステップ 4: クロス ジョイントを挿入する
細いジョイントを慎重にスライドさせて穴を開けます
- ゆっくりと押し通す
- ぴったりはぴったりであるはずですが、強制はありません
- 両側で同じ長さ
- 主ジョイントに対する 90 度の角度
チェック: クロスは両側で均等に突き出ているはずです
ステップ 5: 交差点を封印する
これは重要です- 空気漏れを防ぎます。
1. 小片をながれ紙(サムネイルサイズ)で破れます
2です . よくなめてねばねばします
3. ジョイントが交わる交差点を巻き取る
4. メインとクロス ジョイントの間のすべてのギャップをカバーします
5. しっかりと押して密閉します
3~4枚の紙を使用するさまざまな角度からのラッピング
ステップ 6: エアフローをテストする
点灯前、3 つの端からのテスト ドロー:
1. メインジョイントチップから描画
2. 左端から描画する
3. 右クロスエンドから描画する
3 つすべてが空気を抜く必要があり。 ブロックされている場合は、紙のパッチで漏れを見つけてシールします。
ステップ 7: 3 つの端すべてを照らす
印象的な部分:
方法 1 (ソロ):
- 軽いメインチップが先
- 両端の両端をすばやく照らす
- スピードと調整が必要
方法 2 (友達と):
- 2 ~ 3 人がそれぞれのライトを同時に照らします
- より簡単で信頼性の高い
ゴール: 3 つのサクランボが一気に燃えている
ステップ 8: 煙と回転
喫煙テクニック:
- メインジョイントのみから引き出します (クロスエンドから煙は出さないでください)
- 回転させるために、3 つの側面すべてを均等に燃やします
- エンジニアリングの動作をご覧ください
クロスエンドが焼き尽くされる煙をメイン ジョイントに送り込む
一般的なクロス ジョイントの問題
問題: クロス ジョイントが穴から落ちる
原因: 穴が大きすぎ、クロスジョイントが薄すぎる
ソリューション: クロス ジョイントを厚くするか、交差点でより多くのシール ペーパーを使用します。
問題: 空気が流れない
原因: 交差点が密閉されすぎて、気流が遮断されています
ソリューション: シール パッチに小さな穴を開けて空気の流れを可能にするか、またはシール ペーパーの使用量を減らします。
問題: ジョイントが点灯しません
原因: 緩すぎる、パッキングの不均一、または空気漏れ
ソリューション: 組み立てる前に両方のジョイントをきつく締め、隙間を完全に密閉します。
問題: やけどのない火傷 (片側)
原因: クロス ジョイントが中心にない、または片側がよりきつく詰め込まれています
ソリューション: クロス ジョイントが完全に中央に配置されていることを確認し、両側に均等に詰めます
雑草の量は?
合計: 1.5-2.5 グラム
内訳:
- メインジョイント: 1-1.5g
- クロスジョイント: 0.5-1g
比較のために:
- 通常のジョイント: 0.5-0.75g
- 通常のブラント: 1-2G
クロス ジョイントはもっと使う大麻と燃焼の速さ (3 点燃焼)
無駄ですか
はい、非常に無駄です:
- 3点同時に燃える
- 大麻はあなたが喫煙できるよりも早く燃えます
- 未使用の煙が大量に排出されます
- 効率的な消費ではない
とにかくいつやるの: 特別な機会、お祝い、披露、楽しいエンジニアリング チャレンジ
変奏曲
イエス・ジョイント (四方十字)
さらに高度な:
- メイン ジョイントと交差する 2 つのクロス ジョイント
- 5つの喫煙ポイントを作成します
- 3~4Gの大麻が必要
- 非常に難しい
真のマスターのみ
編み込みジョイント
別の印象的なテクニック:
- 3 つの関節を編み上げた
- 異なる視覚的魅力
- クロスよりもやや簡単
成功へのヒント
ヒント 1: 通常の関節を最初に完成させます
95% の確率で完全な通常の関節を転がすことができない場合、クロス ジョイントの準備ができていません。
ヒント 2: メイン ジョイントを Thicc にする
太い関節には、クロス ジョイントをサポートするための構造的完全性が必要です。 大麻を恥ずかしがらないでください。
ヒント 3: たっぷりと封印する
オーバーシールは、アンダーシールよりも優れています。 余分なパッチはいつでも取り除くことができますが、エア漏れによってクロス ジョイントが台無しになります。
ヒント 4: 照明前にテストする
照明の前に、常にすべての端からの気流をテストしてください。 点灯後の問題の発見 = クロス ジョイントの失敗。
ヒント 5: 失敗を受け入れる
経験豊富なローラーでも、クロス ジョイントの 30 ~ 40% に失敗します。 それは挑戦の一部です。
文化的意義
パイナップル エクスプレス: クロス ジョイントを主流の意識にもたらしました
セス・ローゲン: 「これは共同工学の渦の頂点です」
大麻コミュニティ: クロス ジョイントは尊重されます ローリング アチーブメント
象徴: 工芸品への献身、エンジニアリングの考え方、芸術のために雑草を無駄にする意欲を示しています
このガイドは教育目的のものです。 大麻法は法域によって異なります。
Step 1:
Step 2:
Step 3:
Step 4:
Step 5:
Step 6:
Frequently Asked Questions
はい、クロス ジョイントは専門家レベルです。 しっかりとした関節転がりスキル、安定した手、そして忍耐が必要です。 学習時に何度も失敗することを期待してください。 最初に定期的な関節を練習します。
クロス ジョイントは、メイン ジョイントで約 1 ~ 1.5 グラム、クロス ジョイントで 0.5 ~ 1 グラムの合計で 1.5 ~ 2 グラムを使用します。 複数の点からの焼損により、通常の関節に比べて無駄です。
はい! メインチップを点灯し、両端のクロスジョイントを同時に両端に照らします。 これにより、3 点からの煙による象徴的なクロス ジョイント体験が生まれます。 通常、2 ~ 3 人が適切に点灯する必要があります。
Related Guides
Rolling Paper Sizes Explained: 1 1/4, King Size, and More
Comprehensive guide about rolling paper sizes explained: 1 1/4, king size, and more. Learn everything you need to know with expert tips and detailed instructions.

Best Rolling Papers for Beginners: Complete Buying Guide 2026
Discover the best rolling papers for beginners including RAW, Zig-Zag, and OCB. Learn about sizes, materials (rice vs hemp vs wood pulp), and which papers are easiest to roll with.
Clear Rolling Papers: Are Cellulose Papers Worth It?
Comprehensive guide about clear rolling papers: are cellulose papers worth it?. Learn everything you need to know with expert tips and detailed instructions.