
Come arrotolare un giunto perfetto per i principianti: tutorial passo dopo passo 2026
Mike Rodriguez
Rolling Expert
Come arrotolare un giunto perfetto per i principianti: tutorial passo dopo passo 2026
Rotolare un giuntoè un'abilità fondamentale della cannabis che sembra intimidatoria ma diventa naturale con la pratica. Secondo gli educatori della cannabis, la persona media raggiunge risultati coerenti dopo 10-15 tentativi di pratica. Questo tutorial completo del 2026 ti guida attraverso ogni fase del rotolamento di un classico giunto, dalla selezione delle carte e dalla preparazione del filtro al sigillo finale. Con la giusta tecnica e un po' di pazienza, rotolerai in cannocchiali coerenti e fumabili in pochissimo tempo.
Guide correlate:Prima di iniziare, consulta le nostre guide suScegliere il giusto [ macina](https://guides.munchmakers.com/guide/grinder-maintenance-schedule) eselezionando [ rotolamento](https://guides.munchmakers.com/guide/best-rolling-papers-beginners) per i migliori risultati.
Risposta rapida
Per arrotolare un giunto: crea un filtro piegato a fisarmonica, macina la cannabis in modo uniforme, metti il filtro sulla carta, distribuisci la cannabis lungo la piega, modella in un cilindro rotolando avanti e indietro, infila il bordo non gengivale sotto la cannabis, arrotola verso l'alto fino alla striscia di gomma, lecca e sigilla. Ci vuole pratica, ma la maggior parte delle persone può lanciare un'articolazione fumabile entro 3-5 tentativi.
video tutorial
Guarda questa guida visiva passo-passo per vedere l'intero processo di rolling in azione:
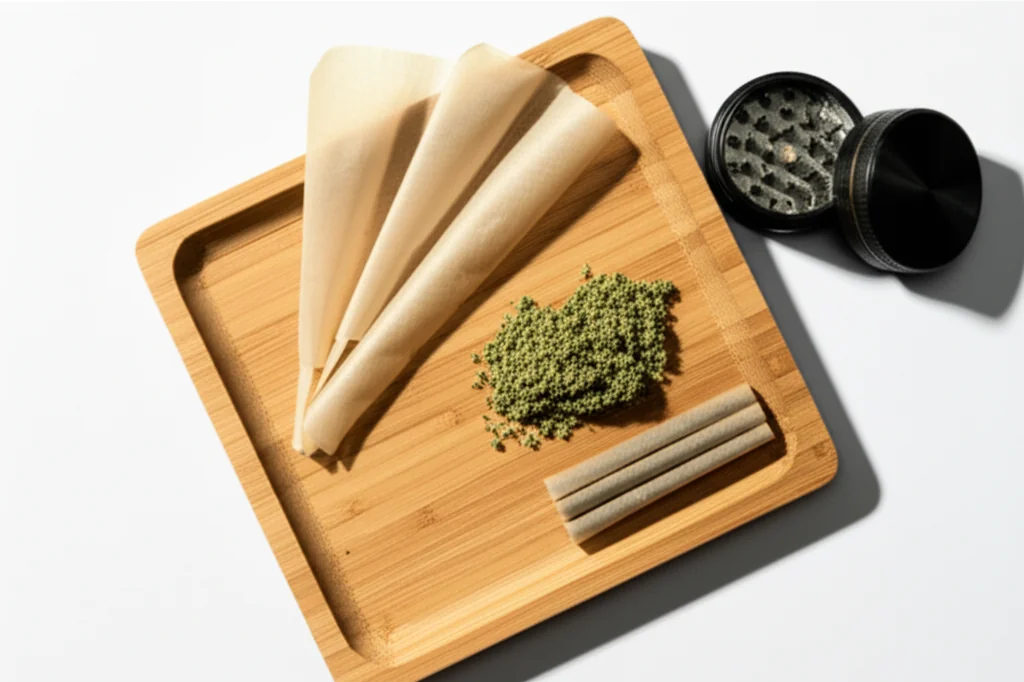
Di cosa avrai bisogno
Richiesto:
- rotolamento(1¼ di taglia consigliata per i principianti)
- cannabis macina(0,5-0,75 grammi)
- Suggerimenti per il filtro(cartone sottile, può utilizzare il biglietto da visita)
- macina(o dita se necessario)
- accendino
Consigliato:
- vassoio(o libro/rivista pulito)
- Penna o strumento di imballaggio
- documenti extra per la pratica
Selezione carta per principianti
Per forniture di rotolamento premium, dai un'occhiataCarte da rotolamento personalizzate di Munchmakers. Per consigli generali sulla tecnica di rotolamento,wikihowoffre guide illustrate.
Le migliori scelte per il 2026:
- Canapa biologica cruda- Naturale, facile da lavorare, perdonando per i principianti. Più raccomandato dagli educatori della cannabis per l'apprendimento.
- Elementi Carte di Riso- Sottile ma robusto, brucia lento, interferenza del gusto minima
- Zig-zag 1¼- Classico, ampiamente disponibile, conveniente. standard del settore per decenni.
- OCB biologico- gomma naturale ultrasottile, preferita da rulli esperti
Taglia:Inizia con 1¼ (78 mm). King Size può essere ingombrante per l'apprendimento. Suggerimento per esperti: i documenti più piccoli forzano uno sviluppo di tecniche migliori.
Ulteriori informazioni:Controlla la nostra guida completa suLe migliori carte per rotoli per principiantiper confronti dettagliati.
Processo di rotolamento passo dopo passo
Passaggio 1: prepara il consiglio del filtro
Il filtro (chiamato anche stampella o punta) fornisce una struttura, impedisce alla cannabis di entrare nella bocca e ti dà qualcosa da tenere.
Come piegare:
1. Strappare o tagliare la carta da filtro a circa 1/2 pollice di larghezza, 2 pollici di lunghezza
2 . A un'estremità, piega avanti e indietro 3-4 volte (motivo a fisarmonica)
3. Arrotolare il resto della carta attorno alla fisarmonica
4. Dovrebbe essere un cilindro sul diametro di una matita
Perché la fisarmonica è importante:Fornisce stabilità e flusso d'aria. Senza di esso, il filtro può crollare mentre fuma.
Passaggio 2: macina la tua cannabis
Approfondimento esperto:La consistenza del macinare è il fattore n. 1 che influenza la qualità dell'ustione. I rulli professionali sottolineano che la macinazione adeguata è più importante della tecnica di laminazione stessa.
Usa un macinino di qualità per ottenere una consistenza costante e soffice:
- non troppo bene:La consistenza simile a una polvere tira attraverso la carta e limita il flusso d'aria. provoca colpi duri.
- non troppo grossolano:Grandi pezzi creano grumi e bruciature irregolari. Crea "runner" o "canoe".
- Giusto:Soffici, anche pezzi simili alla consistenza origano essiccato. dovrebbe tenere la forma quando viene premuto.
Rimuovere gli steli:Creano buchi nell'articolazione e hanno un sapore aspro. Anche i piccoli steli influenzano la qualità delle ustioni.
Importo:0,5-0,75 grammi per un'articolazione standard. Meglio iniziare più piccolo: puoi sempre tirarne un altro.
Raccomandazione macinino:Una smerigliatrice di qualità da 4 pezzi con[ affluenzacatcher](https://munchmakers.com/blog/the-ultimate-guide-to-weed-grinders-with-kief-catchers-2/) garantisce risultati coerenti. Consulta la nostra guida suI migliori macinacaffè per la cannabio SfogliaSmerigliatrici premium presso Munchmakers.
Passaggio 3: crea la piega
Tieni la carta con la striscia di gomma in alto, di fronte a te. Posiziona il filtro preparato a un'estremità (di solito l'estremità sinistra per i destrimani).
Crea un canale:Piega delicatamente la carta nel senso della lunghezza per creare una leggera forma a V o un abbeveratoio. Questa piega conterrà la tua cannabis e renderà più facile il rotolamento.
Passaggio 4: riempire con cannabis macinata
Distribuire la cannabis macinata in modo uniforme lungo la piega:
- Altro nel mezzo, affusolato leggermente verso le estremità
- lasciare spazioalla striscia di gomma e vicino al filtro
- Non riempire eccessivamente- Meno è più facile da rotolare che di più
Errore comune:Caricamento troppo cannabis. Puoi sempre tirare una seconda articolazione. Le articolazioni eccessivamente riempite sono quasi impossibili per i principianti a rotolare correttamente.
Passaggio 5: modella l'articolazione
È qui che si sviluppa l'abilità di rollio:
il movimento:
- Pizzica la carta tra i pollici e gli indici su entrambi i lati della cannabis
- Rotolare avanti e indietro delicatamente (non da un lato all'altro - movimento avanti e indietro)
- La cannabis dovrebbe confezionare e modellare in un cilindro
- Il filtro aiuta a mantenere la forma su quell'estremità
Obiettivo:Cilindro di cannabis imballato uniformemente che è sodo ma non compresso.
Tempo necessario:15-30 secondi di modellatura. Non avere fretta.
Passaggio 6: la piega (passo critico)
È qui che la maggior parte dei principianti lotta. L'induzione determina il successo o il fallimento.
Come infilare:
1. Lavorare dall'estremità del filtro (più facile)
2 . Infila il bordo inferiore della carta (lato non gengivale) sotto la cannabis e sopra il filtro
3. Usa i pollici per infilare mentre gli indici applicano una leggera pressione verso il basso
4. Una volta iniziato, la piega dovrebbe continuare lungo la lunghezza mentre rotoli
La sensazione:Dovresti sentire la carta catturata sotto la cannabis. Se non è rimboccato, rimodellare la cannabis più forte.
Problema comune:La carta si piega su se stessa senza catturare sotto la cannabis. Soluzione: impacchettare prima la cannabis nella forma del cilindro.
Passaggio 7: rotolare sulla striscia di gomma
Una volta avviata la piega:
1. Continuare a rotolare verso l'alto con una pressione uniforme
2 . La carta dovrebbe avvolgere il cilindro di cannabis
3. Rotolare finché non viene visualizzata solo la striscia di gomma
4. Mantieni la tensione costante per tutta la lunghezza
Verifica:Prima di sigillare, guarda in basso. Dovrebbe essere uniforme, non bitorzoluto o sciolto.
Passaggio 8: sigillare il giunto
Leccare la gomma:
- Leccate l'intera striscia di gomma generosamente (non essere timido)
- Alcuni documenti hanno bisogno di più umidità di altri
- iniziare da un'estremità e lavorare all'altra
- Premi con fermezza mentre sigilli
- Tenere il giunto sigillato per 5-10 secondi
Alternativa moderna:Alcuni usano un panno umido invece di leccarsi per l'igiene.
Passaggio 9: imballare e finire
Imballare l'estremità aperta:
- Usa una penna, un bastoncino o il tuo mignolo
- imballare delicatamente la cannabis dall'estremità aperta
- Questo stringe l'intera articolazione e garantisce un'incendiabilità uniforme
- Non fare le valigie così forte da limitare il flusso d'aria
Chiusura della punta:
- Torcere la carta in eccesso chiusa (metodo classico)
- Oppure lascialo aperto e brucia con cura l'eccesso quando si accende
- La punta torto impedisce alla cannabis di cadere
Passaggio 10: controllo della qualità
una buona articolazione:
- fermo ma non duro come una roccia
- spessore anche lungo la lunghezza
- può attirare l'aria facilmente
- Completamente sigillato senza spazi vuoti
- Filtrare sicuro e non gira
Se fallisce controllare:Fumalo comunque! "brutto ma funzionale" ti insegna di più che buttarlo via.
Problemi e correzioni di rolling comuni
Problema: l'articolazione è bitorzoluta/irregolare
Causa:Distribuzione irregolare della cannabis o modellazione insufficiente prima del rotolamento.
FISSARE:Dedica più tempo alla modellatura del passaggio 5. Ridistribuire la cannabis se necessario prima di infilare.
Problema: articolazione troppo allentata, si sfalda
Causa:Tensione insufficiente durante il rotolamento o troppo riempita.
FISSARE:Usa meno cannabis la prossima volta. Applicare una pressione più consistente durante il rotolamento.
Problema: giunto troppo stretto, non attingerà
Causa:cannabis compressa o imballato troppo saldamente.
FISSARE:imballare più delicatamente. Prova di prelievo prima della sigillatura - dovrebbe avere un flusso d'aria facile.
Problema: strappi di carta durante il rotolamento
Causa:Troppa pressione, mani secche o carte di bassa qualità.
FISSARE:Usa un tocco più delicato. Le dita leggermente inumidite. comprare carte migliori.
Problema: il filtro cade
Causa:Filtro troppo piccolo o non correttamente integrato nel rotolo.
FISSARE:Fai il filtro leggermente più grande. Assicurati che sia arrotolato nell'articolazione, non solo posizionato all'estremità.
Problema: forma del cono invece del cilindro
Causa:Più cannabis da un lato all'altro.
FISSARE:Questo in realtà va bene! Le articolazioni del cono sono popolari (estremità del grasso, estremità del filtro stretto). Molti preferiscono questa forma.
Problema: corse o canoe
Causa:imballaggio irregolare o vento durante il fumo.
FISSARE:Concentrati sulla distribuzione uniforme nel passaggio 4. Ruota l'articolazione mentre si accende per garantire uniformi ciliegie.
Consigli di rotolamento da esperti
Suggerimento 1: inizia con più carta di quanto pensi
I principianti usano spesso fogli troppo piccoli. 1 ¼ di dimensione ti dà spazio per lavorare.
Suggerimento 2: esercita prima il tabacco o le erbe aromatiche
Alcune persone praticano la tecnica del rotolamento con tabacco a buon mercato o erbe essiccate prima di "sprecare" cannabis. sviluppa la memoria muscolare.
Suggerimento 3: utilizzare un metodo di rotolamento della banconota da un dollaro
Metti il filtro e la cannabis in una banconota da un dollaro, modella, quindi fai scorrere la carta nella banconota e usa la banconota come guida di rotolamento. Ruote di allenamento per l'apprendimento.
Suggerimento 4: esistono coni prefabbricati
nessuna vergogna nell'usareconi pre-rollatiche ti riempie e basta. Molti rulli esperti li usano per coerenza.
Suggerimento 5: i primi 10 saranno brutti
Accetta che i primi tentativi saranno funzionali nella migliore delle ipotesi. Il rollio articolare è un'abilità che richiede pratica. Il numero 15-20 è quando la maggior parte delle persone raggiunge la coerenza.
Considerazioni avanzate
Impatto del tipo di carta
Carte di canapa:Lento, anche brucia. Sapore naturale. Abbastanza spesso da perdonare.
Carte di riso:molto sottile. gusto più pulito. Meno indulgente per i principianti.
Polpa di legno:Carte classiche. Ustione più veloce. Sapore forte.
Rotolamento senza filtro
Alcuni preferiscono le articolazioni senza filtri. Pizzica l'estremità chiusa o piegala. Fornisce un flusso d'aria leggermente migliore ma richiede un'attenta fumo per evitare la cannabis sciolta in bocca.
il metodo del cono
Invece del cilindro, modellare intenzionalmente un cono (più largo alla punta, stretto al filtro). Molti lo trovano più facile. Riempi l'estremità larga con più cannabis, creando una conicità naturale.
La pratica rende perfetti
Cronologia realistica:
- Giunti 1-3:Probabilmente brutto, forse fumabile
- Giunti 4-7:funzionale, migliorando
- Giunti 8-15:costantemente fumabile
- Giunti 15+:Sviluppare il tuo stile personale
Non mollare!Anche i rulli esperti ricordano inizialmente di lottare. È un'abilità fisica come legare le scarpe - sembra impossibile finché all'improvviso non scatta.
Alternative al rotolamento a mano
Coni pre-rollati:
- Acquista la carta già sagomata
- Basta riempire con cannabis macinata
- imballare e torcere
- Risultati coerenti ogni volta
- Ulteriori informazioni:Vedi il nostroConi pre-rollati vs Confronto a mano a mano
Macchine per laminazione:
- Dispositivo da $ 5-10 che ti gira
- Carica carta e cannabis, gira la maniglia
- Cilindri perfetti ma meno soddisfacenti del rotolamento a mano
- Migliori opzioni:lasciareGuida ai rulli di giunzione
Chiedi a qualcuno di rotolare:
- Non c'è da vergognarsi ad avere un amico esperto per te mentre impari
- Osserva da vicino la loro tecnica
Consigli esperti per risultati migliori
Da rulli professionali (edizione 2026):
1. La temperatura è importante:Le mani leggermente calde e asciutte funzionano meglio. Le mani fredde o appiccicose fanno incollare la carta in modo goffo.
2. La tecnica di illuminazione influisce sulla qualità del rotolo:Anche il giunto meglio laminato necessita di un'illuminazione adeguata. Accendi la punta ruotando per garantire un'eventualità uniforme.
3. Conservazione dello stoccaggio:Le articolazioni correttamente laminate possono essere conservate per mesi. conoscereTecniche di conservazione della cannaPer mantenere le articolazioni pre-rollate fresche.
4. Aggiorna la tua configurazione:Investi in una qualitàvassoioper organizzare i tuoi materiali e prevenire gli sprechi.
Tecniche di rolling correlate
Una volta che hai imparato l'articolazione di base, esplora queste tecniche avanzate:
- Come arrotolare un cono- Forma affusolata per colpi più fluidi
- Rotolamento rotolamento (stile olandese)- Meno carta, gusto più pulito
- Come tirare un [ giunto a croce](https://guides.munchmakers.com/guide/how-to-roll-cross-joint)- Tecnica avanzata per occasioni speciali
- Rotolamento senza filtro- Metodo tradizionale
Forniture di qualità del negozio:curiosareCarte da rotolamento personalizzate, Smerigliatrici premium, eAccessori per rotolamentoA Munchmaker.
Questa guida è a scopo didattico nelle regioni in cui la cannabis è legale. Le leggi sulla cannabis variano a seconda della giuris Controllare sempre le normative locali.
Step 1:
Step 2:
Step 3:
Step 4:
Step 5:
Step 6:
Step 7:
Step 8:
Frequently Asked Questions
Le carte da 1¼ (78 mm) sono ideali per i principianti. Sono abbastanza grandi da poter lavorare ma non così grandi da sprecare cannabis. King Size può intimidire per i primi tentativi.
Related Guides
Rolling Paper Sizes Explained: 1 1/4, King Size, and More
Comprehensive guide about rolling paper sizes explained: 1 1/4, king size, and more. Learn everything you need to know with expert tips and detailed instructions.

Best Rolling Papers for Beginners: Complete Buying Guide 2026
Discover the best rolling papers for beginners including RAW, Zig-Zag, and OCB. Learn about sizes, materials (rice vs hemp vs wood pulp), and which papers are easiest to roll with.
Clear Rolling Papers: Are Cellulose Papers Worth It?
Comprehensive guide about clear rolling papers: are cellulose papers worth it?. Learn everything you need to know with expert tips and detailed instructions.