
Cara Mengemas Vaporizer Herbal Kering untuk Hasil Terbaik
David Martinez
Concentrate Expert
Cara Mengemas Vaporizer Herbal Kering untuk Hasil Terbaik
Teknik pengemasan yang tepat secara dramatis mempengaruhi kinerja vaporizer Anda. Jika terlalu rapat, Anda akan membatasi aliran udara. Jika terlalu longgar, Anda akan mendapatkan uap yang tipis. Panduan ini mengajarkan Anda cara optimal untuk memuat vaporizer Anda untuk rasa, produksi uap, dan efisiensi maksimum.
Jawaban Singkat
Untuk hasil terbaik: Giling ganja hingga konsistensi sedang-halus (seperti garam kasar), isi ruang hingga penuh yang sesuai (penuh untuk konduksi, 3/4 untuk konveksi), dan kemas dengan tekanan lembut—padat tetapi tidak terkompresi. Bahan harus sedikit memberi saat ditekan. Selalu pastikan permukaan bersih dan rata sebelum dipanaskan.
Mengapa Teknik Pengemasan Penting
Pengemasan yang buruk adalah alasan utama orang kecewa dengan vaporizer. Bahkan perangkat seharga $400 berkinerja buruk jika dikemas dengan tidak benar.
Untuk konsistensi penggilingan terbaik, gunakan [penggiling dari MunchMakers](https://munchmakers.com/product-category/custom-grinders/). Untuk ilmu penguapan, ScienceDirect menyelenggarakan studi penelitian ganja.
Apa yang terjadi dengan pengemasan yang buruk:
- Terlalu rapat: Aliran udara terhambat, tarikan yang keras, ekstraksi yang tidak merata
- Terlalu longgar: Uap yang lemah, bahan terbuang, ekstraksi yang tidak lengkap
- Penggilingan yang salah: Saringan tersumbat, titik panas, rasa yang buruk
- Permukaan yang tidak rata: Panas melarikan diri, sesi yang tidak konsisten
Apa yang diberikan oleh pengemasan yang tepat:
- Uap yang padat dan penuh rasa
- Ekstraksi merata (tanpa limbah)
- Aliran udara yang mudah
- Sesi penuh dari setiap mangkuk
Langkah 1: Capai Penggilingan yang Tepat
Penggilingan adalah dasar dari vaping yang baik. Sebagian besar masalah berasal dari konsistensi penggilingan yang tidak tepat.
Penggilingan ideal: Sedang-halus
Pikirkan tentang konsistensi garam kasar atau oregano kering—berbulu tetapi seragam, tidak bubuk dan tidak menggumpal.
Mengapa ini berhasil:
- Luas permukaan: Cukup paparan untuk ekstraksi yang efisien
- Aliran udara: Ruang antara partikel memungkinkan udara panas masuk
- Pemanasan yang konsisten: Potongan yang serupa ukuran memanas secara merata
Penyesuaian penggilingan berdasarkan jenis vaporizer:
Apa yang harus dihindari:
Terlalu halus (bubuk):
- Menyumbat layar dan jalur uap
- Sangat membatasi aliran udara
- Jatuh melalui layar
- Menciptakan uap yang keras dan panas
Terlalu kasar (gumpalan):
- Ekstraksi yang tidak merata (luar matang, dalam mentah)
- Bahan yang terbuang
- Uap yang lemah dan tidak konsisten
- Perlu diaduk terus-menerus
Langkah 2: Siapkan Ruang Anda
Jangan pernah mengisi ruang yang kotor. Sisa-sisa dapat mempengaruhi rasa dan membatasi aliran udara.
Pemeriksaan cepat sebelum sesi:
1. Pemeriksaan visual: Ruang harus terlihat bersih, layar jelas
2. Uji tiup: Tiup perlahan—udara harus mengalir dengan bebas
3. Suhu: Ruang harus pada suhu ruangan sebelum dimuat
4. Penghilangan kotoran: Sikat keluar sisa-sisa material
Alat yang membantu:
- Sikat kecil (sering disertakan dengan vaporizer)
- Tusuk gigi kayu untuk sisa yang membandel
- Udara terkompresi untuk layar
- Lap alkohol isopropil untuk pembersihan mendalam
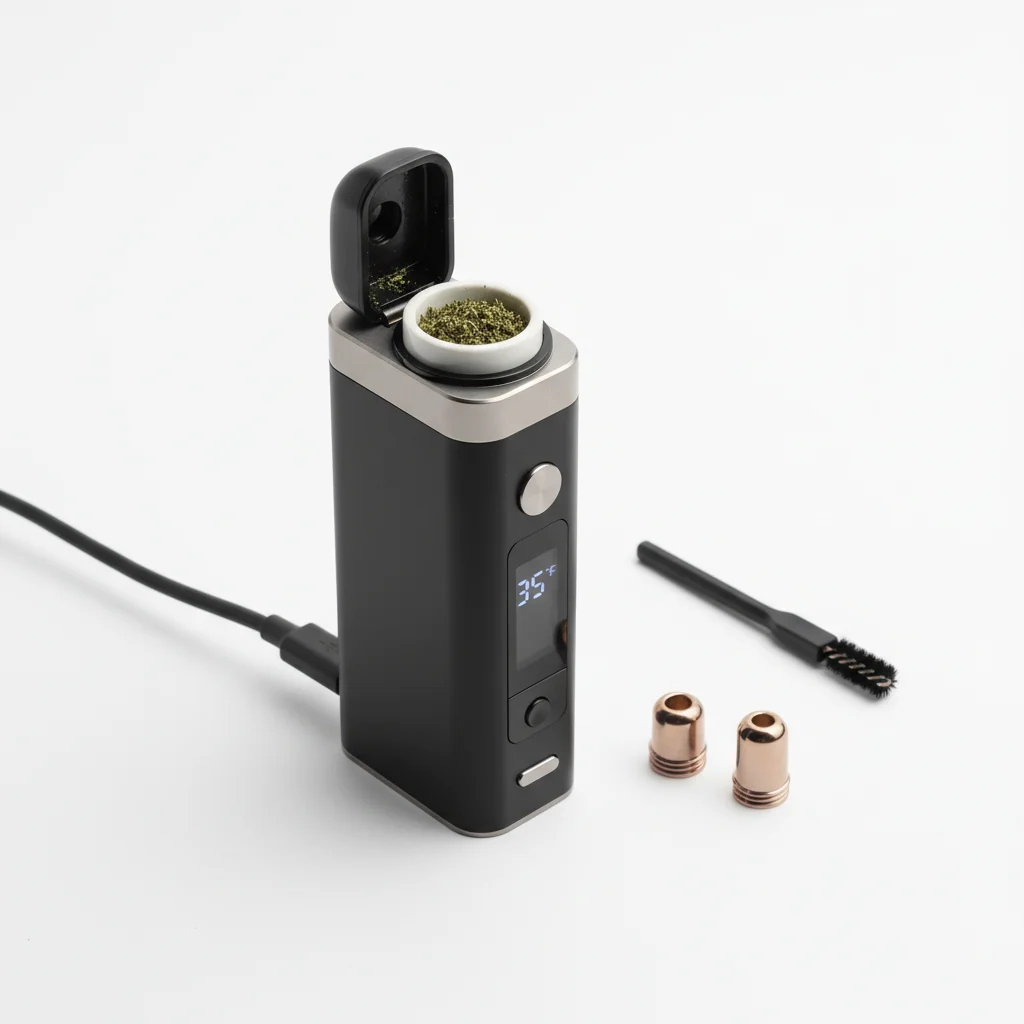
Langkah 3: Muat Ruang
Teknik pengisian sedikit bervariasi tergantung jenis vaporizer. Berikut yang berfungsi:
Untuk Vaporizer Konduksi:
Tingkat pengisian: Ruang penuh (setara dengan bagian atas)
Mengapa: Konduksi memerlukan material untuk bersentuhan dengan dinding yang dipanaskan. Ruang kosong berarti kontak permukaan yang lebih sedikit, lebih sedikit uap.
Metode:
1. Ambil ganja yang sudah digiling dengan alat kecil
2. Jatuhkan ke dalam ruang (jangan tekan saat menambahkan)
3. Isi hingga tepi
4. Lanjutkan ke langkah pengemasan
Untuk Vaporizer Konveksi:
Tingkat pengisian: 3/4 penuh (tinggalkan ruang kepala)
Mengapa: Udara panas perlu mengalir MELALUI material. Pengisian berlebihan menghalangi aliran udara.
Metode:
1. Ambil ganja yang sudah digiling
2. Isi hingga sekitar 3/4 kapasitas
3. Tinggalkan ruang yang terlihat di bagian atas
4. Lanjutkan ke pengemasan (dengan sentuhan yang sangat ringan)
Untuk Vaporizer Hibrida:
Tingkat pengisian: Penuh tetapi tidak meluap
Metode:
1. Ikuti pendekatan konduksi
2. Kemasi sedikit lebih ringan daripada konduksi murni
3. Pastikan bahan tidak terkompresi melawan layar
Langkah 4: Kemasi dengan Kepadatan yang Tepat
Di sinilah kebanyakan orang salah. "Pengemasan" tidak berarti mengompresi—itu berarti menetap.
Tekanan yang tepat:
- Ringan tetapi kokoh: Seperti menekan bubuk kopi, bukan menghancurkannya
- Uji ketahanan: Tekanan harus menghadapi tahanan lembut, bukan kekerasan batu
- Pemeriksaan aliran udara: Anda harus bisa menarik udara melalui
Pengemasan konduksi:
Kemasi sedikit lebih kuat—Anda ingin kontak yang baik dengan dinding ruang. Pikirkan tentang menekan gula merah ke dalam cangkir ukur. Kuat tetapi tidak padat.
Pengemasan konveksi:
Kemasi sangat ringan—hanya menetap bahan. Udara panas perlu mengalir, jadi pikirkan "mengatur" lebih dari "mengemas."
Kesalahan umum dalam pengemasan:
Kesalahan: Menekan berulang kali
Menciptakan lapisan terkompresi yang menghalangi aliran udara. Satu tekanan lembut sudah cukup.
Kesalahan: Mengemas dengan jari
Minyak dari kulit dapat mempengaruhi bahan dan ruang. Gunakan alat.
Kesalahan: Mengisi terlalu banyak lalu menekan ke bawah
Ini mengompresi bahan DAN mengisi berlebihan. Isi dengan benar terlebih dahulu, lalu tetapkan.
Langkah 5: Rata dan Segel
Detail akhir penting untuk sesi yang konsisten.
Buat permukaan datar:
- Sikat atau tekan untuk meratakan bahan
- Tidak ada puncak, lembah, atau bahan longgar di tepi
- Harus terlihat seragam dari atas
Bersihkan tepi:
- Hapus BAHAN APA PUN dari tepi/benang
- Sisa di sini mencegah segel yang tepat
- Gunakan sikat atau jari untuk membersihkan
Periksa segel:
- Tutup ruang/ujung mulut
- Harus menutup dengan mulus tanpa hambatan
- Sensasi grinding = kotoran di ulir
Pengemasan untuk Berbagai Situasi
Mikrodosis (jumlah kecil):
Banyak vaporizer kesulitan dengan ruang yang setengah terisi. Opsi:
- Kapsul dosis: Pod logam kecil yang pas di ruang
- Teknik layar: Tambahkan layar kedua di atas untuk memadatkan
- Paduan konsentrat: Gunakan sebagai spacer di bagian bawah ruang
Sesi kelompok:
Kemasi sedikit lebih padat untuk sesi yang lebih lama dan konsisten. Ruang penuh bekerja paling baik saat dibagikan.
Serangan cepat solo:
Pertimbangkan vaporizer konveksi sesuai permintaan—mereka menangani ruang parsial dengan lebih baik.
Memecahkan Masalah Pengemasan
Masalah: Uap lemah/halus
Kemungkinan penyebab: Kemasan terlalu longgar
Perbaikan: Tingkatkan kepadatan sedikit, pastikan ruang penuh
Masalah: Sulit untuk menarik
Kemungkinan penyebab: Kemasan terlalu ketat
Perbaikan: Gunakan tekanan yang lebih ringan, periksa layar untuk penyumbatan
Masalah: Ekstraksi tidak merata (beberapa coklat, beberapa hijau)
Kemungkinan penyebab: Penggilingan salah atau kemasan tidak merata
Perbaikan: Giling lebih halus, ratakan permukaan kemasan, aduk di tengah sesi
Masalah: Uap keras dan panas
Kemungkinan penyebab: Kemasan terlalu ketat atau penggilingan terlalu halus
Perbaikan: Longgarkan kemasan, gunakan penggilingan yang lebih kasar
Masalah: Bahan jatuh melalui layar
Kemungkinan penyebab: Penggilingan terlalu halus
Perbaikan: Gunakan penggilingan yang lebih kasar, pertimbangkan penggantian layar halus
Ringkasan: Paket Sempurna
1. Giling hingga konsistensi sedang-halus
2. Bersihkan ruang sebelum memuat
3. Isi dengan tepat (penuh untuk konduksi, 3/4 untuk konveksi)
4. Kemas dengan tekanan lembut (kuat, tidak terkompresi)
5. Ratakan permukaan dan bersihkan tepinya
Kuasi dasar-dasar ini dan vaporizer Anda akan memberikan pengalaman yang dirancang untuknya. Jika ragu, lebih baik kemas dengan lebih longgar—Anda selalu bisa menekan lebih banyak, tetapi bahan yang terlalu terkompresi memerlukan untuk memulai dari awal.
Panduan ini untuk tujuan pendidikan. Hukum tentang ganja bervariasi menurut yurisdiksi.
Step 1:
Step 2:
Step 3:
Step 4:
Step 5:
Frequently Asked Questions
Ukuran sedang-halus adalah yang ideal untuk sebagian besar vaporizer - seperti garam kasar. Terlalu halus dapat menyumbat saringan dan membatasi aliran udara. Terlalu kasar menghasilkan ekstraksi yang tidak merata. Sesuaikan sedikit berdasarkan kebutuhan spesifik vaporizer Anda.
Kemasi dengan kepadatan sedang - padat tetapi tidak terkompresi. Vaporizer konduksi bekerja sedikit lebih baik dengan kemasan yang lebih padat (lebih banyak kontak permukaan). Vaporizer konveksi membutuhkan kemasan yang lebih longgar agar udara panas dapat mengalir melalui bahan.
Ya, tetapi hasilnya bervariasi. Beberapa vaporizer memiliki ruang yang lebih kecil atau kapsul dosis untuk muatan yang lebih kecil. Mengisi setengah ruang penuh dapat menyebabkan pemanasan yang tidak merata dan uap yang buruk. Periksa apakah perangkat Anda memiliki opsi mikro-dosing.
Related Guides

510 Thread Batteries: Complete Guide to Vape Pen Batteries
Everything you need to know about 510 thread batteries for vape cartridges. Learn about voltage settings, battery types, features to look for, and how to choose the right battery for your cartridges.
Best Vaporizer Temperature Settings: Effects at Each Level
Comprehensive guide about best vaporizer temperature settings: effects at each level. Learn everything you need to know with expert tips and detailed instructions.

Conduction vs Convection Vaporizers: Heating Methods Explained
Understand the difference between conduction and convection heating in vaporizers. Learn how each method affects flavor, vapor quality, efficiency, and which is best for your vaping style.