
शुरुआत करने वालों के लिए एक परफेक्ट जॉइंट रोल करने का तरीका: चरण-दर-चरण ट्यूटोरियल 2026
Mike Rodriguez
Rolling Expert
शुरुआत करने वालों के लिए एक परफेक्ट जॉइंट रोल करने का तरीका: चरण-दर-चरण ट्यूटोरियल 2026
एक जॉइंट रोल करना एक मौलिक कैनबिस कौशल है जो डरावना लगता है लेकिन अभ्यास के साथ स्वाभाविक हो जाता है। कैनबिस शिक्षकों के अनुसार, औसत व्यक्ति 10-15 अभ्यास प्रयासों के बाद लगातार परिणाम प्राप्त करता है। यह व्यापक 2026 ट्यूटोरियल आपको कागज चुनने और अपने फ़िल्टर को तैयार करने से लेकर अंतिम सील तक, एक क्लासिक जॉइंट रोल करने के हर चरण के माध्यम से ले जाता है। सही तकनीक और थोड़ी धैर्य के साथ, आप जल्दी ही लगातार, धूम्रपान करने योग्य जॉइंट रोल कर सकेंगे।
संबंधित गाइड: शुरू करने से पहले, हमारे गाइड देखें सही [ग्राइंडर](https://guides.munchmakers.com/guide/grinder-maintenance-schedule) और [रोलिंग पेपर का चयन](https://guides.munchmakers.com/guide/best-rolling-papers-beginners) सर्वोत्तम परिणामों के लिए।
त्वरित उत्तर
एक जॉइंट रोल करने के लिए: एक एंकोर्डियन-फोल्डेड फ़िल्टर बनाएं, अपनी कैनबिस को समान रूप से पीसें, फ़िल्टर को पेपर में रखें, crease के साथ कैनबिस वितरित करें, रोलिंग करके एक सिलेंडर का आकार दें, गैर-गम किनारे को कैनबिस के नीचे टक करें, गम स्ट्रिप की ओर ऊपर रोल करें, चाटें और सील करें। अभ्यास की आवश्यकता होती है लेकिन अधिकांश लोग 3-5 प्रयासों में एक धूम्रपान करने योग्य जॉइंट रोल कर सकते हैं।
वीडियो ट्यूटोरियल
पूरे रोलिंग प्रक्रिया को क्रियान्वित होते हुए देखने के लिए इस चरण-दर-चरण दृश्य गाइड को देखें:
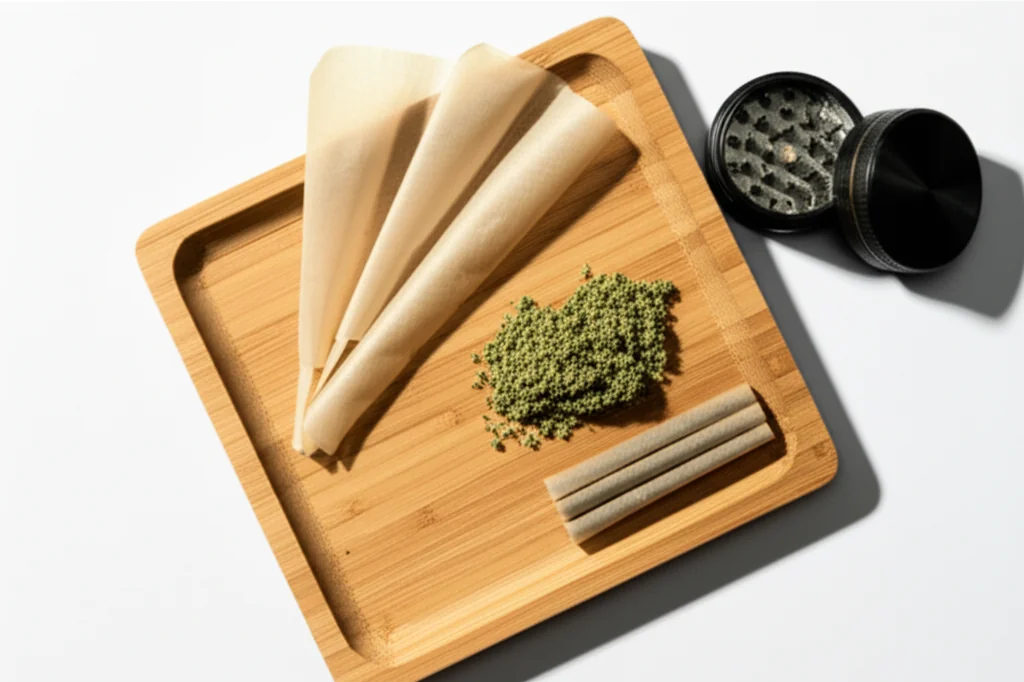
आपको क्या चाहिए
आवश्यक:
- रोलिंग पेपर (शुरुआत करने वालों के लिए 1¼ आकार की सिफारिश की जाती है)
- पीसी हुई कैनबिस (0.5-0.75 ग्राम)
- फिल्टर टिप्स (पतली कार्डबोर्ड, व्यवसाय कार्ड का उपयोग कर सकते हैं)
- ग्राइंडर (या आवश्यक होने पर उंगलियाँ)
- लाइटर
सिफारिश की गई:
- रोलिंग ट्रे (या साफ़ किताब/मैगज़ीन)
- पेन या पैकिंग टूल
- अभ्यास के लिए अतिरिक्त पेपर
शुरुआत करने वालों के लिए पेपर चयन
उच्च गुणवत्ता के रोलिंग सप्लाई के लिए, देखें MunchMakers के कस्टम रोलिंग पेपर. सामान्य रोलिंग तकनीक टिप्स के लिए, wikiHow चित्रित गाइड प्रदान करता है।
2026 के लिए सबसे अच्छे विकल्प:
- RAW ऑर्गेनिक हेम्प - प्राकृतिक, काम करने में आसान, शुरुआती लोगों के लिए सहनशील। कैनबिस शिक्षकों द्वारा सीखने के लिए सबसे अधिक सिफारिश की गई।
- Elements चावल पेपर - पतला लेकिन मजबूत, धीमी जलन, न्यूनतम स्वाद हस्तक्षेप
- Zig-Zag 1¼ - क्लासिक, व्यापक रूप से उपलब्ध, किफायती। दशकों से उद्योग मानक।
- OCB ऑर्गेनिक - अल्ट्रा-पतला, प्राकृतिक गम, अनुभवी रोलर्स द्वारा पसंद किया जाता है
आकार: 1¼ (78 मिमी) से शुरू करें। किंग साइज सीखने के लिए असुविधाजनक हो सकता है। विशेषज्ञ टिप: छोटे पेपर बेहतर तकनीक विकास के लिए मजबूर करते हैं।
और जानें: हमारे व्यापक गाइड पर देखें शुरुआत करने वालों के लिए सबसे अच्छे रोलिंग पेपर विस्तृत तुलना के लिए।
चरण-दर-चरण रोलिंग प्रक्रिया
चरण 1: अपने फिल्टर टिप को तैयार करें
फिल्टर (जिसे क्रच या टिप भी कहा जाता है) संरचना प्रदान करता है, कैनबिस को आपके मुँह में प्रवेश करने से रोकता है, और आपको पकड़ने के लिए कुछ देता है।
कैसे मोड़ें:
1. फ़िल्टर पेपर को लगभग 1/2 इंच चौड़ा और 2 इंच लंबा काटें या फाड़ें
2. एक छोर पर, 3-4 बार आगे-पीछे मोड़ें (एकॉर्डियन पैटर्न)
3. बाकी पेपर को एकॉर्डियन के चारों ओर लपेटें
4. यह एक पेंसिल के व्यास के बराबर सिलेंडर होना चाहिए
एकॉर्डियन का महत्व: यह स्थिरता और वायु प्रवाह प्रदान करता है। इसके बिना, फ़िल्टर धूम्रपान करते समय गिर सकता है।
चरण 2: अपनी कैनाबिस को पीसें
विशेषज्ञ की राय: पीसने की स्थिरता जलने की गुणवत्ता को प्रभावित करने वाला #1 कारक है। पेशेवर रोलर्स पर जोर देते हैं कि सही पीसना रोलिंग तकनीक से अधिक महत्वपूर्ण है।
समान, फुलके बनावट प्राप्त करने के लिए एक गुणवत्ता ग्राइंडर का उपयोग करें:
- बहुत बारीक नहीं: पाउडर जैसी स्थिरता पेपर के माध्यम से खींचती है और वायु प्रवाह को सीमित करती है। यह कठोर हिट का कारण बनता है।
- बहुत मोटा नहीं: बड़े टुकड़े गांठें और असमान जलन पैदा करते हैं। "रनर्स" या "कनो" बनाते हैं।
- सही: फुलके, समान टुकड़े जो सूखे ओरेगैनो की बनावट के समान होते हैं। दबाने पर आकार बनाए रखना चाहिए।
डंठल हटा दें: ये जॉइंट में छिद्र बनाते हैं और स्वाद को कठोर बनाते हैं। छोटे डंठल भी जलने की गुणवत्ता को प्रभावित करते हैं।
मात्रा: एक मानक जॉइंट के लिए 0.5-0.75 ग्राम। छोटे से शुरू करना बेहतर है - आप हमेशा एक और रोल कर सकते हैं।
ग्राइंडर सिफारिश: एक गुणवत्ता 4-पीस ग्राइंडर जिसमें [कीफ कैचर](https://munchmakers.com/blog/the-ultimate-guide-to-weed-grinders-with-kief-catchers-2/) सुनिश्चित करता है कि परिणाम समान हों। हमारी गाइड देखें कैनाबिस के लिए सर्वश्रेष्ठ ग्राइंडर या MunchMakers पर प्रीमियम ग्राइंडर ब्राउज़ करें।
चरण 3: crease बनाएं
पेपर को गम स्ट्रिप के साथ ऊपर की ओर पकड़ें, जो आपकी ओर है। अपने तैयार फ़िल्टर को एक छोर पर रखें (आमतौर पर दाहिने हाथ के लोगों के लिए बाएं छोर पर)।
एक चैनल बनाएं: पेपर को लंबाई में धीरे-धीरे मोड़ें ताकि एक हल्का V-आकार या खाई बने। यह crease आपकी कैनाबिस को पकड़ लेगा और रोलिंग को आसान बनाएगा।
चरण 4: पिसी हुई कैनाबिस से भरें
पीसी हुई कैनाबिस को crease के साथ समान रूप से वितरित करें:
- बीच में अधिक, अंत की ओर थोड़ा सा संकुचन
- गम स्ट्रिप और फ़िल्टर के पास जगह छोड़ें
- अधिक न भरें - कम होना अधिक से रोल करना आसान है
सामान्य गलती: बहुत अधिक कैनबिस लोड करना। आप हमेशा दूसरा जॉइंट रोल कर सकते हैं। ओवरफिल्ड जॉइंट्स को सही तरीके से रोल करना शुरुआती लोगों के लिए लगभग असंभव होता है।
चरण 5: जॉइंट का आकार दें
यहां रोलिंग कौशल विकसित होता है:
गतिविधि:
- कैनबिस के दोनों तरफ अंगूठे और तर्जनी के बीच कागज को चुटकी लें
- धीरे-धीरे आगे-पीछे रोल करें (साइड से साइड नहीं - आगे-पीछे की गतिविधि)
- कैनबिस को एक सिलेंडर के आकार में पैक और आकार देना चाहिए
- फिल्टर उस छोर पर आकार बनाए रखने में मदद करता है
लक्ष्य: कैनबिस का समान रूप से पैक किया गया सिलेंडर जो मजबूत हो लेकिन संकुचित न हो।
आवश्यक समय: आकार देने में 15-30 सेकंड। जल्दी न करें।
चरण 6: टक (महत्वपूर्ण चरण)
यहां अधिकांश शुरुआती संघर्ष करते हैं। टक सफलता या असफलता का निर्धारण करता है।
टक कैसे करें:
1. फिल्टर छोर से काम करें (आसान)
2. कागज के नीचे के किनारे को (गम रहित पक्ष) कैनबिस के नीचे और फिल्टर के ऊपर टक करें
3. अंगूठों का उपयोग करें जबकि तर्जनी हल्का नीचे दबाव डालती है
4. एक बार शुरू होने के बाद, टक को रोल करते समय लंबाई के साथ जारी रखना चाहिए
अनुभव: आपको कागज को कैनबिस के नीचे पकड़ते हुए महसूस करना चाहिए। यदि यह टक नहीं हो रहा है, तो कैनबिस को अधिक कसकर आकार दें।
सामान्य समस्या: कागज अपने आप पर मुड़ रहा है बिना कैनबिस के नीचे पकड़े। समाधान: पहले कैनबिस को सिलेंडर के आकार में अधिक कसकर पैक करें।
चरण 7: गम स्ट्रिप तक रोल करें
एक बार टक शुरू हो जाने पर:
1. समान दबाव का उपयोग करते हुए ऊपर की ओर रोल करना जारी रखें
2. कागज को कैनबिस सिलेंडर के चारों ओर लपेटना चाहिए
3. रोल करें जब तक केवल गम स्ट्रिप दिखाई न दे
4. पूरे लंबाई में तनाव को स्थिर रखें
जांचें: सील करने से पहले, लंबाई के नीचे देखें। यह समान होना चाहिए, गंदला या ढीला नहीं।
चरण 8: जॉइंट को सील करें
गम को चाटना:
- गम स्ट्रिप को उदारता से चाटें (शर्मीले न हों)
- कुछ कागजों को दूसरों की तुलना में अधिक नमी की आवश्यकता होती है
- एक छोर से शुरू करें और दूसरे पर काम करें
- जब आप सील करें तो मजबूती से दबाएं
- सील किए गए जॉइंट को 5-10 सेकंड तक पकड़ें
आधुनिक विकल्प: कुछ लोग स्वच्छता के लिए चाटने के बजाय गीले कपड़े का उपयोग करते हैं।
चरण 9: पैक करें और समाप्त करें
खुले सिरे को पैक करना:
- एक पेन, छोटा डंडा, या अपनी छोटी अंगुली का उपयोग करें
- खुले सिरे से धीरे-धीरे कैनाबिस को पैक करें
- यह पूरे जोइंट को कसता है और समान जलने को सुनिश्चित करता है
- इतना न पैक करें कि वायु प्रवाह में रुकावट आए
सिरे को बंद करना:
- अधिक कागज को मोड़कर बंद करें (क्लासिक विधि)
- या इसे खुला छोड़ दें और जलाते समय अतिरिक्त को सावधानी से जला दें
- मोड़ने वाला सिर कैनाबिस को गिरने से रोकता है
चरण 10: गुणवत्ता जांच
एक अच्छा जोइंट:
- कसकर लेकिन चट्टान की तरह कठोर नहीं
- लंबाई के साथ समान मोटाई
- आसानी से हवा खींच सकता है
- पूर्ण रूप से सील किया गया है, कोई गैप नहीं
- फिल्टर सुरक्षित है और घूमता नहीं है
यदि यह विफल हो जाए तो जांचें: फिर भी इसे धूम्रपान करें! "बदसूरत लेकिन कार्यात्मक" आपको इसे फेंकने से ज्यादा सिखाता है।
सामान्य रोलिंग समस्याएँ और समाधान
समस्या: जोइंट लंपीय/असमान है
कारण: कैनाबिस का असमान वितरण या रोलिंग से पहले अपर्याप्त आकार देना।
समाधान: चरण 5 पर आकार देने में अधिक समय बिताएं। टक करने से पहले यदि आवश्यक हो तो कैनाबिस को पुनर्वितरित करें।
समस्या: जोइंट बहुत ढीला है, टूट जाता है
कारण: रोलिंग के दौरान पर्याप्त तनाव नहीं, या अधिक भरा हुआ।
समाधान: अगली बार कम कैनाबिस का उपयोग करें। रोलिंग के दौरान अधिक स्थिर दबाव लागू करें।
समस्या: जोइंट बहुत कसकर है, खींचता नहीं है
कारण: संकुचित कैनाबिस या बहुत मजबूती से पैक किया गया।
समाधान: और धीरे से पैक करें। सील करने से पहले खींचने का परीक्षण करें - हवा का प्रवाह आसान होना चाहिए।
समस्या: रोलिंग के दौरान कागज फट जाता है
कारण: बहुत अधिक दबाव, सूखी हाथ, या निम्न गुणवत्ता वाले कागज।
सुधार: हल्का स्पर्श करें। उंगलियों को थोड़ा नम करें। बेहतर कागज खरीदें।
समस्या: फ़िल्टर गिर जाता है
कारण: फ़िल्टर बहुत छोटा है या रोल में सही तरीके से एकीकृत नहीं है।
सुधार: फ़िल्टर का व्यास थोड़ा बड़ा करें। सुनिश्चित करें कि इसे जोड़ों में रोल किया गया है, केवल अंत में नहीं रखा गया है।
समस्या: शंकु आकार के बजाय सिलेंडर
कारण: एक छोर पर दूसरे की तुलना में अधिक कैनबिस।
सुधार: यह वास्तव में ठीक है! शंकु जोड़ों की लोकप्रियता है (चौड़ा अंत, संकीर्ण फ़िल्टर अंत)। कई लोग इस आकार को पसंद करते हैं।
समस्या: जोड़ों में जलन या कैनोइंग
कारण: असमान पैकिंग या धूम्रपान करते समय हवा।
सुधार: चरण 4 में समान वितरण पर ध्यान केंद्रित करें। जलाते समय जोड़ों को घुमाएं ताकि समान जलन सुनिश्चित हो सके।
विशेषज्ञों से रोलिंग टिप्स
टिप 1: जितना आप सोचते हैं उससे अधिक कागज से शुरू करें
शुरुआती अक्सर बहुत छोटे कागज का उपयोग करते हैं। 1¼ आकार आपको काम करने के लिए जगह देता है।
टिप 2: पहले तंबाकू या जड़ी-बूटियों के साथ अभ्यास करें
कुछ लोग 'बर्बाद' करने से पहले सस्ते तंबाकू या सूखी जड़ी-बूटियों के साथ रोलिंग तकनीक का अभ्यास करते हैं। मांसपेशियों की याददाश्त विकसित होती है।
टिप 3: डॉलर बिल रोलिंग विधि का उपयोग करें
फ़िल्टर और कैनबिस को एक डॉलर बिल में रखें, आकार दें, फिर कागज को बिल में स्लाइड करें और बिल को रोलिंग गाइड के रूप में उपयोग करें। सीखने के लिए प्रशिक्षण पहिए।
टिप 4: पहले से बने शंकु मौजूद हैं
उपयोग करने में कोई शर्म नहीं है प्री-रोल्ड शंकु जिन्हें आप बस भरते हैं। कई अनुभवी रोलर्स उन्हें स्थिरता के लिए उपयोग करते हैं।
टिप 5: पहले 10 खराब होंगे
स्वीकार करें कि शुरुआती प्रयास सबसे अच्छे रूप में कार्यात्मक होंगे। जोड़ों को रोल करना एक कौशल है जो अभ्यास की आवश्यकता होती है। संख्या 15-20 पर अधिकांश लोग स्थिरता प्राप्त करते हैं।
उन्नत विचार
कागज के प्रकार का प्रभाव
हेम्प कागज: धीमी, समान जलन। प्राकृतिक स्वाद। पर्याप्त मोटा ताकि माफ कर सके।
चावल के कागज: बहुत पतला। साफ स्वाद। शुरुआती लोगों के लिए कम माफ करने वाला।
लकड़ी का गूदे: क्लासिक कागज। तेज जलन। मजबूत स्वाद।
बिना फ़िल्टर के रोलिंग
कुछ लोग फ़िल्टर रहित जोड़ों को पसंद करते हैं। अंत को बंद करें या मोड़ें। यह थोड़ी बेहतर वायु प्रवाह प्रदान करता है लेकिन मुँह में ढीले कैनबिस से बचने के लिए सावधानी से धूम्रपान की आवश्यकता होती है।
कोन विधि
सिलेंडर के बजाय, जानबूझकर एक कोन का आकार दें (सिरे पर चौड़ा, फ़िल्टर पर संकरा)। कई लोगों को यह आसान लगता है। चौड़े सिरे को अधिक कैनाबिस से भरें, जिससे स्वाभाविक रूप से तिरछापन बने।
अभ्यास से परिपूर्णता आती है
वास्तविक समयरेखा:
- जॉइंट 1-3: संभवतः बदसूरत, शायद धूम्रपान करने योग्य
- जॉइंट 4-7: कार्यात्मक, सुधार हो रहा है
- जॉइंट 8-15: लगातार धूम्रपान करने योग्य
- जॉइंट 15+: आपकी व्यक्तिगत शैली विकसित करना
हार मत मानो! यहां तक कि अनुभवी रोलर्स भी शुरुआत में संघर्ष करना याद करते हैं। यह एक शारीरिक कौशल है जैसे जूते बांधना - यह असंभव लगता है जब तक कि अचानक यह क्लिक नहीं करता।
हैंड-रोलिंग के विकल्प
प्री-रोल्ड कोन:
- पहले से आकार में कागज खरीदें
- बस पिसी हुई कैनाबिस से भरें
- पैक करें और मोड़ें
- हर बार लगातार परिणाम
- अधिक जानें: हमारी प्री-रोल्ड कोन बनाम हैंड-रोलिंग तुलना देखें
रोलिंग मशीनें:
- $5-10 का उपकरण जो आपके लिए रोल करता है
- कागज और कैनाबिस लोड करें, हैंडल घुमाएं
- परफेक्ट सिलेंडर लेकिन हैंड-रोलिंग से कम संतोषजनक
- सर्वश्रेष्ठ विकल्प: जॉइंट रोलर्स गाइड देखें किसी से रोल करने के लिए कहें:
सीखते समय अनुभवी दोस्त से रोल कराने में कोई शर्म नहीं है
- उनकी तकनीक को ध्यान से देखें
- बेहतर परिणामों के लिए विशेषज्ञ टिप्स
पेशेवर रोलर्स से (2026 संस्करण):
1.
तापमान महत्वपूर्ण है: थोड़े गर्म, सूखे हाथ सबसे अच्छे काम करते हैं। ठंडे या चिपचिपे हाथ कागज को अजीब तरीके से चिपका देते हैं। 2.
रोशनी की तकनीक रोल गुणवत्ता को प्रभावित करती है: Lighting technique affects roll quality: सही रोली गई जॉइंट को भी सही रोशनी की जरूरत होती है। सुनिश्चित करें कि समान चेर्री के लिए टिप को घुमाते हुए जलाएं।
3. भंडारण संरक्षण: सही तरीके से रोल की गई जॉइंट को महीनों तक संग्रहीत किया जा सकता है। जानें कि कैनाबिस भंडारण तकनीकें प्री-रोल जॉइंट को ताजा रखने के लिए।
4. अपने सेटअप को अपग्रेड करें: एक गुणवत्ता वाले रोलिंग ट्रे में निवेश करें ताकि आप अपने सामग्रियों को व्यवस्थित कर सकें और बर्बादी से बच सकें।
संबंधित रोलिंग तकनीकें
एक बार जब आप बुनियादी जॉइंट में महारत हासिल कर लें, तो इन उन्नत तकनीकों का अन्वेषण करें:
- कोन जॉइंट कैसे रोल करें - चिकनी हिट के लिए तिरछा आकार
- इनसाइड-आउट रोलिंग (डच स्टाइल) - कम कागज, साफ स्वाद
- एक [क्रॉस जॉइंट कैसे रोल करें](https://guides.munchmakers.com/guide/how-to-roll-cross-joint) - विशेष अवसरों के लिए उन्नत तकनीक
- फिल्टर के बिना रोलिंग - पारंपरिक विधि
गुणवत्ता की आपूर्ति खरीदें: ब्राउज़ करें कस्टम रोलिंग पेपर, प्रीमियम ग्राइंडर, और रोलिंग एक्सेसरीज़ MunchMakers पर।
यह गाइड उन क्षेत्रों में शैक्षिक उद्देश्यों के लिए है जहां कैनाबिस कानूनी है। कैनाबिस कानून क्षेत्राधिकार के अनुसार भिन्न होते हैं। हमेशा स्थानीय नियमों की जांच करें।
Step 1:
Step 2:
Step 3:
Step 4:
Step 5:
Step 6:
Step 7:
Step 8:
Frequently Asked Questions
1¼ आकार के पेपर (78 मिमी) शुरुआती लोगों के लिए आदर्श हैं। ये काम करने के लिए बड़े हैं लेकिन इतने बड़े नहीं हैं कि आप कैनबिस बर्बाद करें। किंग साइज पहले प्रयासों के लिए डरावना हो सकता है।
मजबूत लेकिन संकुचित नहीं। आपको जलाने से पहले आसानी से हवा खींचने में सक्षम होना चाहिए। बहुत टाइट होने से वायु प्रवाह में बाधा आती है और धूम्रपान करना मुश्किल हो जाता है। बहुत ढीला होने पर यह बहुत तेजी से जलता है और टूट सकता है।
आमतौर पर बहुत टाइट पैकिंग (ऑक्सीजन को रोकता है) या बहुत नम कैनबिस के कारण। सुनिश्चित करें कि पैकिंग समान और मध्यम हो और सही तरीके से सुखाई गई, सूखी कैनबिस का उपयोग करें।
0.5-1 ग्राम मानक है। शुरुआती लोगों को 0.5 ग्राम से शुरू करना चाहिए, जो 2-3 लोगों के लिए या कई एकल सत्रों के लिए पर्याप्त है।
Related Guides
Rolling Paper Sizes Explained: 1 1/4, King Size, and More
Comprehensive guide about rolling paper sizes explained: 1 1/4, king size, and more. Learn everything you need to know with expert tips and detailed instructions.

Best Rolling Papers for Beginners: Complete Buying Guide 2026
Discover the best rolling papers for beginners including RAW, Zig-Zag, and OCB. Learn about sizes, materials (rice vs hemp vs wood pulp), and which papers are easiest to roll with.
Clear Rolling Papers: Are Cellulose Papers Worth It?
Comprehensive guide about clear rolling papers: are cellulose papers worth it?. Learn everything you need to know with expert tips and detailed instructions.