
बोंग को कैसे साफ करें: संपूर्ण चरण-दर-चरण गाइड
Emma Chen
Glass Specialist
बोंग को कैसे साफ करें: संपूर्ण चरण-दर-चरण गाइड
एक गंदा बोंग सिर्फ बुरा नहीं दिखता - यह आपके कैनबिस के स्वाद को खराब करता है, बैक्टीरिया को पनपने देता है, और कठोर हिट्स देता है। CDC सफाई दिशानिर्देशों के अनुसार,पुन: उपयोग करने योग्य वस्तुओं की नियमित सफाई बैक्टीरिया के विकास को रोकती है। नियमित सफाई आपके बोंग को सही तरीके से काम करने में मदद करती है और सुनिश्चित करती है कि आप उन चिकनी, स्वादिष्ट हिट्स का आनंद ले रहे हैं जिनके लिए इसे डिज़ाइन किया गया था। यह गाइड त्वरित दैनिक कुल्ला से लेकर जिद्दी निर्माण की गहरी सफाई तक सब कुछ कवर करती है।
त्वरित उत्तर
बोंग को साफ करने के लिए: सभी हटाने योग्य हिस्सों को अलग करें, गर्म पानी से कुल्ला करें, प्रत्येक हिस्से में आइसोप्रोपिल अल्कोहल (91%+) और कोर्स नमक डालें, उद्घाटन को ढकें और 2-3 मिनट तक जोर से हिलाएं, छोटे हिस्सों को समाधान के साथ ज़िपलॉक बैग में भिगोएँ, जिद्दी स्थानों को पाइप क्लीनर से स्क्रब करें, पूरी तरह से कुल्ला करें जब तक अल्कोहल की गंध न रहे। सर्वोत्तम परिणामों के लिए, यदि दैनिक उपयोग कर रहे हैं तो साप्ताहिक सफाई करें।
क्यों अपने बोंग को नियमित रूप से साफ करें?
स्वास्थ्य कारण:
- खड़े पानी में 24 घंटे के भीतर बैक्टीरिया बढ़ता है
- रेज़िन निर्माण में फफूंदी विकसित हो सकती है
- गंदे कांच पर बायोफिल्म बनती है
- संक्रमित पानी को इनहेल करते समय कण छोड़ता है
गुणवत्ता कारण:
- ताजा स्वाद (रेज़िन स्वाद को खराब करता है)
- चिकनी हिट्स (निर्माण वायु प्रवाह को प्रतिबंधित करता है)
- बेहतर फ़िल्ट्रेशन (साफ पानी बेहतर फ़िल्टर करता है)
- सही पर्कोलेटर कार्य
व्यावहारिक कारण:
- भारी जमा को हटाने की तुलना में नियमित रूप से साफ करना आसान है
- स्थायी दाग को रोकता है
- बोंग की उम्र बढ़ाता है
उपयोग के बीच भंडारण के लिए, अपने कैनबिस को ताजा रखें गिलास [स्टैश जार](https://munchmakers.com/product-category/glass-stash-jars/)।
आपको क्या चाहिए
आवश्यक सामग्री:
- आइसोप्रोपिल अल्कोहल (91% या उससे अधिक - 99% आदर्श है)
- कोर्स नमक (कोशर, समुद्री नमक, या रॉक नमक)
- गर्म पानी
- ज़िपलॉक बैग (छोटे टुकड़ों के लिए)
- पाइप क्लीनर या बोतल ब्रश
वैकल्पिक लेकिन सहायक:
- रबर के प्लग या प्लास्टिक रैप
- रबर बैंड
- व्यावसायिक बोंग क्लीनर (अल्कोहल/नमक का विकल्प)
- कॉटन स्वाब्स
काम करने वाले नमक के प्रकार:
- कोर्स कोशर नमक (सर्वश्रेष्ठ)
- समुद्री नमक
- रॉक नमक
- एप्सम नमक
टेबल नमक का उपयोग न करें - यह बहुत बारीक है और बहुत जल्दी घुल जाता है।
अल्कोहल और नमक विधि (सबसे प्रभावी)
चरण 1: सब कुछ अलग करें
सभी हटाने योग्य भागों को हटा दें:
- बाउल
- डाउनस्टेम
- कोई भी ऐश कैचर या अटैचमेंट
- पर्कोलेटर इंसर्ट (यदि हटाने योग्य हो)
क्यों: प्रत्येक टुकड़े को व्यक्तिगत ध्यान की आवश्यकता होती है। असेंबल की गई सफाई जॉइंट्स में अवशेष को फंसाती है।
चरण 2: गर्म पानी से धोएं
सभी टुकड़ों के माध्यम से गर्म (गर्म नहीं) पानी चलाएं:
- ताजे अवशेषों को ढीला करता है
- कठोर जमा को नरम करता है
- सफाई समाधान के लिए सतहों को तैयार करता है
टिप: भारी निर्माण के लिए, पहले बोंग में गर्म पानी 5 मिनट के लिए छोड़ दें।
चरण 3: बोंग में अल्कोहल और नमक डालें
मुख्य बोंग चेंबर के लिए:
1. आइसोप्रोपिल अल्कोहल डालें - दागदार क्षेत्रों को ढकने के लिए पर्याप्त
2. 2-3 बड़े चम्मच मोटा नमक डालें
3. नमक घर्षक के रूप में कार्य करता है (यह अल्कोहल में घुलता नहीं है)
आवश्यक मात्रा:
- छोटा बोंग: 1/2 कप अल्कोहल, 2 बड़े चम्मच नमक
- मध्यम बोंग: 1 कप अल्कोहल, 3 बड़े चम्मच नमक
- बड़ा बोंग: 1.5+ कप अल्कोहल, 4+ बड़े चम्मच नमक
चरण 4: ढकें और हिलाएं
हटाने योग्य बाउल वाले बोंग के लिए:
1. माउथपीस को हथेली या प्लग से ढकें
2. डाउनस्टेम छिद्र को अंगुली या प्लग से ढकें
3. 2-3 मिनट तक जोर से हिलाएं
4. नमक स्क्रब करता है जबकि अल्कोहल रेजिन को घोलता है
हिलाने की तकनीक:
- हल्की घुमाने से शुरू करें
- कठोर हिलाने की ओर बढ़ें
- सभी सतहों तक पहुँचने के लिए बोंग को घुमाएँ
- स्पष्ट रूप से दागदार क्षेत्रों पर ध्यान केंद्रित करें
चरण 5: छोटे टुकड़ों (बाउल और डाउनस्टेम) को साफ करें
ज़िपलॉक बैग विधि:
1. एक बैग में बाउल रखें, दूसरे में डाउनस्टेम
2. टुकड़े को ढकने के लिए अल्कोहल डालें
3. प्रति बैग 1 बड़ा चम्मच नमक डालें
4. सील करें और 1-2 मिनट तक हिलाएं
5. जिद्दी टुकड़ों को 30+ मिनट तक भिगोने दें
डिफ्यूज्ड डाउनस्टेम के लिए:
स्लिट्स पर अतिरिक्त ध्यान दें - ये आसानी से बंद हो जाते हैं। भिगोने के बाद पाइप क्लीनर्स का उपयोग करें।
चरण 6: समस्या क्षेत्रों को स्क्रब करें
हिलाने/भिगोने के बाद, जिद्दी स्थानों पर उपकरणों का उपयोग करें:
- पाइप क्लीनर्स: डाउनस्टेम और छोटे छिद्रों के लिए उत्तम
- बोतल ब्रश: मुख्य चेंबर के लिए महान
- कॉटन स्वाब्स: जॉइंट कनेक्शनों और तंग स्थानों के लिए
- टूथब्रश: परकोलेटर आर्म्स के लिए
परकोलेटर को अतिरिक्त ध्यान की आवश्यकता होती है - समाधान को सीधे परकोलेटर छिद्रों के माध्यम से हिलाएं।
चरण 7: अच्छी तरह से धोएं
यह चरण महत्वपूर्ण है:
1. कम से कम 2 मिनट तक गर्म पानी से धोएं
2. सुनिश्चित करें कि कोई शराब की गंध नहीं बची है
3. सभी पानी को हिलाकर निकालें
4. छोटे टुकड़ों को बहते पानी के नीचे धोएं
अच्छी तरह से धोने का महत्व:
- अवशिष्ट शराब का स्वाद भयानक होता है
- शराब के धुएं को इनहेल करना हानिकारक है
- नमक का अवशेष अगले सत्र को प्रभावित करता है
चरण 8: सुखाएं और पुनः असेंबल करें
1. अतिरिक्त पानी को हिलाकर निकालें
2. पूरी तरह से हवा में सूखने दें (या पेपर टॉवल का उपयोग करें)
3. सूखने पर पुनः असेंबल करें
4. उपयोग से पहले ताजा पानी डालें
विभिन्न बोंग प्रकारों की सफाई
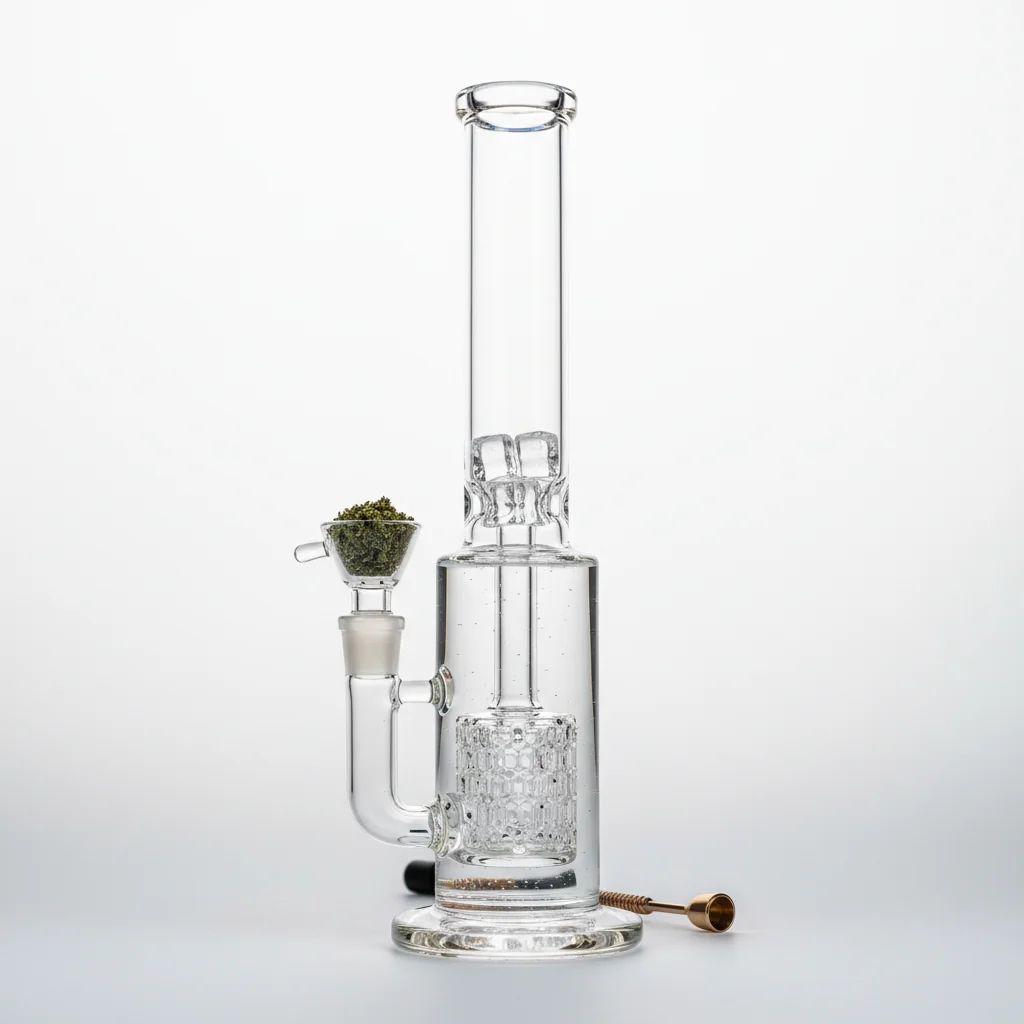
ग्लास बोंग
- सफाई विधियों के प्रति सबसे सहिष्णु
- उच्च सांद्रता वाली शराब का उपयोग कर सकते हैं
- नमक का घर्षण खरोंच नहीं करेगा
- मानक शराब/नमक विधि के साथ सर्वोत्तम परिणाम
सिलिकॉन बोंग
करें:
- गर्म साबुन वाले पानी का उपयोग करें
- फ्रीज करें फिर अवशेष को हिलाएं
- सिलिकॉन-सुरक्षित क्लीनर का उपयोग करें
न करें:
- शराब का उपयोग करें (समय के साथ सिलिकॉन को degrade करता है)
- घर्षण स्क्रबर्स का उपयोग करें
- उच्च तापमान लागू करें
एक्रिलिक बोंग
करें:
- गर्म पानी और डिश साबुन का उपयोग करें
- व्यावसायिक एक्रिलिक-सुरक्षित क्लीनर का उपयोग करें
- गर्म (उबालने वाले नहीं) पानी में भिगोएं
न करें:
- शराब का उपयोग करें (धुंधलापन/दरार का कारण बनता है)
- कठोर एब्रेसिव का उपयोग करें
- अत्यधिक तापमान के संपर्क में लाएं
त्वरित सफाई बनाम गहरी सफाई
दैनिक त्वरित सफाई (2 मिनट)
प्रत्येक सत्र के बाद:
1. पुराना पानी तुरंत खाली करें
2. गर्म पानी से धोएं
3. ढीले अवशेषों को हटाने के लिए हिलाएं
4. ताजा पानी डालें
5. माउथपीस की त्वरित पोंछाई
मुख्य निर्माण को रोकता है और बोंग को कार्यात्मक रखता है।
साप्ताहिक गहरी सफाई (15-20 मिनट)
यदि दैनिक उपयोग कर रहे हैं:
1. पूर्ण शराब/नमक विधि
2. सभी टुकड़ों को अलग से साफ करें
3. समस्या क्षेत्रों को स्क्रब करें
4. अच्छी तरह से धोएं
इष्टतम प्रदर्शन बनाए रखता है और स्वास्थ्य समस्याओं को रोकता है।
मासिक गहन सफाई
भारी उपयोगकर्ताओं के लिए:
1. विस्तारित भिगोना (1+ घंटे)
2. कई हिलाने के सत्र
3. पर्कुलेटर्स की विस्तृत स्क्रबिंग
4. स्थायी दाग के लिए निरीक्षण
पर्कुलेटर्स की सफाई
पर्कुलेटर्स अवशेषों को कठिन-से-पहुंचने वाले क्षेत्रों में फंसाते हैं।
सामान्य दृष्टिकोण:
1. पर्क स्तर से ऊपर सफाई समाधान के साथ बोंग भरें
2. छिद्रों को ढकें और हिलाएं - समाधान पर्क के माध्यम से चलता है
3. अधिक समय तक भिगोने दें (जिद्दी निर्माण के लिए 1+ घंटे)
4. सुलभ क्षेत्रों के लिए पतले पाइप क्लीनर का उपयोग करें
5. आवश्यकतानुसार हिलाने के चक्र दोहराएं
पर्क प्रकार द्वारा:
- ट्री पर्क: सबसे कठिन। कई भुजाएं अवशेषों को फंसाती हैं। विस्तारित भिगोना आवश्यक है।
- हनीकॉम्ब पर्क: छोटी छिद्रें बंद हो जाती हैं। छिद्रों के माध्यम से सीधे समाधान को हिलाएं।
- शॉवरहेड पर्क: साफ करना आसान। समाधान स्वाभाविक रूप से बहता है।
- इनलाइन पर्क्स: आमतौर पर सुलभ। पाइप क्लीनर अच्छे काम करते हैं।
व्यावसायिक बोंग क्लीनर्स
कब उपयोग करें:
- एल्कोहल/नमक का विकल्प
- सिलिकॉन या एक्रिलिक टुकड़ों के लिए
- जब एल्कोहल उपलब्ध न हो
- अतिरिक्त जिद्दी निर्माण के लिए
लोकप्रिय विकल्प:
- फॉर्मूला 420
- ग्रंज ऑफ
- रैंडी का ब्लैक लेबल
- ऑरेंज क्रॉनिक
फायदे: उद्देश्य के लिए डिज़ाइन किया गया, कुछ पुन: उपयोग योग्य हैं
नुकसान: एल्कोहल/नमक से अधिक महंगा
कितनी बार साफ करें
आपको अभी साफ करने की आवश्यकता है:
- दृश्यमान अवशेष निर्माण
- पानी धुंधला/रंगीन है
- बासी या खराब स्वाद
- हवा का प्रवाह प्रतिबंधित
- बुरा गंध
निर्माण को रोकना
पानी को बार-बार बदलें:
- प्रत्येक सत्र में ताजा पानी (आदर्श)
- कम से कम, पानी को 24+ घंटे तक न रखें
ऐश कैचर्स का उपयोग करें:
- मुख्य चेंबर से पहले मलबे को पकड़ता है
- पूरे बोंग की तुलना में साफ करना बहुत आसान है
- मुख्य बोंग की सफाई को काफी कम करता है
बोल्स को अधिक न भरें:
- कम मलबा बोंग में प्रवेश करता है
- साफ जलने वाला
उपयोग के बाद त्वरित धोना:
- 30 सेकंड का धोना निर्माण को रोकता है
- सूखे रेजिन को हटाने से बहुत आसान है
समस्या निवारण
समस्या: दाग नहीं निकलते
- लंबे समय तक भिगोने की कोशिश करें (रात भर)
- उच्च सांद्रता वाला अल्कोहल उपयोग करें
- वाणिज्यिक क्लीनर की कोशिश करें
- कुछ दाग अनदेखा करने पर स्थायी हो जाते हैं
समस्या: पर्कोलेटर के अंदर नहीं पहुंच सकते
- लंबे समय तक भिगोने दें
- सॉल्यूशन को पर्क होल्स के माध्यम से हिलाएं
- कुछ क्षेत्रों में हल्का दाग रह सकता है
समस्या: रेजिन का निर्माण जल्दी लौटता है
- आप शायद निम्न गुणवत्ता वाली कैनबिस का उपयोग कर रहे हैं
- पानी को अधिक बार बदलें
- प्रत्येक उपयोग के बाद त्वरित धोना
समस्या: सफाई के बाद धुंधला कांच
- कठोर पानी के अवशेष - आसुत पानी से धोएं
- अल्कोहल का अवशेष - अधिक अच्छी तरह से धोएं
- पुराने निर्माण से स्थायी उत्कीर्णन
सुरक्षा नोट्स
- क्षेत्र को हवादार करें जब अल्कोहल का उपयोग कर रहे हों
- कभी भी अल्कोहल को गर्म न करें - आग का खतरा
- पूरी तरह से धोएं उपयोग से पहले
- अपशिष्ट को सही तरीके से निपटाएं - रेजिन को नाली में न डालें
- आग से दूर रखें - जब तक अल्कोहल वाष्पित न हो जाए
यह मार्गदर्शिका शैक्षिक उद्देश्यों के लिए है। भांग के कानून क्षेत्राधिकार के अनुसार भिन्न होते हैं।
Step 1:
Step 2:
Step 3:
Step 4:
Step 5:
Step 6:
Frequently Asked Questions
दैनिक उपयोगकर्ताओं के लिए, प्रत्येक सत्र के बाद एक त्वरित कुल्ला और साप्ताहिक गहरी सफाई। आकस्मिक उपयोगकर्ताओं के लिए, हर कुछ सत्रों के बाद गहरी सफाई करें। यदि पानी धुंधला दिखता है या आप बासीपन का स्वाद लेते हैं, तो इसे साफ करने का समय है।
Related Guides
Ash Catcher Guide: Keep Your Bong Clean Longer
Complete guide to ash catchers for bongs: what they do, types including dry and percolator ash catchers, joint sizes and angles, how to use and clean them, and how to choose the right one.

Ash Catchers: What They Do and Why Use One
Learn what ash catchers do, how they keep your bong clean, and whether you need one. Understand different types, how to choose the right size, and maintenance tips.
Beaker vs Straight Tube Bongs: Which Style is Better?
Comprehensive guide about beaker vs straight tube bongs: which style is better?. Learn everything you need to know with expert tips and detailed instructions.