
איך לגלגל ג'וינט צלב: מדריך שלם לג'וינט הצלב האיקוני
Mike Rodriguez
Rolling Expert
איך לגלגל ג'וינט צלב: מדריך שלם לג'וינט הצלב האיקוני
הג'וינט הצלב (שהפך לפופולרי בזכות Pineapple Express) הוא היהלום שבכתר של טכניקות הגלגול - שני ג'וינטים חוצים בזווית של 90 מעלות, נשרפים משלוש נקודות בו זמנית. טכניקה זו ברמת מומחה היא מאתגרת אך מרשימה מאוד.
תשובה מהירה
כדי לגלגל ג'וינט צלב: גלגל ג'וינט עבה אחד וג'וינט צלב דק אחד, דקר חור במרכז הג'וינט העבה, הכנס את הג'וינט הדק דרך החור ליצירת צורת צלב, סגור את הצומת עם חתיכות נייר גלגול רטובות, בדוק את זרימת האוויר משלושת הקצוות, הדלק את שלושתם בו זמנית. נדרש 1.5-2 גרם קנאביס סך הכל ומיומנויות גלגול מומחה.
מהו ג'וינט צלב?
מבנה:
- ג'וינט עבה "ראשי" אחד (אנכי)
- ג'וינט דק "צלב" אחד (אופקי)
- חוצים בזווית של 90 מעלות
- כל שלושת הקצוות נשרפים בו זמנית
הפך לפופולרי: סרט Pineapple Express (סת' רוגן וג'יימס פרנקו)
קושי: ברמת מומחה - דורש יסודות גלגול טובים
לספקי ג'וינט צלב, בדוק את ניירות גלגול מותאמים אישית מ-MunchMakers](https://munchmakers.com/product-category/custom-rolling-papers/). למדריכי גלגול מתקדמים, פיינפל אקספרס ב-IMDb עשה את הטכניקה האיקונית הזו מפורסמת.
למה לגלגל ג'וינט צלב?
סיבות:
- טכניקת התפארות אולטימטיבית
- משיכה ויזואלית מרשימה
- חוויית עישון ייחודית (שלוש דובדבנים)
- אתגר הנדסי
- אירועים מיוחדים/חגיגות
לא מעשי: ג'וינטים צולבים הם בזבזניים, קשים ולא מעשיים. הם בשביל כיף ומופע, לא עבור יעילות.
דרישות מוקדמות
לפני שתנסה, עליך להיות מסוגל:
- לגלגל ג'וינטים רגילים בצורה מושלמת (שיעור הצלחה של 90% ומעלה)
- לגלגל ג'וינטים בצורת קונוס
- למלא ג'וינטים בצורה הדוקה ואחידה
- לעבוד בעדינות עם ניירות גלגול
אם אינך יכול: תרגל ג'וינטים רגילים לפחות עוד חודש. ג'וינטים צולבים רק י frustrate אותך ויבזבזו קנאביס.
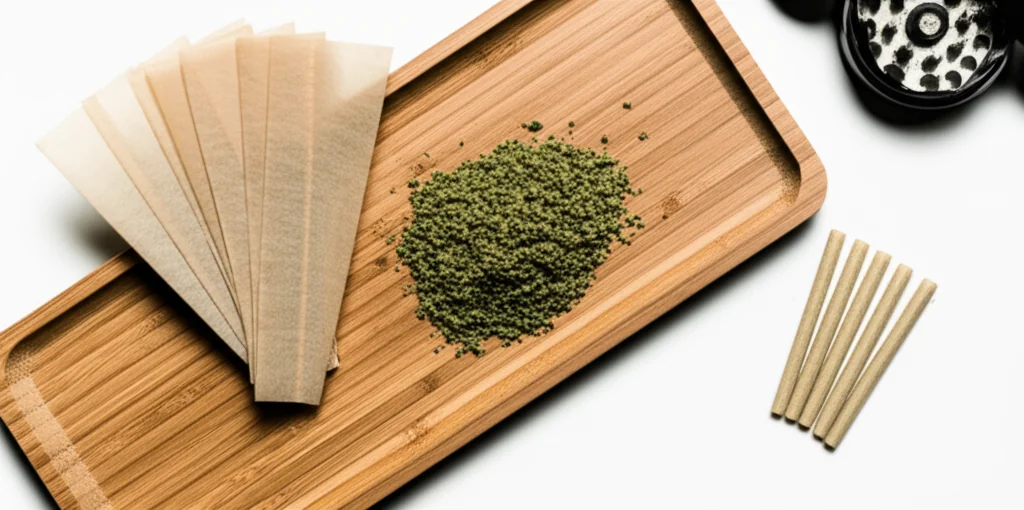
חומרים נדרשים
- ניירות גלגול בגודל קינג (2-3 ניירות)
- ניירות רגילים בגודל 1¼ (2 ניירות)
- פילטרים/קביים (2)
- קנאביס טחון (1.5-2 גרם סך הכל)
- קליפס נייר או כלי פוקר
- נייר גלגול נוסף לתיקונים
- סבלנות
שלב אחר שלב: גלגול ג'וינט צלב
שלב 1: גלגל שני ג'וינטים נפרדים
ג'וינט עיקרי (אנכי):
- השתמש בנייר בגודל קינג
- גלגל עבה וחזק
- מלא 1-1.5 גרם קנאביס
- עשה אותו שמן - צריך יציבות מבנית
ג'וינט צלב (אופקי):
- השתמש בנייר בגודל 1¼
- גלגל דק יותר מהעיקרי
- מלא 0.5-0.75 גרם
- צריך להתאים דרך חור הג'וינט העיקרי
שניהם צריכים להיות:
- ארוזים היטב
- מפוזרים באופן אחיד
- מוח sealed לחלוטין
- אין נקודות רכות
שלב 2: מצא את נקודת המרכז
על המפרק העיקרי העבה:
- מדוד כדי למצוא את המרכז המדויק
- סמן בעדינות עם האצבע
- כאן ייפגש המפרק הצולב
קריטי: נקודת המרכז = בעירה אחידה משני הצדדים
שלב 3: דקר את החור
באמצעות קליפס נייר או דוקר:
1. הכנס בנקודת המרכז המסומנת
2. דחוף ישר לצד השני
3. זוז מעט כדי להרחיב את החור
4. צריך להיות רק רחב יותר מקוטר המפרק הצולב
היזהר: אל תקרע את המפרק, רק צור חור נקי
שלב 4: הכנס את המפרק הצולב
החלק בעדינות את המפרק הדק דרך החור:
- דחוף לאט
- צריך להיות צמוד אבל לא בכוח
- אורך שווה משני הצדדים
- זווית של 90 מעלות למפרק הראשי
בדוק: המפרק הצולב צריך לבלוט באופן אחיד משני הצדדים
שלב 5: Seal the Intersection
זה קריטי - מונע דליפות אוויר:
1. קרע חתיכות קטנות של נייר גלגול (בגודל ציפורן)
2. ליקק אותם היטב כדי להפוך לדביקים
3. עטוף סביב הצומת שבה המפרקים נפגשים
4. כסה את כל הפערים בין המפרקים הראשיים והצולבים
5. לחץ חזק כדי לאטום
השתמש ב-3-4 חתיכות נייר עטיפה מכיוונים שונים
שלב 6: בדוק את זרימת האוויר
לפני ההדלקה, בדוק שאיפה משלושת הקצוות:
1. שאבו מהקצה הראשי
2. שאבו מקצה החיבור השמאלי
3. שאבו מקצה החיבור הימני
שלושתם צריכים לשאוב אוויר. אם אחד מהם חסום, מצאו ואטמו דליפות עם פיסות נייר נוספות.
שלב 7: הדליקו את שלושת הקצוות
החלק המרשים:
שיטה 1 (לבד):
- הדליקו קודם את הקצה הראשי
- הדליקו במהירות את שני הקצוות החוצים
- דורש מהירות ותיאום
שיטה 2 (עם חברים):
- 2-3 אנשים מדליקים כל אחד קצה אחד בו זמנית
- קל יותר ואמין יותר
מטרה: שלושת הדובדבנים בוערים בו זמנית
שלב 8: עישון וסיבוב
טכניקת עישון:
- שאבו רק מהחיבור הראשי (אל תעשנו מהקצוות החוצים)
- סובבו כדי לשמור על שלושת הצדדים בוערים באופן אחיד
- צפו בהנדסה בפעולה
הקצוות החוצים נשרפים ומזינים עשן לתוך החיבור הראשי
בעיות נפוצות בחיבור חוצה
בעיה: החיבור החוצה נופל מהחור
סיבה: החור גדול מדי, החיבור החוצה דק מדי
פתרון: עשו את החיבור החוצה עבה יותר, או השתמשו ביותר נייר אטימה בצומת
בעיה: אוויר לא זורם
סיבה: הצומת אטום חזק מדי, חוסם את זרימת האוויר
פתרון: דקרו חורים קטנים בפיסות האטימה כדי לאפשר זרימת אוויר, או השתמשו בפחות נייר אטימה
בעיה: החיבור לא נשאר דלוק
סיבה: רפוי מדי, אריזת חומרים לא אחידה, או דליפות אוויר
פתרון: ארזו את שני החיבורים חזק יותר לפני ההרכבה, אטמו את כל הפערים ביסודיות
בעיה: בעירה לא אחידה (צד אחד מקדים)
סיבה: חיבור צולב לא ממורכז, או צד אחד דחוס יותר
פתרון: ודא שהחיבור הצולב ממורכז לחלוטין, דחוס באופן אחיד משני הצדדים
כמה קנאביס זה צורך?
סך הכל: 1.5-2.5 גרם
פירוט:
- חיבור ראשי: 1-1.5 גרם
- חיבור צולב: 0.5-1 גרם
לצורך השוואה:
- חיבור רגיל: 0.5-0.75 גרם
- בלונט רגיל: 1-2 גרם
חיבורים צולבים משתמשים בְּיָדוּעַ יותר קנאביס ונשרפים מהר יותר (שלושה נקודות בעירה)
האם זה בזבזני?
כן, מאוד בזבזני:
- נשרף משלוש נקודות בו זמנית
- קנאביס נשרף מהר יותר ממה שאתה יכול לעשן
- הרבה עשן בורח ללא שימוש
- לא צריכה יעילה
מתי לעשות את זה בכל מקרה: הזדמנויות מיוחדות, חגיגות, להראות, אתגר הנדסה מהנה
וריאציות
החיבור של ישו (חיבור צולב ארבע-כיווני)
עוד יותר מתקדם:
- שני חיבורים צולבים חוצים את החיבור הראשי
- יוצר 5 נקודות עישון
- דורש 3-4 גרם קנאביס
- קשה מאוד
רק למומחים אמיתיים
החיבור הקלוע
טכניקת רושם חלופית:
- שלושה חיבורים קלועים יחד
- אסתטיקה ויזואלית שונה
- קצת יותר קל מאשר חיבור צולב
טיפים להצלחה
טיפ 1: שפר את החיבורים הרגילים שלך קודם
אם אתה לא יכול לגלגל חיבורים רגילים מושלמים 95% מהזמן, אתה לא מוכן לחיבורים צולבים.
טיפ 2: עשה את החיבור הראשי עבה
המפרק העבה זקוק לשלמות מבנית כדי לתמוך במפרק הצלב. אל תהסס עם קנאביס.
טיפ 3: Seal Generously
איטום יתר טוב מאיטום חסר. תמיד אפשר להסיר פatches עודפים, אבל דליפות אוויר הורסות מפרקי צלב.
טיפ 4: בדוק לפני ההדלקה
תמיד בדוק את זרימת האוויר מכל הכיוונים לפני ההדלקה. מציאת בעיות לאחר ההדלקה = מפרק צלב כושל.
טיפ 5: קבל כישלונות
אפילו רולים מנוסים נכשלו ב-30-40% מהניסיונות למפרקי צלב. זה חלק מהאתגר.
חשיבות תרבותית
פינת אננס: הביא את מפרקי הצלב לתודעה הכללית
סת' רוגן: "זה השיא של הוורטקס של הנדסת ג'וינט"
קהילת הקנאביס: מפרקי צלב הם הישג מכובד ברולינג
סמל: מראה מסירות למלאכה, חשיבה הנדסית, נכונות לבזבז קנאביס עבור האמנות
המדריך הזה מיועד למטרות חינוכיות. חוקים לגבי קנאביס משתנים לפי שיפוט.
Step 1:
Step 2:
Step 3:
Step 4:
Step 5:
Step 6:
Frequently Asked Questions
כן, ג'וינט צלב הוא ברמת מומחה. אתה צריך מיומנויות טובות בגלגול ג'וינטים, ידיים יציבות וסבלנות. צפה בכמה ניסיונות כושלים כשאתה לומד. תרגל קודם ג'וינטים רגילים.
ג'וינטים צלב משתמשים ב-1.5-2 גרם סך הכל - כ-1-1.5 גרם בג'וינט הראשי ו-0.5-1 גרם בג'וינט הצלב. הם בזבזניים בהשוואה לג'וינטים רגילים בגלל בעירה מכמה נקודות.
כן! הדלק את הקצה הראשי ואת שני קצוות הג'וינט הצלב בו זמנית. זה יוצר את חוויית ג'וינט הצלב האיקונית עם עשן משלוש נקודות. בדרך כלל נדרשים 2-3 אנשים כדי להדליק כראוי.
Related Guides
Rolling Paper Sizes Explained: 1 1/4, King Size, and More
Comprehensive guide about rolling paper sizes explained: 1 1/4, king size, and more. Learn everything you need to know with expert tips and detailed instructions.

Best Rolling Papers for Beginners: Complete Buying Guide 2026
Discover the best rolling papers for beginners including RAW, Zig-Zag, and OCB. Learn about sizes, materials (rice vs hemp vs wood pulp), and which papers are easiest to roll with.
Clear Rolling Papers: Are Cellulose Papers Worth It?
Comprehensive guide about clear rolling papers: are cellulose papers worth it?. Learn everything you need to know with expert tips and detailed instructions.