
כיצד לארוז מכשיר אידוי עשב יבש לקבלת התוצאות הטובות ביותר
David Martinez
Concentrate Expert
כיצד לארוז מכשיר אידוי עשב יבש לקבלת התוצאות הטובות ביותר
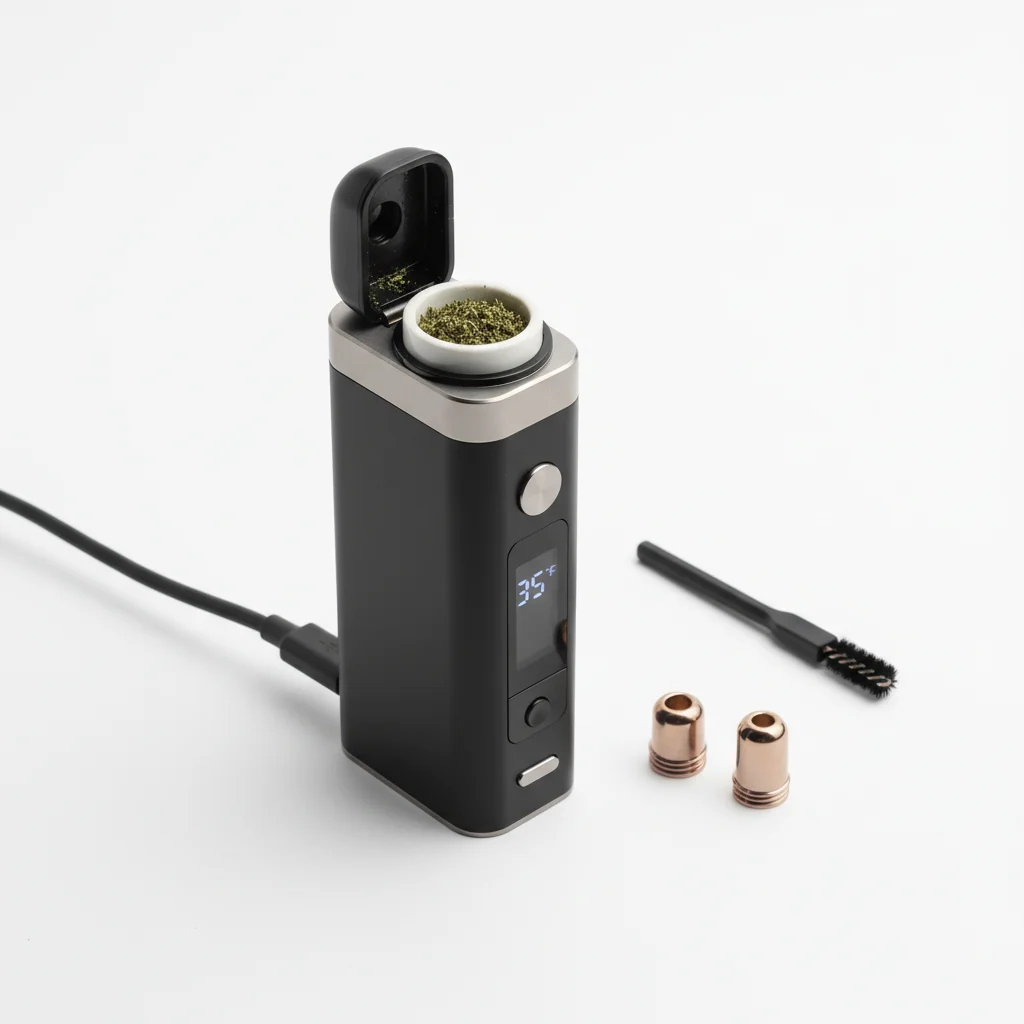
טכניקת אריזה נכונה משפיעה באופן דרמטי על הביצועים של הוופורייזר שלך. ארזו חזק מדי ותגביל את זרימת האוויר. רופף מדי ותקבל אדים פתולים. מדריך זה מלמד אותך את הדרך האופטימלית להעמיס את הוופורייזר שלך לטעם מקסימלי, ייצור אדים ויעילות.
תשובה מהירה
לקבלת התוצאות הטובות ביותר: טחנו קנאביס לעקביות בינונית-עדינה (כמו מלח גס), העמיסו את החדר למלאות מתאימה (מלאה להולכה, 3/4 להסעה), וארזו בלחץ עדין - מוצק אך לא דחוס. החומר צריך לתת קלות בלחיצה. ודא תמיד משטח נקי וישר לפני החימום.
למה טכניקת האריזה חשובה
אריזה לקויה היא הסיבה מספר 1 שאנשים מאוכזבים ממכשירי אידוי. אפילו מכשיר של 400 דולר מתפקד בצורה גרועה כשהוא ארוז בצורה לא נכונה.
לקבלת עקביות הטחינה הטובה ביותר, השתמש באיכות[ [ [ [ מַבְטָמאת Munchmakers](https://munchmakers.com/product-category/custom-grinders/). למדע אידוי,SciDirectמארח מחקרי קנאביס.
מה קורה עם אריזה גרועה:
- צמוד מדי: זרימת אוויר מוגבלת, משיכה קשה, חילוץ לא אחיד
- רופף מדי: אדים חלשים, חומר מבוזבז, מיצוי לא שלם
- טחינה שגויה: מסכים סתומים, נקודות חמות, טעם גרוע
- משטח לא אחיד: בריחות חום, מפגשים לא עקביים
מה אריזה נכונה מספקת:
- אדים צפופים וטעימים
- אפילו מיצוי (ללא פסולת)
- זרימת אוויר קלה
- מפגשים מלאים מכל קערה
שלב 1: השג את הטחינה הנכונה
הטחינה היא הבסיס לאידוי טוב. רוב הבעיות עקבו אחר עקביות טחינה לא נכונה.
טחינה אידיאלית: בינונית-עדינה
חשבו על העקביות של מלח גס או אורגנו מיובש - אוורירי אך אחיד, לא אבקה ולא גושים.
למה זה עובד:
- מֶמַע: מספיק חשיפה לחילוץ יעיל
- גַלשָׁ: מרווחים בין חלקיקים מאפשרים אוויר חם לעבור
- חימום עקבי: חתיכות בגודל דומה מתחממות באופן שווה
התאמות טחינה לפי סוג אידוי:
ממה להימנע:
עדין מדי (אבקה):
- סתימות מסכים ונתיבי אדים
- מגביל את זרימת האוויר בצורה חמורה
- נופל דרך מסכים
- יוצר אדים קשים וחם
גס מדי (שמנמן):
- מיצוי לא אחיד (מחוץ לבישולים, בתוך גולמי)
- חוֹמֶר
- אדים חלשים, לא עקביים
- צריך ערבוב מתמיד
שלב 2: הכן את החדר שלך
לעולם אל תארוז לתוך תא מלוכלך. שאריות משפיעות על הטעם ויכולות להגביל את זרימת האוויר.
בדיקה מהירה לפני הפגישה:
1. בדיקה ויזואלית: החדר צריך להיראות נקי, המסכים נקיים
2. מבחן מכה: נשוף בעדינות - האוויר צריך לזרום בחופשיות
3. מִדַ: החדר צריך להיות בטמפ' החדר לפני הטעינה
4. פִטוּל: צחצח את כל שאריות החומר
כלים שעוזרים:
- מברשת קטנה (לעתים קרובות כלולה עם מכשירי אידוי)
- קיסם עץ לשאריות עקשנות
- אוויר דחוס למסכים
- מגבוני אלכוהול איזופרופיל לניקוי עמוק
שלב 3: טען את החדר
טכניקת הטעינה משתנה מעט לפי סוג הוופורייזר. הנה מה שעובד:
לאיידוי הולכה:
רמת מילוי:תא מלא (מפלס עם החלק העליון)
למה:הולכה דורשת חומר למגע בין קירות מחוממים. חלל ריק פירושו פחות מגע פני השטח, פחות אדים.
שיטה:
1. סקופ קנאביס טחון עם כלי קטן
2. זרוק לתא (אל תלחץ תוך כדי הוספת)
3. ממלאים עד השפה
4. המשך לשלב האריזה
לאיידוי הסעה:
רמת מילוי:3/4 מלא (השאירו מרחב ראש)
למה:אוויר חם צריך לזרום דרך החומר. אריזת יתר חוסמת את זרימת האוויר.
שיטה:
1. סקופ קנאביס טחון
2. מלאו עד 3/4 קיבולת
3. השאר מקום גלוי בחלק העליון
4. המשך לאריזה (עם מגע קל מאוד)
עבור מכשירי אידוי היברידיים:
רמת מילוי:מלא אבל לא עולה על גדותיו
שיטה:
1. עקוב אחר גישת ההולכה
2. ארוז מעט קל יותר מאשר הולכה טהורה
3. ודא שהחומר לא נדחס כנגד מסכים
שלב 4: ארוז לצפיפות תקינה
זה המקום שבו רוב האנשים טועים. "אריזה" לא פירושה דחיסה - זה אומר להתייצב.
הלחץ הנכון:
- מֵצַר: כמו ללחוץ על שאריות קפה, לא לרסק אותן
- מבחן תן: לחיצה צריכה לעמוד בהתנגדות עדינה, לא בקשיות סלע
- בדיקת זרימת אוויר: אתה אמור להיות מסוגל לשאוב אוויר דרך
אריזת הולכה:
ארוז מעט מוצק יותר - אתה רוצה מגע טוב עם קירות תא. תחשוב על דחיפת סוכר חום לתוך כוס מדידה. יציב אך לא מוצק.
אריזת הסעה:
ארוז קלות מאוד - פשוט הסדר את החומר. אוויר חם צריך לזרום דרכו, אז תחשוב "לסדר" יותר מ"אריזה".
טעויות אריזה נפוצות:
טעות: חבטות חוזרות
יוצר שכבות דחוסות החוסמות את זרימת האוויר. מספיקה לחיצה עדינה אחת.
טעות: אריזת אצבעות
שמנים מהעור יכולים להשפיע על החומר והתא. השתמש בכלים.
טעות: מילוי יתר ואז לחיצה למטה
זה דוחס חומר ומילוי יתר. למלא נכון תחילה, ואז להתמקם.
שלב 5: רמה וחותם
הפרטים הסופיים חשובים למפגשים עקביים.
צור משטח שטוח:
- מברשת או מהדקים כדי ליישר את החומר
- אין פסגות, עמקים או חומר רופף בקצוות
- צריך להיראות אחיד מלמעלה
נקה את השפה:
- הסר כל חומר מהקצוות/הברגות
- פסולת כאן מונעת אטימה תקינה
- השתמש במברשת או באצבע כדי לנגב
בדוק את החותם:
- סגור את החדר/הפה
- צריך להיסגר בצורה חלקה ללא התנגדות
- כל תחושת טחינה = פסולת בחוטים
אריזה למצבים שונים
מינון מיקרו (כמויות קטנות):
מכשירי אידוי רבים נאבקים עם חדרים עמוסים למחצה. אפשרויות:
- כמוסות מינון: תרמילי מתכת קטנים שמתאימים לתא
- טכניקת מסך: הוסף מסך שני למעלה כדי לדחוס
- כְּרִית: השתמש כמרווח בתחתית החדר
מפגשים קבוצתיים:
ארוז מעט מוצק יותר למפגשים ארוכים ועקביים. חדרים מלאים עובדים הכי טוב במעבר.
להיטים מהירים סולו:
שקול מכשירי אידוי הסעה לפי דרישה - הם מטפלים טוב יותר בתאים חלקיים.
פתרון בעיות אריזה
בעיה: אדים חלשים/חצובים
סיבה סבירה:ארוז משוחרר מדי
תיקון:הגדל מעט את הצפיפות, וודא תא מלא
בעיה: קשה לצייר
סיבה סבירה:ארוז חזק מדי
תיקון:השתמש בלחץ קל יותר, בדוק את המסך לאיתור סתימות
בעיה: מיצוי לא אחיד (חלקם חום, חלק ירוק)
סיבה סבירה:טחינה שגויה או חבילה לא אחידה
תיקון:טוחנים עדינים יותר, משטח אריזה ישר, מערבבים באמצע הפגישה
בעיה: אדים קשים וחם
סיבה סבירה:לארוז חזק מדי או לטחון עדין מדי
תיקון:שחרר את החבילה, השתמש בטחינה גסה יותר
בעיה: חומר נופל דרך המסך
סיבה סבירה:לטחון עדין מדי
תיקון:השתמש ב-Carser Grind, שקול החלפת מסך עדין
תקציר: החבילה המושלמת
1. לִטחועדינות בינונית-עדינה
2. לְנַתא לפני הטעינה
3. לְמַכראוי (מלא להולכה, 3/4 להסעה)
4. לַה�בלחץ עדין (יציב, לא דחוס)
5. לְמַאת המשטח ולנקות את השפה
שלטו ביסודות אלה והמכשיר האידוי שלכם יספק את החוויה שאליה הוא תוכנן. כאשר יש ספק, תטעו בצד של אריזה רופפת יותר - תמיד תוכלו לבלום יותר, אבל חומר דחוס יתר דורש התחלה מחדש.
מדריך זה מיועד למטרות חינוכיות. חוקי הקנאביס משתנים לפי תחום השיפוט.
Step 1:
Step 2:
Step 3:
Step 4:
Step 5:
Frequently Asked Questions
בינוני-עדין הוא אידיאלי עבור רוב מכשירי האידוי - כמו מלח גס. עדין מדי סתום מסכים ומגביל את זרימת האוויר. גס מדי גורם לחילוץ לא אחיד. התאם מעט על סמך הדרישות של הוופורייזר הספציפי שלך.
אריזה לצפיפות בינונית - יציבה אך לא דחוסה. מכשירי אידוי הולכה עובדים מעט טוב יותר עם חבילות מוצקות יותר (יותר מגע משטח). מכשירי אידוי הסעה זקוקים לאריזות רופפות יותר כדי שאוויר חם יוכל לזרום דרך החומר.
כן, אבל התוצאות משתנות. לחלק מהמכשירים יש חדרים מופחתים או כמוסות מינון לעומסים קטנים יותר. מילוי חצי תא מלא עלול לגרום לחימום לא אחיד ולאדים לקויים. בדוק אם למכשיר שלך יש אפשרויות מיקרו-מינון.
Related Guides

510 Thread Batteries: Complete Guide to Vape Pen Batteries
Everything you need to know about 510 thread batteries for vape cartridges. Learn about voltage settings, battery types, features to look for, and how to choose the right battery for your cartridges.
Best Vaporizer Temperature Settings: Effects at Each Level
Comprehensive guide about best vaporizer temperature settings: effects at each level. Learn everything you need to know with expert tips and detailed instructions.

Conduction vs Convection Vaporizers: Heating Methods Explained
Understand the difference between conduction and convection heating in vaporizers. Learn how each method affects flavor, vapor quality, efficiency, and which is best for your vaping style.