
How to Roll a Tulip Joint: The Dutch Tulip Technique Tutorial
Mike Rodriguez
Rolling Expert
How to Roll a Tulip Joint: The Dutch Tulip Technique Tutorial
The tulip joint is really something to look at - it's a cannabis roll that's shaped just like a tulip flower. You've got this big, cone-shaped bulb sitting on top of a twisted paper stem, and it's pretty impressive. This style of rolling actually comes from Dutch cannabis culture, and it takes some skill to get it right. But if you can master it, the payoff is worth it - you'll have a shareable smoke that's sure to turn heads whenever you break it out.
Quick Answer
To roll a tulip joint: lay out 3 rolling papers in a windmill pattern, place 2-3g of cannabis in the center, gather the corners upward to form the bulb, twist the paper below the bulb into a stem, insert a thick filter tube into the stem as the mouthpiece, and wrap the stem with paper to seal it. Light the bulb from the top. This is an expert-level roll, so it's not for beginners.
--- ## What is a Tulip Joint?
A tulip joint is made up of three main parts, kind of like a real tulip flower. You've got the big cannabis bulb at the top, which is like the flower, then a twisted paper stem underneath, and a filter tube at the bottom that you use as a mouthpiece. This design actually came from the cannabis culture in the Netherlands, where coffee shops in Amsterdam would make them for special occasions. People don't roll tulips to be efficient, it's more about the visual effect, smoking with a group, and celebrating something special. The whole point is to have a good time and make it a memorable experience.
For premium rolling papers perfect for tulip joints, visit MunchMakers. For Dutch cannabis culture context, Wikipedia explains the coffee shop tradition.
--- ## Why Roll a Tulip Joint?
Rolling tulips is about the visual appeal and the fun of it, not practicality. People do it to impress their friends, to take on the engineering challenge, and to pay homage to a Dutch tradition, often at special events and celebrations. But let's be real - tulips burn quickly and use a lot more cannabis than your average joint. They're art pieces, meant to be admired, not a sensible way to consume.
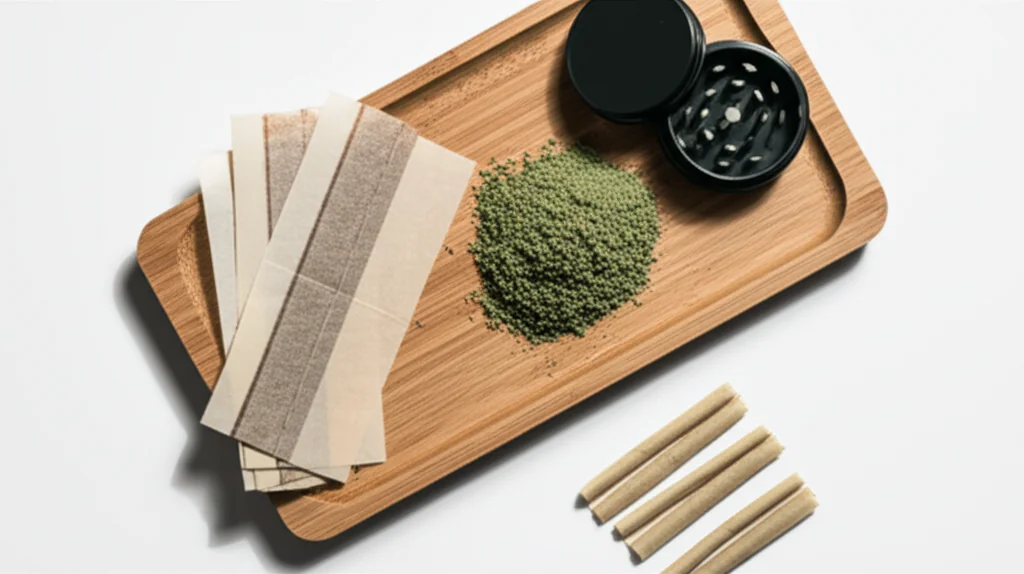
--- ## What You Need Gather 3-4 king size rolling papers, 2-3 grams of ground cannabis, thick filter material that can be formed into a tube, and a lighter. Beyond the supplies, the two most important ingredients are steady hands and patience. --- ## Step-by-Step: Rolling a Tulip Joint ### Step 1: Create the Windmill Base Lay out three rolling papers so they overlap slightly in the center, forming a clover or windmill shape with the gum strips facing outward. When laid flat, the arrangement should look like a three-petal flower. This combined sheet becomes the wrapper for the bulb. ### Step 2: Add the Cannabis Bulb Place 2-3 grams of ground cannabis in the center of the windmill and mound it up rather than spreading it toward the edges. Be generous here, since this pile becomes the flower bulb that defines the whole roll. ### Step 3: Form the Bulb Lift all three paper corners and bring them together above the cannabis, creating a pouch that contains the flower inside. Done right, it should look like a closed tulip bud sitting on your work surface. ### Step 4: Twist the Stem Directly below the cannabis bulb, twist all of the gathered paper tightly and keep twisting for two to three inches to create the stem. Twist firmly, because this twist is what holds the entire structure together. ### Step 5: Insert the Filter Tube Roll several filters together or use a thick cardboard tube, then insert it into the bottom of the twisted stem so it fits snugly. This tube becomes your mouthpiece, and a thin filter will collapse, so make it thick. ### Step 6: Seal the Stem Tear off a strip of rolling paper, wrap it around the twisted stem from the filter up to the bulb, then lick and seal it. This wrap reinforces the structure and prevents air leaks along the stem. ### Step 7: Light the Flower Light the top of the bulb evenly around the edges. The cannabis will cherry like a large bowl and draw through the stem and filter, burning from top to bottom like a giant candle. --- ## Common Tulip Joint Problems
When your bulb doesn't keep its shape, it's probably because the stem isn't twisted tightly enough, or the papers are too dry. To fix this, twist the stem firmly and add a bit of moisture to the papers to make them more flexible. On the other hand, if you're not getting any airflow, it's likely that the stem is twisted too tightly or the cannabis is packed too densely in the bulb. In this case, ease up on both the twist and the packing. If your bulb falls apart, you'll need to add more paper patches where the stem meets the bulb and give it a tighter twist. As for the tulip burning too quickly, that's just how it is - the design of the exposed bulb means it's going to burn fast, and there's no way to change that.
--- ## Tulip Joint Tips
Practice regular joints first, because you genuinely need a hundred or more successful standard rolls before a tulip will come together. Use fresh, slightly moist papers that shape without tearing. Don't over-pack the bulb, since it needs airflow to burn. Make the filter tube thick, because thin filters collapse under the stem. Finally, accept that tulips are wasteful by design. They're for show, not efficiency.
--- ## Tulip vs Regular Joint | Feature | Tulip Joint | Regular Joint | |---------|-------------|---------------| | Cannabis | 2-3g | 0.5-0.75g | | Difficulty | Expert | Beginner-Intermediate | | Burn Time | 15-20 min (fast) | 10-15 min | | Efficiency | Low (wasteful) | High | | Visual Appeal | Very High | Standard | | Practicality | Low | High | --- ## When to Roll Tulip Joints
Tulips shine at celebrations like birthdays and holidays, in group sessions of four to six people, for photos and social media, and any time you want to show off your rolling skills. Skip the tulip when you're smoking solo, running low on cannabis, still learning to roll, or just need efficient consumption.
--- This guide is for educational purposes. Cannabis laws vary by jurisdiction.
Step 1: Create the tulip flower
Use 3 rolling papers arranged in windmill pattern, overlapping slightly. This creates large surface for cone-shaped flower.
Step 2: Form the bulb
Place 2-3g ground cannabis in center of windmill papers. Gather corners upward creating pouch/bulb shape like flower bud.
Step 3: Twist the stem
Twist the gathered paper tightly below the cannabis bulb, creating a stem. Twist firmly - this holds everything together.
Step 4: Insert filter tube
Roll thick filter tube and insert into twisted stem opening. This becomes the mouthpiece and provides airflow.
Step 5: Seal the stem
Wrap rolling paper around the stem from filter to bulb, sealing the twisted section. Lick and seal to make airtight.
Step 6: Light the flower
Light the top of the tulip bulb evenly around the edges. The cannabis flower will cherry and burn down like candle.
Frequently Asked Questions
Tulip joints typically hold 2-3 grams of cannabis in the flower bulb. They're designed for groups (4-6 people) or special occasions, not solo smoking.
Yes, tulip joints are inefficient - cannabis burns quickly from the exposed flower bulb. They're for show and special occasions, not efficient consumption.
No, tulip joints are expert-level. Master regular joints, cones, and blunts first. Requires strong rolling fundamentals and delicate paper handling.
Related Guides
Rolling Paper Sizes Explained: 1 1/4, King Size, and More
Comprehensive guide about rolling paper sizes explained: 1 1/4, king size, and more. Learn everything you need to know with expert tips and detailed instructions.

Best Rolling Papers for Beginners: Complete Buying Guide 2026
Discover the best rolling papers for beginners including RAW, Zig-Zag, and OCB. Learn about sizes, materials (rice vs hemp vs wood pulp), and which papers are easiest to roll with.
Clear Rolling Papers: Are Cellulose Papers Worth It?
Comprehensive guide about clear rolling papers: are cellulose papers worth it?. Learn everything you need to know with expert tips and detailed instructions.