
So rollen Sie ein perfektes Gelenk für Anfänger: Schritt-für-Schritt-Tutorial 2026
Mike Rodriguez
Rolling Expert
So rollen Sie ein perfektes Gelenk für Anfänger: Schritt-für-Schritt-Tutorial 2026
ein Gelenk rollenist eine grundlegende Cannabis-Fertigkeit, die einschüchternd erscheint, aber mit Übung natürlich wird. Laut Cannabis-Pädagogen erzielt die durchschnittliche Person nach 10-15 Übungsversuchen konsistente Ergebnisse. Dieses umfassende Tutorial 2026 führt Sie durch jeden Schritt des Rollens eines klassischen Joints, von der Auswahl der Papiere und der Vorbereitung Ihres Filters bis zur endgültigen Versiegelung. Mit der richtigen Technik und etwas Geduld rollen Sie in kürzester Zeit konsistente, rauchbare Gelenke.
Verwandte Anleitungen:Bevor Sie beginnen, lesen Sie unsere Anleitungen zuDie richtige Wahl [ Schleifer](https://guides.munchmakers.com/guide/grinder-maintenance-schedule) undAuswählen von [ Papierrollen](https://guides.munchmakers.com/guide/best-rolling-papers-beginners) für die besten Ergebnisse.
schnelle Antwort
So rollen Sie eine Verbindung: Erstellen Sie einen Filter mit Akkordeon, schleifen Sie Ihren Cannabis gleichmäßig, legen Sie den Filter in Papier, verteilen Sie Cannabis entlang der Falte, formen Sie ihn zu einem Zylinder, indem Sie es hin und her rollen, stecken Sie die Non-Gum-Kante unter das Cannabis, rollen Sie nach oben zum Gummistreifen, lecken und versiegeln Sie sie. Es braucht Übung, aber die meisten Menschen können innerhalb von 3-5 Versuchen ein rauchbares Gelenk rollen.
Video-Tutorial
Sehen Sie sich diese Schritt-für-Schritt-Anleitung an, um den gesamten Rollprozess in Aktion zu sehen:
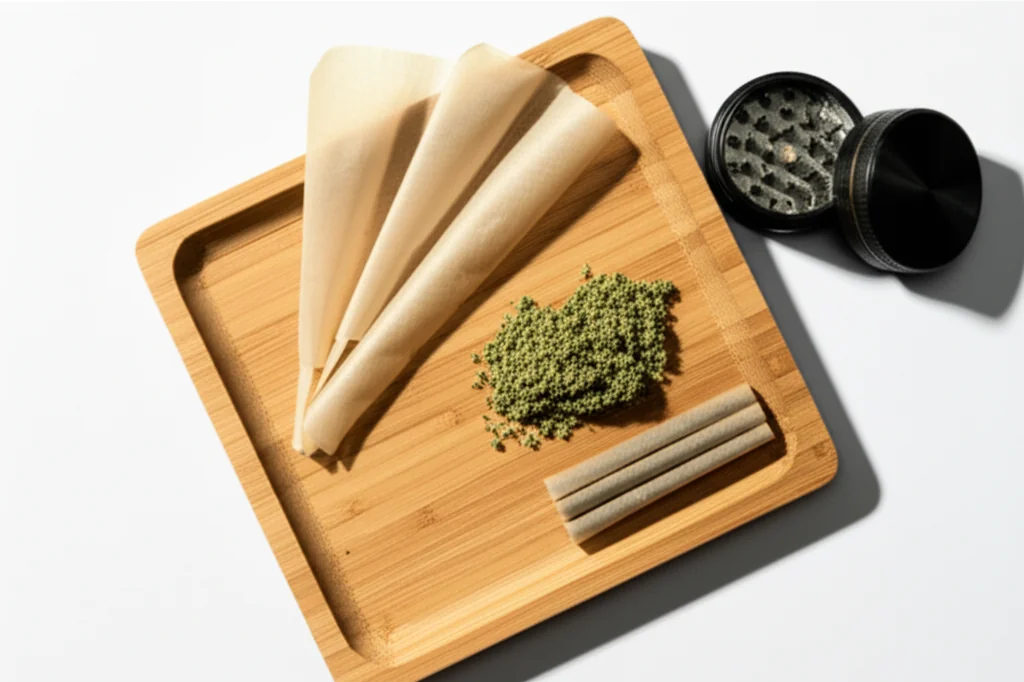
Was du brauchst
Erforderlich:
- Papierrollen(1¼ Größe empfohlen für Anfänger)
- Boden-Cannabis(0,5-0,75 Gramm)
- Filtertipps(Dünnkarton, kann Visitenkarte verwenden)
- Schleifer(oder Fingern ggf.)
- Feuerzeug
Empfohlen:
- Rollbehälter(oder sauberes Buch / Magazin)
- Stift oder Verpackungswerkzeug
- Zusätzliche Papiere zum Üben
Papierauswahl für Anfänger
Für Premium-Rollmaterial sehen Sie sich dieBenutzerdefinierte Rollpapiere von Munchmakersdrohen Für allgemeine Tipps zur Rolltechnik,wikiHowBietet illustrierte Anleitungen.
Beste Wahl für 2026:
- Roher Bio-Hanf- Natürlich, einfach zu bearbeiten, für Anfänger vergeben. Die meisten von Cannabis-Pädagogen zum Lernen empfohlen.
- Elemente Reispapier- dünne, aber robuste, langsame Verbrennung, minimale Geschmacksstörung
- Zick-Zack 1¼- Klassisch, weit verbreitet, erschwinglich. Industriestandard seit Jahrzehnten.
- OCB organisch- Ultradünner, natürlicher Gummi, bevorzugt von erfahrenen Rollen
Größe:Beginnen Sie mit 1¼ (78 mm). King Size kann unhandlich sein zum Lernen. Expertentipp: Kleinere Papiere erzwingen eine bessere Technikentwicklung.
Mehr erfahren:Überprüfen Sie unseren umfassenden Leitfaden zuBeste Rollpapiere für Anfängerfür detaillierte Vergleiche.
Schritt-für-Schritt-Rollprozess
Schritt 1: Bereiten Sie Ihren Filtertipp vor
Der Filter (auch Krücke oder Spitze genannt) sorgt für Struktur, verhindert, dass Cannabis in den Mund gelangt und gibt Ihnen etwas zum Halten.
Wie falten:
1. Filterpapier auf ca. 1/2 Zoll breit, 2 Zoll lang reißen oder schneiden
2 drohen An einem Ende 3-4 Mal hin und her falten (Akkordeonmuster)
3. Rollen Sie den Rest des Papiers um das Akkordeon
4. Sollte Zylinder über Durchmesser eines Bleistifts sein
Warum Akkordeon wichtig ist:Bietet Stabilität und Luftstrom. Ohne sie kann der Filter beim Rauchen zusammenbrechen.
Schritt 2: Mahlen Sie Ihr Cannabis
Experten-Einblick:Die Mahlkonsistenz ist der Faktor Nr. 1, der die Brennqualität beeinflusst. Professionelle Rollen betonen, dass ein richtiges Schleifen wichtiger ist als die Rolltechnik.
Verwenden Sie einen Qualitätsmühlen, um eine konsistente, flauschige Textur zu erzielen:
- Nicht zu fein:Pulverähnliche Konsistenz zieht durch das Papier und schränkt den Luftstrom ein. Verursacht harte Treffer.
- Nicht zu grob:Große Stücke erzeugen Klumpen und ungleichmäßiges Brennen. Erstellt "Läufer" oder "Kanus".
- Genau richtig:Flauschige, gleichmäßige Stücke ähnlich der getrockneten Oregano-Textur. sollte beim Drücken der Form halten.
Stiele entfernen:Sie bilden Löcher in der Verbindung und schmecken hart. Auch kleine Stiele beeinflussen die Verbrennungsqualität.
Menge:0,5-0,75 Gramm für eine Standardverbindung. Besser, kleiner zu beginnen - Sie können immer einen anderen rollen.
Mahlgutempfehlung:Eine hochwertige 4-teilige Mühle mit[ KiesteCatcher](https://munchmakers.com/blog/the-ultimate-guide-to-weed-grinders-with-kief-catchers-2/) sorgt für konsistente Ergebnisse. Siehe unseren Leitfaden aufBeste Mühlen für Cannabisoder stöbernPremium-Mühle bei Munchmakers.
Schritt 3: Erstellen Sie die Falte
Halten Sie das Papier mit dem Gummistreifen oben nach vorne. Platzieren Sie Ihren vorbereiteten Filter an einem Ende (normalerweise linkes Ende für Rechtshänder).
Erstellen Sie einen Kanal:Falten Sie das Papier vorsichtig in Längsrichtung, um eine leichte V-Form oder einen Trog zu erzeugen. Diese Falte hält Ihr Cannabis und erleichtert das Rollen.
Schritt 4: Mit gemahlenem Cannabis füllen
Verteilen Sie gemahlenes Cannabis gleichmäßig entlang der Falte:
- Mehr in der Mitte, sich leicht zu den Enden verjüngen
- Platz lassenam Gummistreifen und in der Nähe des Filters
- Nicht überfüllen- Weniger ist leichter zu rollen als mehr
Häufiger Fehler:Laden Sie viel zu viel Cannabis. Sie können immer ein zweites Gelenk rollen. Überfüllte Fugen sind für Anfänger nahezu unmöglich, richtig zu rollen.
Schritt 5: Gelenk formen
Hier entwickelt sich der Roll-Skill:
Die Bewegung:
- Das Papier zwischen Daumen und Zeigefinger auf beiden Seiten des Cannabis kneifen
- sanft hin und her rollen (nicht von Seite zu Seite - Hin- und Herbewegung)
- Das Cannabis sollte verpackt und zu einem Zylinder geformt werden
- Der Filter hilft, die Form an diesem Ende beizubehalten
Ziel:Gleichmäßig gepackter Zylinder aus Cannabis, der fest, aber nicht komprimiert ist.
Zeit benötigt:15-30 Sekunden Formgebung. Beeil dich nicht.
Schritt 6: Die Tuck (Kritischer Schritt)
Hier kämpfen die meisten Anfänger. Die Tuck bestimmt Erfolg oder Misserfolg.
So stecken Sie:
1. Arbeiten Sie vom Filterende aus (einfacher)
2 drohen Unteres Cannabis und Filter unterhalb des Filters unterbringen
3. Verwenden Sie Ihre Daumen zum Einstecken, während die Zeigefinger sanften Druck nach unten ausüben
4. Einmal gestartet, sollte die Tuck während des Rollens weiterlaufen
Das Gefühl:Sie sollten spüren, wie sich der Papier unter dem Cannabis verfangen. Wenn es nicht stuckt, formen Sie den Cannabis enger um.
Gemeinsames Problem:Papier faltet sich über sich, ohne unter Cannabis zu fangen. Lösung: Packen Sie Cannabis zuerst in Zylinderform.
Schritt 7: Rollen Sie zum Gummistreifen
Sobald die Tuck gestartet ist:
1. Weiter nach oben rollen mit gleichmäßigem Druck
2 drohen Das Papier sollte sich um den Cannabiszylinder wickeln
3. Rollen, bis nur der Gummistreifen angezeigt wird
4. Halten Sie die Spannung über die gesamte Länge gleich
Überprüfen Sie:Vor dem Verschließen, die Länge nach unten schauen. Es sollte gleichmäßig, nicht klumpig oder locker sein.
Schritt 8: Fugen versiegeln
Lecken des Kaugummis:
- Lecken Sie den gesamten Gummistreifen großzügig (Seien Sie nicht schüchtern)
- Einige Papiere brauchen mehr Feuchtigkeit als andere
- Beginnen Sie an einem Ende und arbeiten Sie zum anderen
- Drücken Sie fest, während Sie versiegeln
- Halten Sie die versiegelte Verbindung für 5-10 Sekunden
Moderne Alternative:Einige verwenden ein feuchtes Tuch, anstatt aus Hygiene zu lecken.
Schritt 9: Packen und beenden
Packen Sie das offene Ende:
- Verwenden Sie einen Stift, einen kleinen Stock oder Ihren kleinen Finger
- Packen Sie Cannabis vorsichtig vom offenen Ende ab
- Dies strafft das gesamte Gelenk und sorgt für gleichmäßiges Brennen
- Packen Sie nicht so fest, dass der Luftstrom eingeschränkt wird
Tipp schließen:
- Überschüssiges Papier verdrehen (klassische Methode)
- oder lassen Sie es offen und verbrennen Sie es beim Anzünden vorsichtig
- Verdrehte Spitze verhindert, dass Cannabis herausfällt
Schritt 10: Qualitätsprüfung
Ein gutes Gelenk:
- fest, aber nicht steinhart
- gleichmäßige Dicke entlang der Länge
- Kann Luft leicht durchziehen
- Vollständig versiegelt ohne Lücken
- Filtern sicher und dreht sich nicht
Wenn es fehlschlägt, überprüfen Sie:Rauch es trotzdem! "Häusliche, aber funktionale" lehrt Sie mehr als wegwerfen.
Häufige Probleme und Korrekturen
Problem: Gelenk ist klumpig / ungleichmäßig
Ursache:Ungleichmäßige Cannabisverteilung oder unzureichende Formgebung vor dem Rollen.
Fix:Verbringen Sie mehr Zeit mit der Gestaltung von Schritt 5. Verteilen Sie Cannabis bei Bedarf vor dem Einstecken neu.
Problem: Gelenk zu locker, fällt auseinander
Ursache:Nicht genug Spannung beim Rollen oder überfüllt.
Fix:Benutze beim nächsten Mal weniger Cannabis. Beim Rollen gleichmäßigeren Druck ausüben.
Problem: Gelenk zu eng, nicht zeichnen
Ursache:komprimiertes Cannabis oder zu fest verpackt.
Fix:Packen Sie sanfter. Testziehen vor dem Versiegeln - sollte einen einfachen Luftstrom haben.
Problem: Papierreißen beim Rollen
Ursache:Zu viel Druck, trockene Hände oder Papiere von geringer Qualität.
Fix:Verwenden Sie sanftere Berührungen. Fingerspitzen leicht anfeuchten. Kaufen Sie bessere Papiere.
Problem: Filter fällt aus
Ursache:Filtern zu klein oder nicht richtig in die Rolle integriert.
Fix:Filter etwas größerer Durchmesser machen. Stellen Sie sicher, dass es in die Verbindung gerollt wird und nicht nur am Ende platziert wird.
Problem: Kegelform statt Zylinder
Ursache:An einem Ende mehr Cannabis als am anderen.
Fix:Das ist eigentlich in Ordnung! Kegelgelenke sind beliebt (fettes Ende, schmales Filterende). Viele bevorzugen diese Form.
Problem: Gelenkläufe oder Kanus
Ursache:Ungleichmäßiges Packen oder Wind beim Rauchen.
Fix:Konzentrieren Sie sich in Schritt 4 auf die gleichmäßige Verteilung. Drehen Sie die Verbindung während der Beleuchtung, um eine gleichmäßige Kirsche zu gewährleisten.
Rolltipps von Experten
Tipp 1: Beginnen Sie mit mehr Papier als Sie denken
Anfänger verwenden oft zu kleine Papiere. 1¼ Größe gibt Ihnen Platz zum Arbeiten.
Tipp 2: Übe zuerst mit Tabak oder Kräutern
Einige Leute üben die Rolltechnik mit billigem Tabak oder getrockneten Kräutern, bevor sie Cannabis "verschwenden". Entwickelt Muskelgedächtnis.
Tipp 3: Verwenden Sie eine Dollar-Roll-Rolling-Methode
Legen Sie Filter und Cannabis in einen Dollarschein, formen Sie ihn, schieben Sie ihn in die Rechnung und verwenden Sie die Rechnung als Rollhilfe. Trainingsräder zum Lernen.
Tipp 4: Vorgefertigte Zapfen existieren
Keine Schande bei der VerwendungKegel vorgerolltdas füllt man einfach. Viele erfahrene Walzen verwenden sie für die Konsistenz.
Tipp 5: Die ersten 10 werden hässlich sein
Akzeptieren Sie, dass frühe Versuche bestenfalls funktionsfähig sein werden. Joint Rolling ist eine Fähigkeit, die Übung erfordert. Nummer 15-20 ist, wenn die meisten Menschen Konsistenz erreichen.
Erweiterte Überlegungen
Auswirkungen auf den Papiertyp
Hanfpapiere:Langsam, sogar brennen. Natürlicher Geschmack. dick genug, um zu vergeben.
Reispapiere:Sehr dünn. Reiniger Geschmack. Weniger verzeihen für Anfänger.
Holzzellstoff:Klassische Papiere. schneller brennen. Starker Geschmack.
Ohne Filter rollen
Einige bevorzugen filterlose Verbindungen. Das Ende zugeklemmt oder umklappen. Bietet etwas bessere Luftstrom, erfordert jedoch sorgfältiges Rauchen, um lose Cannabis im Mund zu vermeiden.
Die Kegelmethode
Anstelle des Zylinders absichtlich einen Kegel formen (breiter an der Spitze, schmal am Filter). Viele finden das einfacher. Füllen Sie das breite Ende mit mehr Cannabis und schaffen Sie eine natürliche Verjüngung.
Übung macht den Meister
Realistische Zeitachse:
- Gelenke 1-3:Wahrscheinlich hässlich, vielleicht rauchbar
- Gelenke 4-7:Funktional, verbessern
- Gelenke 8-15:konsequent rauchbar
- Gelenke 15+:Entwickeln Sie Ihren persönlichen Stil
Gib nicht auf!Selbst erfahrene Walzen erinnern sich anfangs an Probleme. Es ist eine körperliche Fähigkeit wie Schuhe zu binden - scheint unmöglich, bis es plötzlich klickt.
Alternativen zum Handrollen
Vorgerollte Kegel:
- Kaufen Sie das Papier bereits geformt
- Füllen Sie einfach gemahlenes Cannabis
- Packen und drehen
- Jedes Mal konsistente Ergebnisse
- Mehr erfahren:siehe unsereVorgerollte Kegel vs. Handrollen Vergleich
Rollmaschinen:
- $ 5-10 Gerät, das für Sie rollt
- Papier und Cannabis einlegen, Griff drehen
- Perfekte Zylinder, aber weniger zufriedenstellend als Handrollen
- Beste Optionen:abreisenVerbindungsrollenführung
Bitten Sie jemanden zu rollen:
- Keine Schande, wenn ein erfahrener Freund beim Lernen für Sie rollt
- Beobachten Sie ihre Technik genau
Expertentipps für bessere Ergebnisse
Von Profirollen (Ausgabe 2026):
1. Temperatur zählt:Leicht warme, trockene Hände funktionieren am besten. Kalte oder feuchte Hände lassen das Papier unbeholfen.
2. Die Beleuchtungstechnik beeinflusst die Rollenqualität:Auch die am besten gerollte Verbindung braucht eine richtige Beleuchtung. Die Spitze beim Drehen anzünden, um eine gleichmäßige Kirsche zu gewährleisten.
3. Aufbewahrungskonservierung:Richtig gerollte Fugen können monatelang gelagert werden. erfährstCannabis-SpeichertechnikenVorgerollte Gelenke frisch zu halten.
4. Aktualisieren Sie Ihr Setup:Investieren Sie in eine QualitätRollbehälterum Ihre Materialien zu organisieren und Abfall zu vermeiden.
Verwandte Rolltechniken
Wenn Sie das Grundgelenk beherrschen, erkunden Sie diese fortschrittlichen Techniken:
- wie man ein Kegelgelenk rollt- Konische Form für glattere Treffer
- Inside-Out-Rolling (niederländischer Stil)- Weniger Papier, sauberer Geschmack
- Wie rollt man [ Kreuzgelenk](https://guides.munchmakers.com/guide/how-to-roll-cross-joint)- fortgeschrittene Technik für besondere Anlässe
- Ohne Filter rollen- Traditionelle Methode
Shop-Qualitätsbedarf:seufBenutzerdefinierte Rollpapiere, Premium-Schleifmaschinen, undRoll-Zubehörbei MUNCHMAKERS.
Dieser Leitfaden ist für Bildungszwecke in Regionen gedacht, in denen Cannabis legal ist. Die Cannabisgesetze variieren je nach Gerichtsbarkeit. Überprüfen Sie immer die örtlichen Vorschriften.
Step 1:
Step 2:
Step 3:
Step 4:
Step 5:
Step 6:
Step 7:
Step 8:
Frequently Asked Questions
1¼-Formpapiere (78 mm) sind ideal für Anfänger. Sie sind groß genug, um damit zu arbeiten, aber nicht so groß, dass Sie Cannabis verschwenden. King Size kann für erste Versuche einschüchtern.
Related Guides
Rolling Paper Sizes Explained: 1 1/4, King Size, and More
Comprehensive guide about rolling paper sizes explained: 1 1/4, king size, and more. Learn everything you need to know with expert tips and detailed instructions.

Best Rolling Papers for Beginners: Complete Buying Guide 2026
Discover the best rolling papers for beginners including RAW, Zig-Zag, and OCB. Learn about sizes, materials (rice vs hemp vs wood pulp), and which papers are easiest to roll with.
Clear Rolling Papers: Are Cellulose Papers Worth It?
Comprehensive guide about clear rolling papers: are cellulose papers worth it?. Learn everything you need to know with expert tips and detailed instructions.