
كيفية لف مفصل متقاطع: برنامج تعليمي كامل لصليب الحشائش الأيقوني
Mike Rodriguez
Rolling Expert
كيفية لف مفصل متقاطع: برنامج تعليمي كامل لصليب الحشائش الأيقوني
المفصل الصليبي (اشتهرت بهأناناس إكسبرس) هي جوهرة التاج لتقنيات الدرفلة - مفصلان يتقاطعان عند 90 درجة ، يحترقان من ثلاث نقاط في وقت واحد. هذه التقنية على مستوى الخبراء صعبة ولكنها مثيرة للإعجاب بشكل لا يصدق.
إجابة سريعة
لدحرجة مفصل متقاطع: لفة مفصل رئيسي سميك ومفصل أرق واحد ، قم بفتحة من خلال مركز المفصل السميك ، أدخل مفصلًا رقيقًا من خلال الفتحة مما يخلق شكلًا متقاطعًا ، وأغلق التقاطع بقطع ورقية متدحرجة ، واختبر تدفق الهواء من جميع الأطراف الثلاثة ، وأضيء الثلاثة في وقت واحد. يتطلب 1.5-2 جرام من القنب الكلي ومهارات التدوير الخبراء.
ما هو المفصل المتقاطع؟
الهيكل:
- مفصل رئيسي سميك "أساسي" (رأسي)
- مفصل رفيع "متقاطع" (أفقي)
- تتقاطع بزاوية 90 درجة
- جميع الأطراف الثلاثة تحترق في وقت واحد
جعل مشهوراً: فيلم Pineapple Express (سيث روجن وجيمس فرانكو)
عسر: مستوى الخبراء - يتطلب أساسيات درفلة صلبة
للحصول على إمدادات مشتركة ، تحقق منالعرف [ أوراق المتداولمن Munchmakers] (https://munchmakers.com/product-category/custom-rolling-papers/). لدروس الدرفلة المتقدمةالأناناس السريع على موقع IMDb (الإنجليزية)جعل هذه التقنية الشهيرة مشهورة.
لماذا دحرجة مفصل متقاطع؟
الأسباب:
- تقنية الاستعراض النهائي
- جاذبية بصرية رائعة
- تجربة تدخين فريدة من نوعها (ثلاثة كرز)
- تحدي الهندسة
- المناسبات الخاصة / الاحتفالات
غير عملي: المفاصل المتقاطعة مهدرة وصعبة وغير عملية. إنها للمتعة والمشهد وليس الكفاءة.
شروط
قبل المحاولة، يجب أن تكون قادراً على:
- لفة المفاصل العادية بشكل مثالي (90٪ + معدل النجاح)
- لفة مفاصل مخروطية
- حزم المفاصل بإحكام وبشكل متساوٍ
- اعمل برفق مع ورق اللف
إذا كنت لا تستطيع: ممارسة المفاصل العادية لمدة شهر آخر كحد أدنى. ستؤدي المفاصل المتقاطعة إلى إحباطك وإهدار الحشيش.
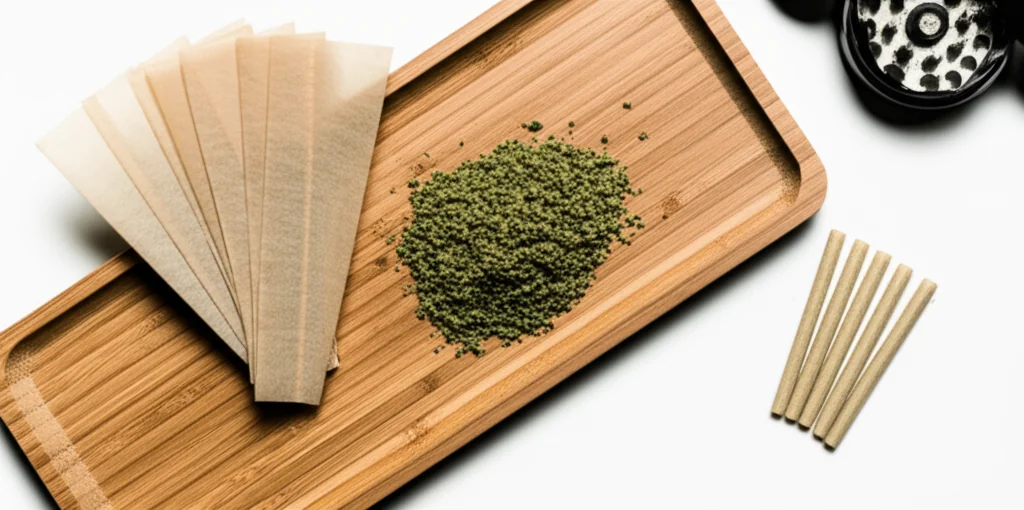
المواد المطلوبة
- ورق درفلة بحجم كينج (2-3 أوراق)
- 1 ورق عادي (2 ورق)
- مرشحات/عكازات (2)
- القنب المطحون (إجمالي 1.5-2 جرام)
- أداة مشبك أو بوكر
- ورق لف إضافي للبقع
- صبر
خطوة بخطوة: دحرجة مفصل متقاطع
الخطوة 1: لف مفصلين منفصلين
المفصل الرئيسي (عمودي):
- استخدم ورق بحجم كينج
- لفة سميكة وثابتة
- عبوة 1-1.5 جرام من القنب
- اجعلها سمينة - تحتاج إلى السلامة الهيكلية
مفصل (أفقي):
- استخدم 1 ورق
- لفة أرق من الرئيسي
- عبوة 0.5-0.75 جرام
- يجب أن تناسب من خلال فتحة المفصل الرئيسية
يجب أن يكون كلاهما:
- معبأة بإحكام
- موزعة بالتساوي
- مختوم بالكامل
- لا توجد بقع ناعمة
الخطوة 2: ابحث عن نقطة المركز
على المفصل الرئيسي السميك:
- القياس لإيجاد المركز الدقيق
- ضع علامة خفيفة بإصبعك
- هذا هو المكان الذي سيتقاطع فيه المفصل المتقاطع
حرج: نقطة المركز = حرق على كلا الجانبين
الخطوة 3: ثقب الحفرة
باستخدام مشبك الورق أو البوكر:
1. إدراج في نقطة مركزية ملحوظة
2 ادفع مباشرة إلى الجانب الآخر
3. تذبذب لتوسيع الفتحة قليلا
4. يجب أن يكون أوسع من قطر المفصل المتقاطع
انتبه: لا تمزق المفصل ، فقط قم بإنشاء ثقب نظيف
الخطوة 4: أدخل المفصل المتقاطع
حرك المفصل الرفيع بعناية من خلال الفتحة:
- ادفع ببطء
- يجب أن تكون دافئة ولكن لا يجبر
- طول متساوي على كلا الجانبين
- زاوية 90 درجة للمفصل الرئيسي
شيك: يجب أن يبرز الصليب بالتساوي على كلا الجانبين
الخطوة 5: ختم التقاطع
هذا أمر بالغ الأهمية- يمنع تسرب الهواء:
1. قطع صغيرة من ورق اللف (بحجم الظفر)
2 لعقهم جيدًا لجعله لزجًا
3. التفاف حول التقاطع حيث تلتقي المفاصل
4. تغطية جميع الفجوات بين المفاصل الرئيسية والصليبية
5. اضغط بقوة لختم
استخدم 3-4 قطع ورقيةالتفاف من زوايا مختلفة
الخطوة 6: اختبار تدفق الهواء
قبل الإضاءة، اختبر الرسم من جميع الأطراف الثلاثة:
1. ارسم من طرف المفصل الرئيسي
2. ارسم من الطرف الأيسر المتقاطع
3. ارسم من الطرف الأيمن المتقاطع
يجب على الثلاثة سحب الهواء. إذا تم حظر أي منها ، فابحث عن التسريبات وأغلقها بمزيد من بقع الورق.
الخطوة 7: أشعل جميع الأطراف الثلاثة
الجزء المثير للإعجاب:
الطريقة الأولى (منفرد):
- نصيحة رئيسية خفيفة أولاً
- ضوء سريع كلا الطرفين المتقاطعين
- يتطلب السرعة والتنسيق
الطريقة الثانية (مع الأصدقاء):
- 2-3 أشخاص يضيء كل منهم طرفًا واحدًا في وقت واحد
- أسهل وأكثر موثوقية
قصد: كل الكرز الثلاثة يحترق في وقت واحد
الخطوة 8: دخان ودوران
تقنية التدخين:
- ارسم من المفصل الرئيسي فقط (لا تدخن من الأطراف المتقاطعة)
- تدوير للحفاظ على جميع الجوانب الثلاثة حرقًا بالتساوي
- شاهد الهندسة في العمل
نهايات الصليب تحترقوتغذية الدخان في المفصل الرئيسي
مشاكل مشتركة عبر المفاصل
المشكلة: سقوط المفصل المتقاطع من الحفرة
دافع ين: ثقب كبير جدًا ، مفصل متقاطع رقيق جدًا
حلول: جعل المفصل المتقاطع أكثر سمكًا ، أو استخدم المزيد من ورق الختم عند التقاطع
المشكلة: الهواء لا يتدفق
دافع ين: تقاطع محكم الإغلاق بإحكام شديد ، مما يحجب تدفق الهواء
حلول: قم بفتح ثقوب صغيرة في بقع الختم للسماح بتدفق الهواء ، أو استخدام ورق ختم أقل
المشكلة: المفصل لن يبقى مضاء
دافع ين: فضفاضة للغاية ، أو تعبئة غير متساوية ، أو تسرب الهواء
حلول: قم بتعبئة كلا المفاصلين بشكل أكثر إحكامًا قبل التجميع ، وسد جميع الفجوات جيدًا
المشكلة: حرق غير متساو (جانب واحد أمامك)
دافع ين: مفصل متقاطع غير مركز ، أو جانب واحد معبأ أكثر إحكامًا
حلول: تأكد من أن المفصل المتقاطع متمركز بشكل مثالي ، وحزمه بالتساوي على كلا الجانبين
ما مقدار الحشائش التي تستخدمها؟
مجموع: 1.5-2.5 جرام
الانهيار:
- المفصل الرئيسي: 1-1.5 جرام
- مفصل عبر: 0.5-1 جم
للمقارنة:
- المفصل العادي: 0.5-0.75 جم
- بلانت العادية: 1-2 جرام
المفاصل المتقاطعة تستخدم المزيدالقنب والحرق بشكل أسرع (ثلاث نقاط احتراق)
هل هي مهدرة؟
نعم مهدر جدا:
- يحترق من ثلاث نقاط في وقت واحد
- يحترق القنب أسرع مما يمكنك التدخين
- الكثير من الدخان يهرب من غير استخدام
- استهلاك غير فعال
متى تفعل ذلك على أي حال: المناسبات الخاصة ، الاحتفالات ، الاستعراض ، التحدي الهندسي الممتع
اختلافات
مفصل يسوع (صليب رباعي)
أكثر تقدمًا:
- مفصلان متقاطعان يتقاطعان مع المفصل الرئيسي
- يخلق 5 نقاط تدخين
- يحتاج 3-4 جرام من القنب
- صعب للغاية
فقط للماجستير الحقيقي
مفصل الجديل
تقنية بديلة رائعة:
- ثلاث مفاصل مضفرة معا
- جاذبية بصرية مختلفة
- إلى حد ما أسهل من الصليب
نصائح للنجاح
نصيحة 1: اتقن مفاصلك العادية أولاً
إذا لم تتمكن من لف المفاصل العادية المثالية بنسبة 95٪ من الوقت ، فأنت لست مستعدًا للمفاصل المتقاطعة.
نصيحة 2: اصنع المفصل الرئيسي
يحتاج المفصل السميك إلى السلامة الهيكلية لدعم المفصل المتقاطع. لا تخجل من الحشيش.
نصيحة 3: ختم بسخاء
الإفراط في الختم أفضل من الختم السفلي. يمكنك دائمًا إزالة البقع الزائدة ، لكن تسرب الهواء يفسد الوصلات المتقاطعة.
نصيحة 4: اختبر قبل الإضاءة
اختبر دائمًا تدفق الهواء من جميع الأطراف قبل الإضاءة. العثور على المشاكل بعد الإضاءة = فشل المفصل المتقاطع.
نصيحة 5: قبول الفشل
حتى البكرات ذات الخبرة تفشل بنسبة 30-40٪ من محاولات الوصلات المتقاطعة. إنه جزء من التحدي.
أهمية ثقافية
أناناس إكسبرس: جلبت المفاصل المتقاطعة إلى الوعي السائد
سيث روجن: "إنها قمة دوامة الهندسة المشتركة"
مجتمع القنب: المفاصل المتقاطعة هي إنجاز متداول محترم
رمز: يظهر التفاني في الحرفية ، والعقلية الهندسية ، والاستعداد لإهدار الأعشاب الضارة للفن
هذا الدليل للأغراض التعليمية. تختلف قوانين القنب حسب الولاية القضائية.
Step 1:
Step 2:
Step 3:
Step 4:
Step 5:
Step 6:
Frequently Asked Questions
نعم ، المفاصل المتقاطعة على مستوى الخبراء. أنت بحاجة إلى مهارات قوية في لف المفاصل ، وأيدي ثابتة ، وصبر. توقع عدة محاولات فاشلة عند التعلم. تدرب على المفاصل العادية أولاً.
تستخدم المفاصل المتقاطعة 1.5-2 جرام إجمالي - حوالي 1-1.5 جرام في المفصل الرئيسي و 0.5-1 جرام في المفصل المتقاطع. إنها مهدرة مقارنة بالمفاصل العادية بسبب الاحتراق من نقاط متعددة.
نعم! أشعل الطرف الرئيسي وكلا الطرفين المتقاطعين في وقت واحد. هذا يخلق تجربة مشتركة متقاطعة مع Smoke من ثلاث نقاط. عادة ما يتطلب 2-3 أشخاص للإضاءة بشكل صحيح.
Related Guides
Rolling Paper Sizes Explained: 1 1/4, King Size, and More
Comprehensive guide about rolling paper sizes explained: 1 1/4, king size, and more. Learn everything you need to know with expert tips and detailed instructions.

Best Rolling Papers for Beginners: Complete Buying Guide 2026
Discover the best rolling papers for beginners including RAW, Zig-Zag, and OCB. Learn about sizes, materials (rice vs hemp vs wood pulp), and which papers are easiest to roll with.
Clear Rolling Papers: Are Cellulose Papers Worth It?
Comprehensive guide about clear rolling papers: are cellulose papers worth it?. Learn everything you need to know with expert tips and detailed instructions.